The Return of the Muscle Sedan: Precision Windshield Replacement for the 2006-2010 Dodge Charger
When the Dodge Charger was resurrected in 2006, it brought the aggressive, unapologetic spirit of the American muscle car back to the streets—this time on a highly versatile four-door LX platform. With its pronounced front grille, sweeping hood, and steeply raked windshield, the 2006-2010 Dodge Charger was engineered to cut through the wind while commanding absolute attention. That iconic aerodynamic profile relies heavily on the structural integrity and exact curvature of its auto glass. The windshield of your Charger does far more than keep the bugs out of your teeth; it provides up to 30% of the vehicle’s cabin structural support in the event of a rollover and acts as the crucial backstop for passenger-side airbag deployment. Preserving the legendary stance and safety of your Charger requires the meticulous touch of a Master Technician. At AlexWindshield, we combine automotive passion with unparalleled technical expertise to deliver flawless windshield replacements tailored specifically for the 2006-2010 Dodge Charger.
Local Auto Glass Experts Serving the Greater Toronto Area (GTA)
Driving a powerful rear-wheel-drive sedan through the ever-changing weather and heavy traffic of the Greater Toronto Area (GTA) can take a toll on your auto glass. Whether you are commuting down the Don Valley Parkway, cruising through the suburban avenues of Vaughan, navigating the busy intersections of Richmond Hill, or traveling along the heavily constructed routes of Markham, kicked-up rocks and construction debris are an everyday hazard. A minor chip can rapidly spread into a massive, vision-impairing crack during our harsh Canadian winters. AlexWindshield brings top-tier, mobile auto glass replacement services directly to your driveway, workplace, or preferred location across the GTA. We eliminate the hassle of waiting in a traditional shop, ensuring your Dodge Charger is serviced efficiently and safely right where you are.
Master Technician's Guide: Step-by-Step Dodge Charger Windshield Replacement Process
Replacing the windshield on a 2006-2010 Dodge Charger is a highly specialized process that requires precision, patience, and a deep understanding of automotive structural engineering. As Senior SEO Specialist and Master Technician at AlexWindshield, I ensure that every replacement follows a rigorous A-to-Z protocol. We do not cut corners. Here is the exact, step-by-step methodology we use to restore your vehicle’s glass to factory-level perfection.
Step 1: Comprehensive Vehicle Preparation and Interior Protection
The first step in our professional windshield replacement process is safeguarding your vehicle. The Dodge Charger’s aggressive hood and meticulously styled interior demand respect. We begin by applying protective, scratch-resistant fender covers over the front body panels to shield your paint from tools and technicians' belts. Inside the cabin, we drape heavy-duty protective drop cloths over the steering wheel, dashboard, and front leather or cloth seats. This ensures that absolutely no dust, debris, or urethane primer compromises your Charger's interior during the procedure.
Step 2: Removal of Cowl, Wipers, and Exterior Trim
Before we can access the structural mounting point of the glass, we must carefully strip away the exterior components. The 2006-2010 Dodge Charger features a specific plastic cowl cover at the base of the windshield that protects the wiper motor assembly. Over time, the retaining clips on this cowl can become brittle due to UV exposure. Our technicians use specialized non-marring trim removal tools to gently unseat the cowl and detach the wiper arms without causing damage. We also carefully remove the rubber side moldings and weatherstripping framing the windshield, ensuring they are preserved for reinstallation or replaced if deteriorated.
Step 3: Precision Extraction of the Damaged Windshield
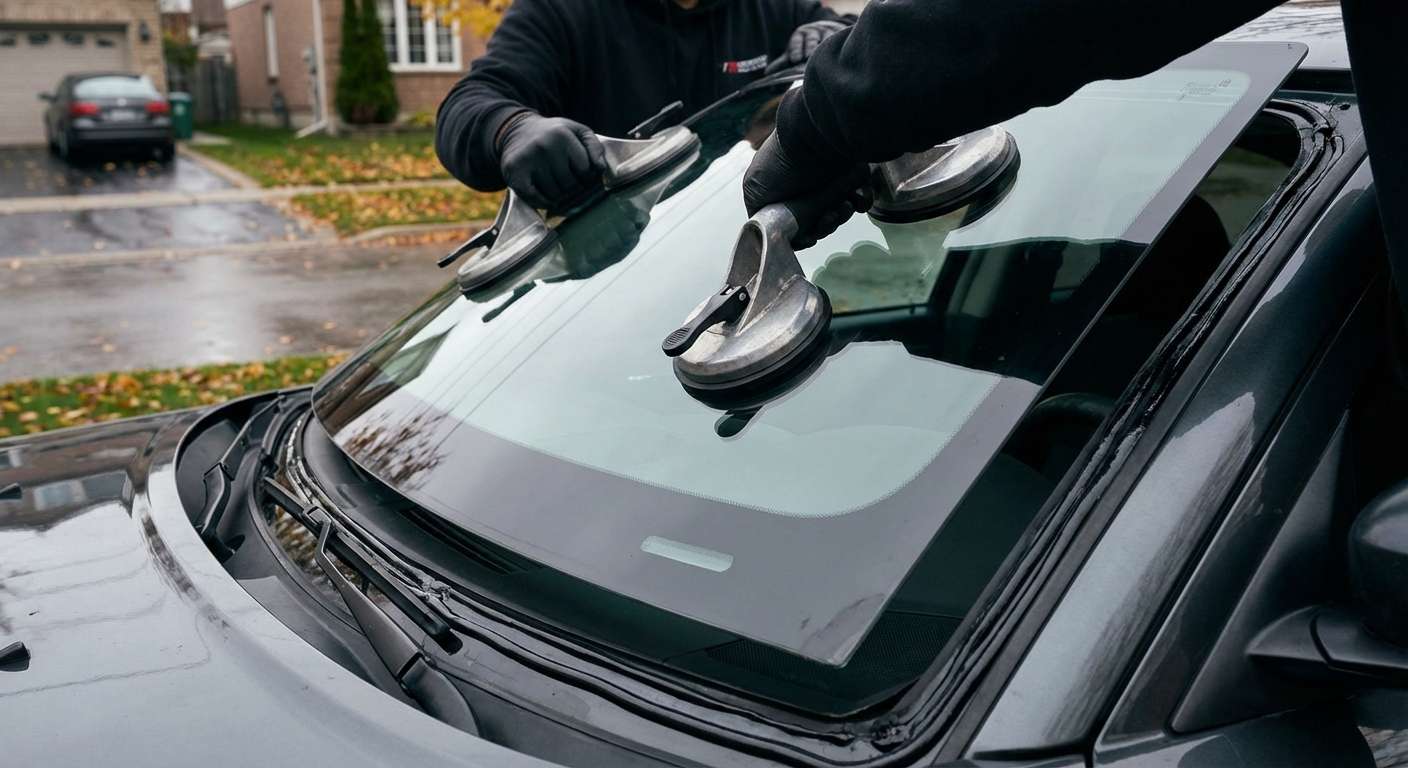
Removing the broken glass is a delicate operation that separates amateur installers from Master Technicians. The windshield is bonded to the vehicle’s steel frame using a tough, industrial-grade polyurethane adhesive. To cut through this bond, we employ advanced wire extraction systems or a specialized cold knife. By threading a high-tensile cutting wire through the adhesive bead and operating a localized winch system, we slice through the urethane cleanly from the inside out. This modern method prevents any stress fractures to the glass and, more importantly, ensures the cold knife does not scratch the painted metal frame beneath the glass. Once the seal is broken completely, two technicians use heavy-duty suction cup lifting tools to safely hoist the heavy damaged windshield out of the vehicle.
Step 4: Pinch Weld Preparation and Surface Cleaning
The metal frame where the windshield sits is known as the pinch weld. For the new windshield to adhere correctly, this area must be meticulously prepped. We use specialized scraping chisels to trim the old polyurethane bead down to a uniform thickness of about 1 to 2 millimeters. We never strip the adhesive down to bare metal, as the old urethane provides an excellent bonding base for the new adhesive. After trimming, we use powerful vacuums and specialized industrial glass cleaners to remove all dirt, dust, pollen, and microscopic debris from the pinch weld channel. A pristine surface is absolutely critical to prevent future air leaks, water leaks, and rust formation.
Step 5: Advanced Primer Application
Primer application is a dual-step chemical process that ensures a lifetime bond. First, we inspect the trimmed pinch weld for any accidental scratches that may have exposed bare metal. If any are found, we apply a specialized anti-corrosion metal primer to prevent future rust. Next, we prepare the new OEM-quality windshield. We clean the inside perimeter of the glass and apply a high-adhesion black glass primer to the ceramic "frit" band (the black painted edge of the glass). This primer acts as a chemical bridge, promoting a molecular bond between the smooth glass surface and the urethane adhesive, while also blocking UV rays from degrading the adhesive over time.
Step 6: Application of High-Quality Urethane Adhesive
The adhesive is the structural lifeline of your windshield installation. At AlexWindshield, we exclusively use premium, fast-curing automotive urethane that meets or exceeds Original Equipment Manufacturer (OEM) safety standards. Using an electric caulking gun for absolute consistency, our Master Technicians apply a thick, triangular bead of urethane directly on top of the trimmed existing bead on the pinch weld. The triangular shape is an industry-best practice, as it allows the adhesive to compress evenly and completely when the heavy glass is set into place, eliminating the risk of hidden air gaps or weak points.
Step 7: Setting and Aligning the New Windshield
Timing is critical once the urethane is applied. Before the adhesive begins to skin over, our technicians carefully lift the newly primed windshield using specialized suction grips. The 2006-2010 Charger has specific alignment pins and setting blocks at the base of the pinch weld to guide the glass into its exact factory position. We gently lower the windshield into the wet urethane, applying firm, even pressure around the entire perimeter to ensure the triangular bead compresses into a watertight, airtight seal. We then secure the glass with specialized retention tape to hold it perfectly in place while the chemical curing process begins.
Step 8: Mandatory ADAS Camera Calibration Process
Modern auto glass is a complex piece of technological equipment. While the 2006-2010 Dodge Charger predates some of today's most complex autonomous features, many models from this generation are equipped with sensitive rearview mirror electronics, auto-dimming sensors, and rain-sensing wiper modules mounted directly to the glass. As a strict, non-negotiable protocol for any windshield replacement, we emphasize the mandatory ADAS (Advanced Driver Assistance Systems) camera calibration process.
- Precision Alignment: Even a millimeter of difference in the curvature of the new glass or the placement of a sensor bracket can alter the field of view for forward-facing safety cameras and sensors.
- Diagnostic Integration: We connect specialized diagnostic scanning tools to your Charger's OBD-II port to communicate directly with the vehicle's computer.
- Dynamic and Static Calibration: Depending on the specific hardware mounted to your windshield, we perform rigorous recalibration to ensure the systems register the new glass perfectly.
- Safety Guarantee: Skipping the calibration process can result in malfunctioning rain sensors, delayed emergency braking systems, or disabled lane-departure warnings. We ensure every electronic component looking through your new windshield operates flawlessly before handing over the keys.
Step 9: Reassembly and the Safe Drive-Away Time (SDAT)
With the glass firmly set and the sensors calibrated, we meticulously reassemble the vehicle. The cowl cover is re-secured, the wiper arms are bolted back into their precise resting positions, and all rubber weatherstripping is locked into place. We perform a final, comprehensive clean of the new glass to remove any fingerprints or smudges. Finally, we inform you of the Safe Drive-Away Time (SDAT). Because we use advanced, rapid-curing urethane, your Dodge Charger will be structurally safe to drive in a fraction of the time compared to budget adhesives, getting you back on the road safely and swiftly.
Trust AlexWindshield for Mobile Auto Glass Services in the GTA
Your 2006-2010 Dodge Charger is a bold statement of American performance, and maintaining its safety and aesthetic appeal should never be compromised by subpar auto glass repair. At AlexWindshield, we pride ourselves on being the most trusted experts for mobile auto glass services across the Greater Toronto Area. Whether you are parked at home in Markham, at your office in Richmond Hill, or out running errands in Vaughan, our fully equipped mobile service vans bring the auto glass shop directly to you.
We stand confidently behind our master-level craftsmanship and premium materials, which is why every full windshield replacement we perform comes backed by our comprehensive Lifetime Warranty. This warranty covers any manufacturer defects in the glass, as well as any issues related to our workmanship, including air noises and water leaks, for as long as you own your vehicle. Don't let a cracked windshield ruin the aggressive stance of your Charger or compromise your safety on the road. Contact AlexWindshield today to experience precision auto glass replacement designed to perfection.


