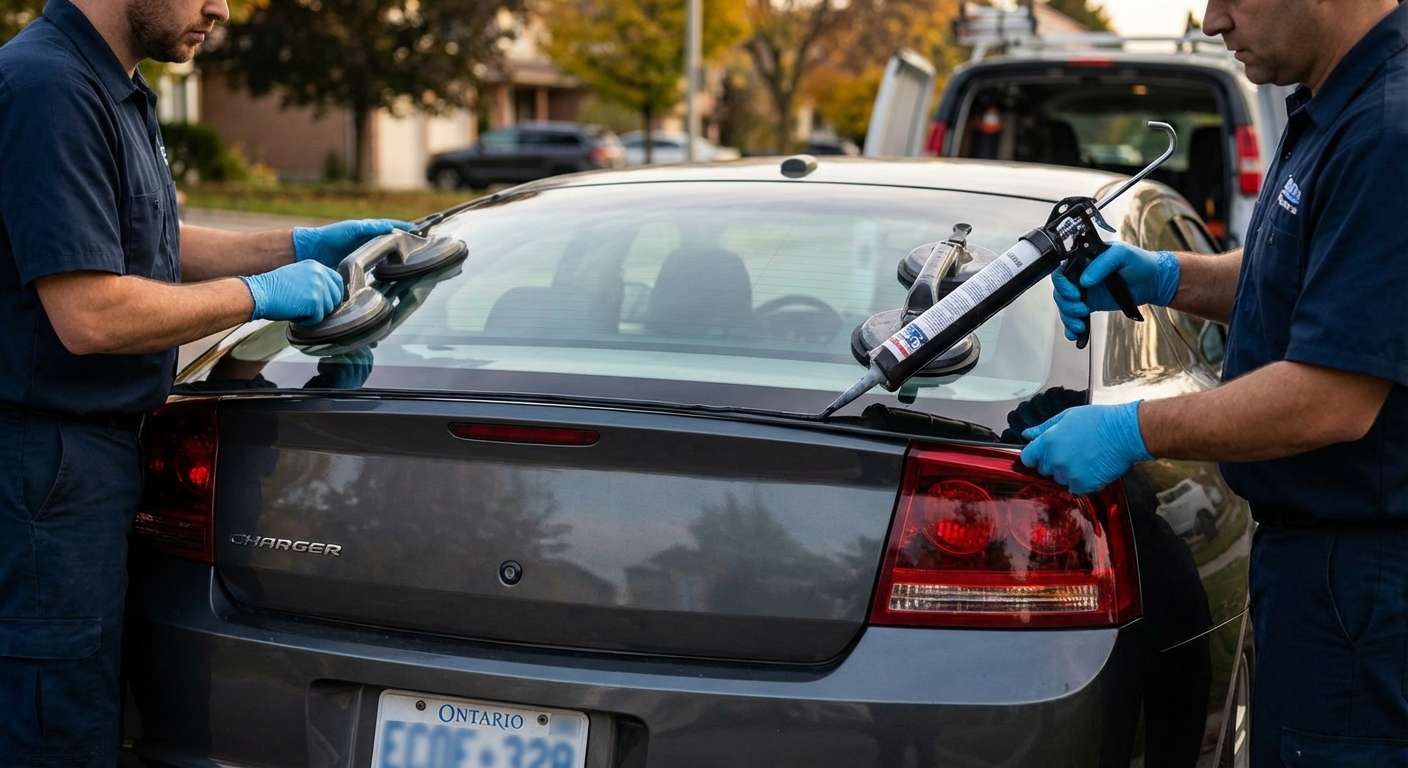
The Rebirth of American Muscle: Dodge Charger 2006-2010 Back Glass Replacement
The 2006-2010 Dodge Charger brought the iconic muscle car nameplate roaring back into the 21st century, combining aggressive, bold styling with modern rear-wheel-drive performance on the LX platform. A defining feature of this 6th generation Charger is its sleek, sloping rear roofline and expansive rear windshield, which perfectly complements its imposing stance. However, when the back glass of your 2006-2010 Dodge Charger shatters, it does more than just ruin the aesthetic of your American muscle car. It completely compromises your vehicle's cabin security, exposes your interior to the elements, and disables your rear defroster system. At AlexWindshield, we specialize in restoring your Charger to its factory-grade glory with precision, technical expertise, and premium materials.
Dedicated Mobile Auto Glass Service Across the Greater Toronto Area (GTA)
A shattered back glass means your vehicle is entirely open to the environment, making it dangerous and impractical to drive to a repair shop. As a premier mobile auto glass service provider, AlexWindshield brings the glass shop directly to your driveway or workplace. We proudly serve the entire Greater Toronto Area (GTA), with dedicated, rapid-response mobile units frequently operating in Vaughan, Richmond Hill, and Markham.
Whether you are parked at a commercial complex in Markham, your home garage in Vaughan, or commuting through Richmond Hill, our master technicians arrive fully equipped to perform a flawless, factory-standard back glass replacement on-site. We understand the unpredictable Canadian weather in the GTA, which is why our mobile service utilizes fast-curing, temperature-resilient adhesives to ensure your Dodge Charger is safe and road-ready in no time.
Understanding Your Dodge Charger's Rear Glass: Tempered vs. Laminated
Unlike the front windshield, which is made of laminated glass designed to crack but stay intact, the rear windshield of your 2006-2010 Dodge Charger is manufactured from tempered safety glass. Through an intense heating and rapid cooling process during manufacturing, tempered glass is highly pressurized. When it sustains a severe impact, it is designed to explode into thousands of small, blunt cube-like pieces rather than dangerous, jagged shards. While this is a crucial safety feature, it creates an extensive mess inside the cabin, trunk, and hidden panel crevices of your Charger. Proper replacement requires a master technician who understands not just how to install the new glass, but how to meticulously decontaminate the vehicle beforehand.
Our Master Technician A-Z Step-by-Step Back Glass Replacement Process
At AlexWindshield, we do not cut corners. Replacing the back glass on a 2006-2010 Dodge Charger requires a systematic, heavily detailed approach to ensure structural integrity, perfect aesthetics, and zero water leaks. Here is our rigorous, master-level replacement procedure:
Phase 1: Meticulous Preparation and Interior Protection
Before any heavy work begins, protecting the interior of your Dodge Charger is our top priority.
- Exterior Masking: We apply automotive-grade protective tape around the rear roofline, C-pillars, and trunk lid to protect your Charger's paint from tool scratches and chemical drips.
- Interior Draping: Heavy-duty protective drop cloths are laid over the rear leather or cloth seats, center console, and floorboards.
- Panel and Trim Removal: To access the hidden glass fragments and the structural pinch weld, our technicians carefully remove the interior C-pillar trim panels. We also detach the rear parcel shelf (the deck behind the rear seats) and lower the rear headliner slightly to prevent damage during the extraction process.
Phase 2: Comprehensive Broken Glass Extraction
Because the Dodge Charger's back glass is tempered, the blast radius of shattered glass is immense. Leaving even a few shards behind can lead to irritating rattles while driving or potential damage to the new glass seal.
- Initial Debris Clearance: We manually remove large, loose chunks of tempered glass still clinging to the old urethane bead using specialized glass-handling gloves.
- Deep Interior Vacuuming: Utilizing high-powered, industrial shop vacuums with precision crevice attachments, we thoroughly vacuum the rear seating area, floor mats, and the exposed rear parcel shelf.
- Trunk Decontamination: Glass frequently falls through the rear deck into the trunk. We open the trunk, remove the cargo liner, and vacuum the entire cargo space, ensuring no hidden shards remain lodged near your spare tire or battery compartment.
Phase 3: Removing the Old Urethane Seal and Remaining Glass
With the shattered glass safely removed from the cabin, we must extract the original bonding agent.
- Cutting the Urethane: Using a professional-grade cold knife and, when necessary, a specialized wire cutting system, we slice through the factory or pre-existing urethane adhesive bead that bonds the glass track to the vehicle's frame.
- Defroster Disconnection: We carefully locate and disconnect the wiring harness terminals for the rear defroster grid, ensuring the factory wiring remains pristine and fully functional for the new installation.
- Clearing the Frame: The outer molding and any remaining encapsulated glass chunks embedded in the old glue are completely removed from the vehicle frame.
Phase 4: Surface Cleaning and Pinch Weld Preparation
The secret to a lifetime-guaranteed auto glass replacement lies in the preparation of the vehicle's metal frame, known as the pinch weld.
- Trimming the Old Bead: We use razor-sharp chisel scrapers to pare down the old urethane bead to a flat, even layer of about 1 to 2 millimeters. This thin base layer is essential as it provides the best bonding surface for the fresh adhesive.
- Deep Cleaning: The entire channel is scrubbed with a specialized, alcohol-based auto glass cleaner to remove dirt, grease, and moisture that could compromise the new seal.
- Applying Pinch Weld Primer: If any bare metal was exposed during the removal process, we meticulously apply a specialized, anti-corrosive black primer. This step is non-negotiable; it prevents rust from forming around the window frame, which could cause structural failure and water leaks down the line.
Phase 5: Priming the New Glass and Applying High-Quality Adhesive
We source only premium, OEM-equivalent back glass for your 2006-2010 Dodge Charger, complete with the correct factory tint and integrated thermal defroster grid.
- Glass Preparation: The inside bonding edge of the new rear windshield is chemically cleaned and treated with a glass prep primer. This chemical activator ensures the adhesive bites permanently into the glass surface.
- High-Quality Urethane Application: We load our electric caulking guns with premium, fast-curing, high-quality adhesive urethane. Our master technicians lay down a flawless, continuous "V-bead." The triangular shape of the V-bead ensures that when the glass is pressed into place, the adhesive collapses evenly, eliminating any air pockets or gaps that cause wind noise or water ingress.
Phase 6: Precision Installation and System Reconnection
The final installation requires a steady hand and perfect alignment to match the aggressive body lines of the 6th generation Charger.
- Setting the Glass: Utilizing suction cups and a two-man lift technique (or precision setting tools), the new back glass is carefully lowered onto the fresh urethane bed. We ensure the glass is perfectly centered, maintaining uniform gaps along the roofline and trunk edge.
- Reconnecting the Electronics: Once the glass is seated, we immediately reconnect the rear defroster terminals to the vehicle's electrical system, ensuring your defogging capabilities are fully restored for harsh Greater Toronto Area winters.
- Reassembling Trims: The interior C-pillar trims, rear parcel shelf, and exterior moldings are reinstalled and secured exactly to factory specifications.
Post-Installation Care and Quality Assurance
Once the new back glass is successfully installed on your Dodge Charger, our technicians perform a rigorous quality assurance check. We inspect the perimeter for complete adhesive contact and test the defroster continuity.
Because we use advanced, fast-curing urethane, your vehicle's Safe Drive-Away Time (SDAT) is exceptionally short. However, we advise all our clients on a few crucial aftercare steps:
- Keep windows slightly open: Roll down a side window by an inch for the first 24 hours. This prevents cabin air pressure from pushing against the newly curing back glass seal when you close the doors.
- Avoid high-pressure car washes: Do not take your Charger through an automatic car wash or use high-pressure power washers for at least 48 hours to allow the high-quality adhesive to fully cross-link and cure.
- Leave retention tape in place: If our technicians apply specialized support tape to hold the top molding in place, leave it undisturbed for 24 hours.
Trust AlexWindshield: Your Auto Glass Experts in the GTA
Your 2006-2010 Dodge Charger is an iconic piece of modern muscle, and it deserves to be treated by professionals who respect the vehicle's engineering. At AlexWindshield, we are deeply committed to providing the highest standard of mobile auto glass repair and replacement services across the Greater Toronto Area. Whether you reside in Vaughan, work in Markham, or need an emergency replacement at a parking lot in Richmond Hill, our fully equipped mobile units bring unparalleled dealership-level expertise directly to you.
We stand firmly behind our master craftsmanship. Every back glass replacement we perform is backed by our comprehensive Lifetime Warranty against water leaks, air noises, and manufacturer defects. Do not let shattered glass keep your Charger off the road or expose your interior to the harsh Canadian elements. Choose the experts who combine meticulous clean-up, superior surface preparation, and high-quality adhesive technology to deliver a flawless result. Contact AlexWindshield today to schedule your mobile back glass replacement and get your Dodge Charger back on the road safely and stylishly.


