Restoring the Muscle: Expert Dodge Charger 2011-2023 Back Glass Replacement
The 2011-2023 Dodge Charger is a modern masterclass in American muscle, characterized by its aggressive stance, roaring Hemi or Pentastar powerplants, and a deeply sloped, aerodynamic roofline. However, when the rear window shatters—whether due to a severe temperature drop, a break-in, or highway debris—that commanding presence is immediately compromised. A broken back glass not only ruins the vehicle's striking aesthetic but also exposes your meticulously crafted interior to the unpredictable Canadian elements, compromises cabin security, and disables your rear defroster grid. As a Master Technician at AlexWindshield, I have replaced countless rear windows on this specific generation of the Charger. We understand the precise curvature, the structural requirements, and the specific electrical connections necessary to return your four-door powerhouse to its factory-original condition.
Mobile Auto Glass Service Across the Greater Toronto Area (GTA)
Driving a Dodge Charger with a shattered rear window is not just uncomfortable; it is incredibly dangerous. The lack of structural support, compromised rear visibility, and the constant threat of falling glass shards make immediate repair critical. That is why AlexWindshield brings the glass shop directly to your location. We provide premier, fully equipped mobile auto glass services across the Greater Toronto Area (GTA).
Whether your Charger is parked at your workplace in the bustling commercial sectors of Vaughan, sitting in your residential driveway in Richmond Hill, or temporarily grounded in a parking garage in Markham, our specialized mobile auto glass technicians will arrive on-site. We carry all the specialized tools, premium urethanes, and OEM-quality glass required to perform a flawless replacement without you ever needing to arrange a tow or risk driving an unsafe vehicle.
The Anatomy of the Dodge Charger Back Glass
Before diving into the replacement process, it is essential to understand that the back glass of a Dodge Charger (2011-2023) is more than just a pane of glass. It is a highly engineered component manufactured from tempered safety glass, designed to shatter into small, blunt cubes rather than jagged shards upon impact to prevent severe passenger injury. Furthermore, this rear glass integrates a complex thermal defroster grid essential for navigating harsh Ontario winters, and in many trims, integrated radio antenna lines. Properly replacing this glass requires profound technical knowledge to ensure all electrical components function seamlessly and the aerodynamic seal is perfectly restored.
Step-by-Step Technical Process: Dodge Charger Back Glass Replacement
At AlexWindshield, we do not cut corners. Our comprehensive, A-to-Z replacement protocol guarantees a permanent, leak-free, and structurally sound installation. Here is an inside look at our rigorous Master Technician procedure:
Step 1: Vehicle Preparation and Interior Protection
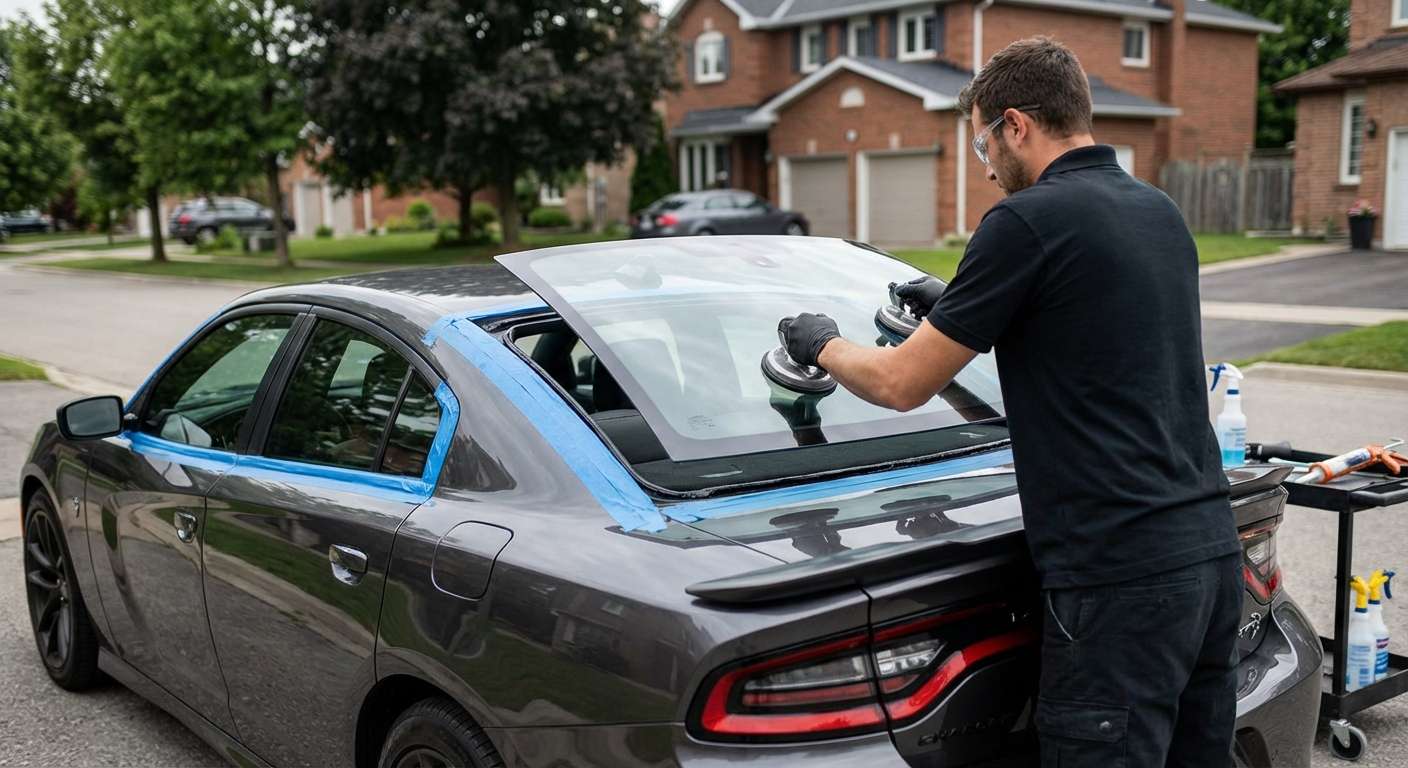
The first step in any professional auto glass replacement is safeguarding the vehicle's exterior paint and interior upholstery. We begin by applying heavy-duty protective masking tape around the Charger’s prominent C-pillars, roofline, and trunk lid to prevent any accidental scratches during the extraction process. Inside the cabin, we lay down thick, protective drop cloths over the rear seats, the center console, and the rear parcel shelf. Protecting the interior of your Dodge Charger is paramount before any mechanical work begins.
Step 2: Comprehensive Glass Shard Extraction and Vacuuming
Because the back glass of the Charger is tempered, a break results in thousands of tiny glass fragments. These shards inevitably fall onto the rear deck lid, down behind the rear seats, and often into the trunk compartment. Our technicians meticulously remove the rear interior trim panels and, if necessary, the rear parcel shelf to access hidden crevices. We then use high-powered industrial vacuums to extract every single broken glass shard from the interior. We vacuum the seats, the floor mats, the subwoofer and speaker cutouts, and the trunk lining. Leaving even a single shard behind can cause annoying rattles, damage your upholstery, or pose a safety risk to passengers.
Step 3: Disconnecting Electrical Components
With the interior safely prepped and cleaned, we carefully locate and disconnect the wiring harnesses attached to the broken rear window. For the 2011-2023 Dodge Charger, this primarily involves the heavy-duty connectors for the rear defroster grid. We inspect the pigtail connectors for any signs of corrosion or melting, ensuring the vehicle's electrical side is in perfect condition to receive the new glass.
Step 4: Removing the Remaining Glass and Old Urethane
Using specialized auto glass cut-out tools—such as a braided wire extrusion system or a precision cold knife—we carefully cut through the existing polyurethane adhesive bead securing the outer perimeter of the glass. We work meticulously to separate the broken glass frame from the vehicle without scraping the painted pinch weld (the metal frame where the glass sits). Once the remnants of the old back glass are removed, we use sharp, specialized scraper blades to trim the old urethane adhesive down to a thin, even layer of about 1 to 2 millimeters. This remaining layer acts as the perfect bonding base for the new adhesive.
Step 5: Pinch Weld Cleaning and Primer Application
Any dirt, debris, or moisture left in the pinch weld channel can cause the new adhesive to fail, leading to dangerous leaks and wind noise. We thoroughly clean the entire perimeter using a specialized, alcohol-based auto glass cleaner. Next comes one of the most critical steps: primer application. We apply a premium, fast-drying automotive glass primer to any bare metal scratches on the pinch weld to prevent future rust formation. We also apply this specialized primer to the ceramic frit band (the black painted border) of the new OEM-quality replacement back glass. The primer acts as a chemical bonding agent, ensuring the urethane adhesive cross-links perfectly with both the vehicle's body and the new glass.
Step 6: Applying High-Quality Urethane Adhesive
At AlexWindshield, we utilize only the highest grade, fast-curing polyurethane adhesives available in the industry. Using a heavy-duty electric caulking gun equipped with a precision V-notch nozzle, our Master Technicians apply a continuous, thick "V-bead" of urethane directly onto the prepared pinch weld. The V-shape is an industry-standard best practice that ensures the adhesive compresses perfectly when the glass is set, eliminating air pockets and creating an impenetrable, watertight seal capable of withstanding the high-speed aerodynamics of the Dodge Charger.
Step 7: Precision Installation of the New Back Glass
Due to the aggressive slope and heavy weight of the Dodge Charger's rear window, setting the glass requires extreme precision. Using heavy-duty suction cup grips, two technicians carefully lift and lower the new back glass into the fresh urethane bed. We apply firm, even pressure around the entire perimeter of the glass to ensure it seats at the exact factory depth. Once set, we use specialized retention tape to hold the glass firmly in place while the urethane begins its chemical curing process.
Step 8: Reconnection and Final System Testing
With the new glass securely bonded, we reconnect the rear defroster electrical tabs and any integrated antenna wires. We then turn on the vehicle and test the defroster circuit with a multimeter to guarantee proper voltage and functionality. Finally, we reinstall all interior C-pillar trim pieces, the rear parcel shelf, and conduct a final sweep with our vacuums to ensure your interior is immaculate. We then clean the new auto glass with a streak-free, ammonia-free foaming cleaner.
Step 9: Safe Drive-Away Time (SDAT) Briefing
Before handing over the keys to your 2011-2023 Dodge Charger, we brief you on the Safe Drive-Away Time (SDAT). Because we use premium, fast-curing urethanes, your vehicle is typically safe to drive within 30 to 60 minutes after installation. We will also provide instructions on how long to leave the retention tape on and advise against high-pressure car washes for the first 48 hours to allow the adhesive to achieve maximum tensile strength.
Why the Greater Toronto Area Chooses AlexWindshield
Replacing the back glass on a high-performance vehicle like the Dodge Charger requires the steady hand and deep knowledge of a Master Technician. Settling for cut-rate shops can lead to misaligned glass, malfunctioning defrosters, rust formation in your pinch weld, and devastating water leaks that can destroy your vehicle's electronics and interior.
By choosing AlexWindshield, you are opting for unparalleled expertise and ultimate convenience. Our dedicated focus on customer satisfaction and technical perfection has made us the highest-rated mobile auto glass service in Vaughan, Richmond Hill, Markham, and throughout the rest of the GTA.
- OEM-Quality Materials: We source top-tier glass that perfectly matches your Dodge Charger's factory specifications, ensuring flawless defroster performance and structural integrity.
- Master Technician Expertise: Every installation is performed or overseen by highly trained professionals who understand the intricate anatomy of modern muscle cars.
- Comprehensive Clean-Up: We go beyond just replacing the glass; our exhaustive interior vacuuming ensures no dangerous shards are left behind in your cabin.
- Unmatched Convenience: Our mobile fleet comes directly to your home, office, or emergency location anywhere in the Greater Toronto Area.
Your Dodge Charger was built to command the road, and a broken back window shouldn't keep you in the garage. Trust the industry leaders to restore your vehicle's safety, aesthetics, and performance. Contact AlexWindshield today for your expert mobile auto glass replacement, backed by our comprehensive Lifetime Warranty against leaks, whistling, and workmanship defects. Drive with confidence knowing your vehicle was serviced by the best in the GTA.


