The 1996-2004 Nissan Pathfinder: Preserving a Classic with Professional Auto Glass Care
The 1996-2004 Nissan Pathfinder, known to enthusiasts as the R50 generation, marked a highly celebrated and pivotal shift in SUV engineering. By transitioning from a traditional, stiff body-on-frame truck design to an advanced unibody construction, Nissan delivered a vehicle that offered a phenomenally smooth highway ride without sacrificing a single ounce of its legendary off-road capability. Whether you use your classic Pathfinder for daily commuting, hauling family gear, or navigating rugged weekend trails, the expansive rear liftgate glass remains a crucial component of your vehicle's structural integrity, climate control, and rearward visibility. However, conquering demanding terrains or simply driving on busy highways puts this large piece of back glass directly in the crosshairs of flying debris, shifting cargo impacts, and extreme seasonal temperature fluctuations.
Unlike the laminated safety glass used for windshields, the rear liftgate glass on the 1996-2004 Nissan Pathfinder is constructed from highly pressurized tempered glass. When tempered glass sustains a severe impact, it is engineered to shatter instantly into thousands of tiny, blunt-edged cubes rather than dangerous, jagged shards. While this is a critical safety feature designed to protect passengers during a collision, it also creates an immediate, massive vulnerability. A shattered back glass leaves your vehicle's interior completely exposed to harsh weather, opportunistic theft, and road noise. Furthermore, those thousands of tiny glass cubes infiltrate every crevice of your cargo area and liftgate mechanisms. When this happens, you need a highly skilled Master Technician to meticulously restore your vehicle to its factory-safe condition.
Complete A to Z Back Glass Replacement Process for the Nissan Pathfinder
Replacing the back glass on a 1996-2004 Nissan Pathfinder is not a simple swap. It requires a rigorous, multi-step technical process to ensure flawless aesthetics, restored structural integrity, and long-lasting durability. As a Master Technician, I follow a strict, factory-approved protocol for every rear glass installation.
Step 1: Vehicle Assessment and Interior Preparation
The first and most critical step before removing any components is protecting the pristine interior of your Nissan Pathfinder. We begin by laying down heavy-duty protective drop cloths and moving blankets across the entire rear cargo area, folding down the rear seats if necessary, and draping the exterior rear bumper to prevent any accidental scratches to your vehicle's paintwork during the installation process. We then conduct a thorough assessment of the damage, inspecting the liftgate hinges, the rear wiper motor housing, and the electrical connections for the rear window defroster to ensure no secondary damage occurred when the glass shattered.
Step 2: Extensive Glass Remediation and Panel Removal
Because the Pathfinder's back glass is tempered, a shattered rear window means thousands of tiny glass pieces have rained down into your vehicle. We systematically remove the interior rear liftgate door panels and trim pieces to access the inner cavity of the rear door. Using high-powered industrial vacuums, we meticulously extract all broken glass shards from the vehicle's interior cargo floor, the seat folds, and deep within the liftgate shell itself. Skipping this step would result in infuriating rattling noises every time you close the trunk or drive over a bump, and leftover shards could potentially jam the tailgate latch or rear wiper mechanism. Our exhaustive vacuuming process guarantees your interior is safe and clean.
Step 3: Disconnection of Electronics and Removal of Remaining Glass
The 1996-2004 Pathfinder rear glass is equipped with integrated defroster grid lines and, depending on the trim level, a rear wiper assembly. We carefully disconnect the electrical wiring harnesses and defroster terminal tabs. If the rear wiper motor passes through the glass, we unbolt and safely extract the wiper arm and motor assembly. Using specialized auto glass removal tools, such as an ergonomic cold knife and advanced wire-cutting systems, we carefully slice through the remaining original polyurethane adhesive bead that bonds the glass frame to the vehicle's metal pinch weld. Any remaining chunks of shattered glass attached to the adhesive are safely removed and discarded.
Step 4: Pinch Weld Preparation and Surface Cleaning
The foundation of a safe, watertight back glass installation relies entirely on the condition of the metal pinch weld. We utilize specialized heavy-duty scrapers to trim down the old factory urethane bead to a completely flat, uniform thickness of approximately 1 to 2 millimeters. This thin layer of original urethane acts as an excellent base for the new adhesive to bond to. Next, we aggressively clean the entire pinch weld and surrounding liftgate frame using an alcohol-based, lint-free cleaning solution. This removes all dirt, road grime, natural oils, and microscopic glass dust that could compromise the chemical adhesion of the new seal.
Step 5: Applying Premium Primer and High-Quality Adhesive
With the pinch weld meticulously cleaned, we inspect the metal for any deep scratches or signs of rust—a common issue on classic SUVs like the 96-04 Pathfinder. We apply a specialized black auto glass primer to any exposed bare metal on the pinch weld to prevent future oxidation and corrosion. This same premium primer is applied to the black ceramic frit band on the edges of the brand-new replacement back glass. Once the primer flashes and cures, we use a professional-grade caulking gun to extrude a thick, uniform, triangular bead of high-quality, OEM-grade urethane adhesive directly onto the pinch weld. The triangular shape is vital, as it ensures the adhesive will compress perfectly flat when the glass is seated, preventing any air gaps or water leaks.
Step 6: Precision Installation of the New Back Glass
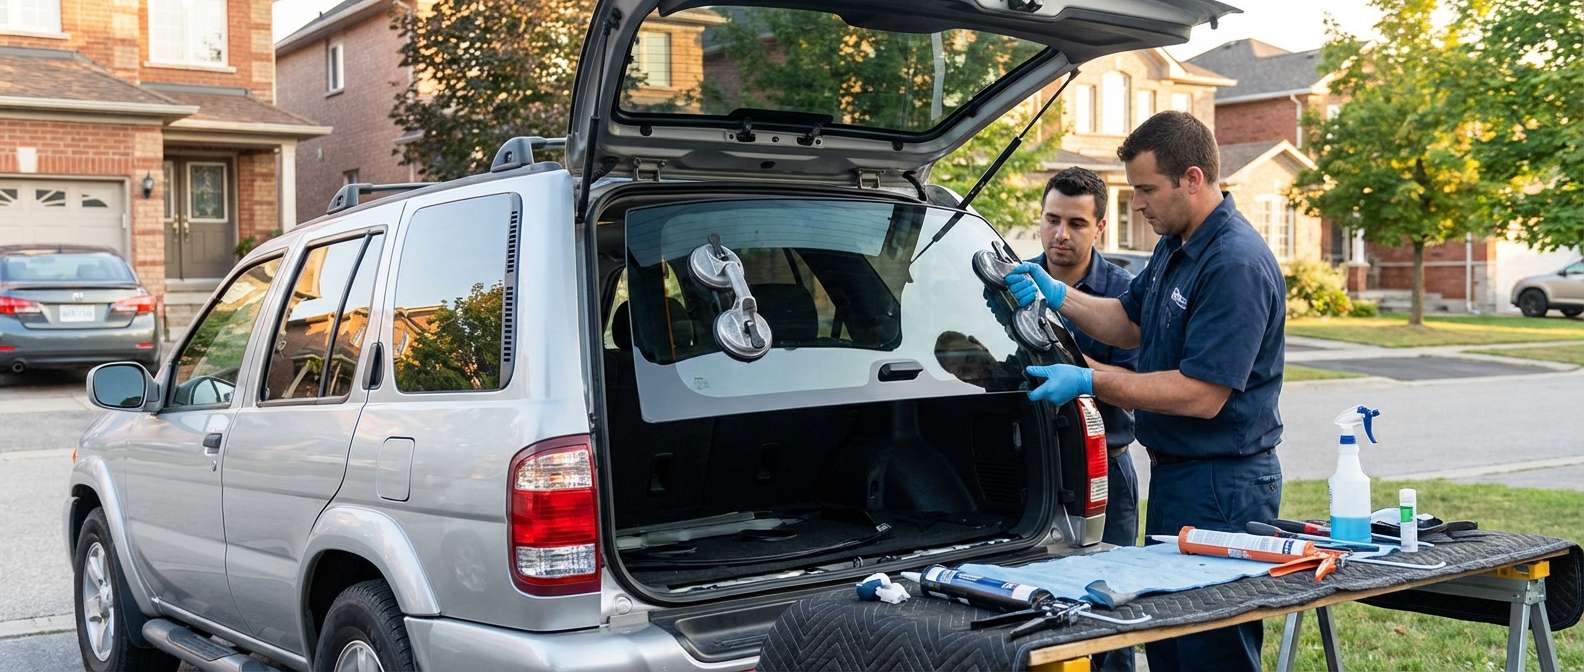
Handling the heavy, uniquely curved rear glass of the Pathfinder requires exact precision. Utilizing heavy-duty industrial suction cups, two technicians carefully lift the new, fully prepped rear glass and gently lower it into the fresh urethane bead. We apply precise, even pressure around the entire perimeter of the glass to properly compress the adhesive, ensuring a factory-tight seal. We use specialized automotive retention tape to hold the top of the glass securely in place against the roofline, preventing any downward sliding while the urethane goes through its initial curing phase.
Step 7: Reassembly, Defroster Connection, and Final Inspection
Once the glass is firmly set in its correct position, the reassembly process begins. We carefully reinstall the rear wiper motor assembly and align the external wiper arm to its proper resting position. The electrical connections for the rear defroster grid are securely reattached and tested for continuity. Next, we replace all the previously removed interior liftgate panels, ensuring every factory clip snaps tightly into place. Finally, we perform a comprehensive quality control inspection, checking the alignment, verifying the neatness of the interior and exterior trim, and cleaning the newly installed glass with a streak-free automotive glass cleaner.
Unmatched Local SEO Mobile Service Across the Greater Toronto Area
Dealing with a shattered rear window is a stressful emergency that leaves your vehicle highly vulnerable. Driving a Pathfinder with a missing back glass on busy highways like the 400, 404, or 407 is not only incredibly uncomfortable due to massive wind drafts and exhaust fumes entering the cabin, but it is also exceptionally dangerous. That is why we bring our Master Technician expertise directly to your driveway, workplace, or emergency location.
We are proud to offer rapid, fully equipped mobile service throughout the Greater Toronto Area (GTA). If you are a resident dealing with a broken window near the bustling shopping centers of Vaughan, we will dispatch our mobile fleet directly to you. If you are located near the residential communities or busy tech hubs of Markham, our technicians will arrive with all the vacuums, tools, and premium glass needed to complete the job on-site. Even if you are stranded in a parking lot or driveway in Richmond Hill, you do not need to risk driving your compromised vehicle. Our mobile service guarantees that you receive in-shop quality workmanship without ever having to leave the comfort of your home or office.
Why Choose AlexWindshield for Your Nissan Pathfinder Glass Needs?
- Master Technician Expertise: We do not rely on generic solutions. We understand the specific nuances, trim levels, and structural requirements of the 1996-2004 Nissan Pathfinder.
- Impeccable Cleanup Standards: We guarantee that every single shard of broken tempered glass is vacuumed from your interior panels and cargo area, ensuring a safe environment for your family and pets.
- High-Quality Materials: We exclusively use OEM-equivalent glass, industry-leading urethane adhesives, and advanced anti-corrosion primers for an unbreakable seal.
- Convenient Mobile Repairs: Proudly servicing the entire Greater Toronto Area, including prompt, priority dispatch to Vaughan, Richmond Hill, and Markham.
When the back glass of your trusted 1996-2004 Nissan Pathfinder shatters, do not settle for amateur repairs that could lead to severe water damage, rust, or electrical failures. Trust the experts who combine technical mastery with unparalleled customer convenience. AlexWindshield is your premier destination for highly professional, flawless mobile auto glass services. We stand proudly behind our craftsmanship, which is why every single back glass replacement we perform is backed by our comprehensive Lifetime Warranty against any water leaks, air noises, or workmanship defects. Contact AlexWindshield today and let our Master Technicians restore the safety, security, and beauty of your classic Nissan Pathfinder.


