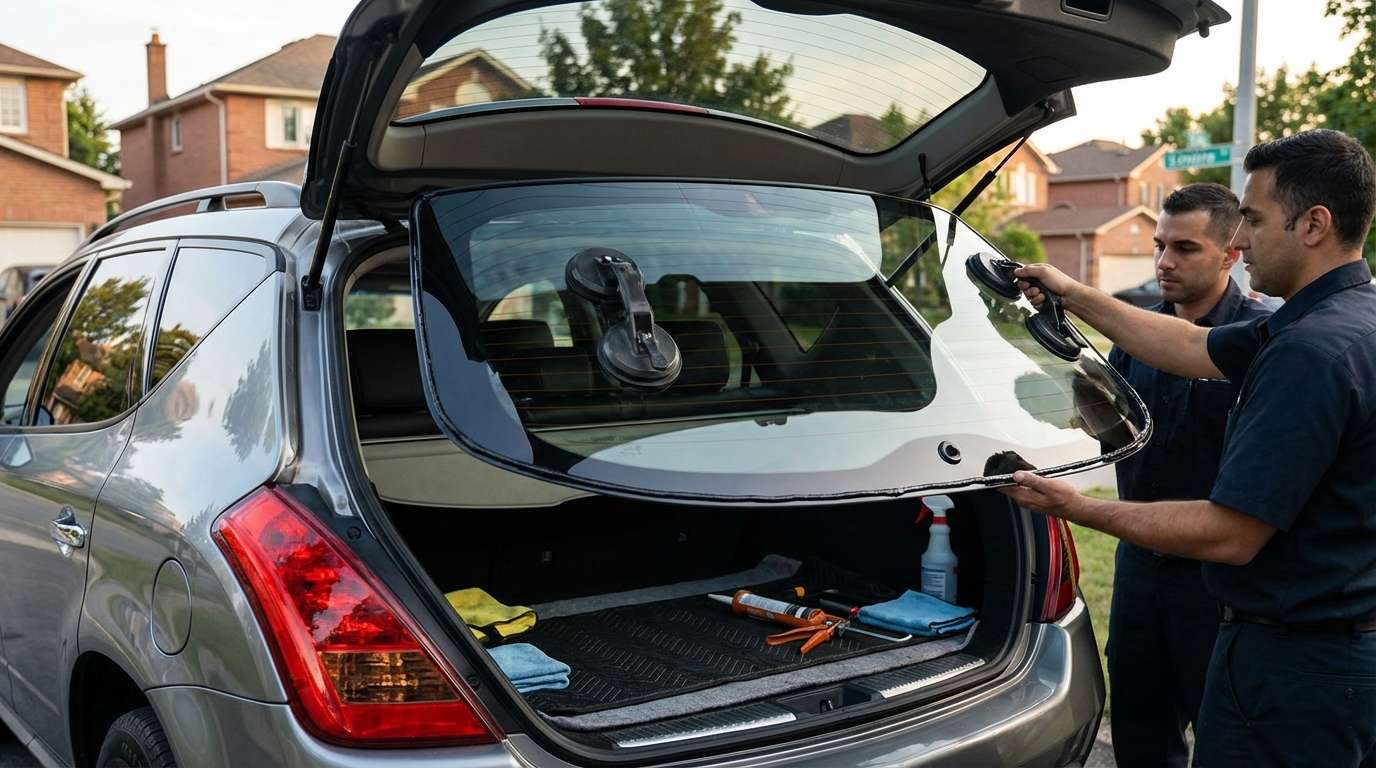
The Z50 Era: Specialized Back Glass Replacement for Your 2003-2008 Nissan Murano
When Nissan introduced the first-generation Murano (chassis code Z50) in 2003, it fundamentally revolutionized the mid-size crossover SUV market with its space-age, aerodynamic styling. A defining feature of this bold automotive design is the aggressively sloped, highly curved rear hatch glass. While this swept-back aesthetic turns heads on the highway, it also means that when a rogue rock, harsh winter weather, or an unfortunate collision shatters your rear windshield, you need a highly specialized team to restore it perfectly. The complex curvature and integrated electronics of the 2003-2008 Nissan Murano back glass demand precision, patience, and master-level technical skills that go far beyond a standard windshield swap.
At AlexWindshield, we do not just replace auto glass; we engineer a flawless, factory-grade restoration for your vehicle. As Master Technicians, we understand the specific nuances and engineering quirks of the 2003-2008 Nissan Murano's liftgate structure. We know how much you value your vehicle, which is why we handle every single step of the replacement process with uncompromising care and attention to detail.
Premium Mobile Auto Glass Services in Vaughan, Richmond Hill, and Markham
Driving with a shattered rear windshield is not only a massive safety hazard that obstructs your rearward visibility, but it also leaves your SUV's interior completely exposed to the elements, theft, and severe water damage. We proudly dispatch our fully equipped mobile service vans throughout the Greater Toronto Area (GTA), offering rapid-response dispatch specifically to Vaughan, Richmond Hill, and Markham. Our goal is to minimize your downtime and maximize your safety. You do not need to risk driving a compromised SUV to a traditional garage—our certified Master Technicians deliver dealership-quality back glass replacement directly to your driveway, office parking lot, or wherever you happen to be.
Understanding the 2003-2008 Nissan Murano Rear Windshield Features
Before diving into the replacement process, it is critical to understand the technical components integrated into the back glass of a 2003-2008 Nissan Murano. This is not just a piece of standard glass; it is a complex assembly that includes:
- Tempered Safety Glass: Unlike the front windshield which is laminated, the back glass is designed to shatter into thousands of small, dull cubes rather than lethal, jagged shards upon impact, protecting rear passengers from severe lacerations.
- Thermal Defroster Grid: Baked-in conductive electrical lines that require precise circuit reconnection to ensure your rear visibility remains clear during brutal Canadian winters.
- Rear Wiper Assembly: A structural pass-through hole in the glass dictates that the exterior wiper arm and interior wiper motor must be carefully removed and precisely recalibrated during installation.
- Complex Curvature: The Z50 Murano's sloped liftgate requires a highly accurate, custom-shaped urethane bead to ensure the glass sits completely flush against the frame, preventing high-speed wind noise and trunk water leaks.
The AlexWindshield Master Technician Step-by-Step Replacement Process
As a senior auto glass technician, I hold our team to the absolute highest industry standards. A back glass replacement on a first-generation Nissan Murano involves meticulous preparation, extensive interior cleanup, and precise chemical engineering. Here is the complete A to Z breakdown of our process.
Phase 1: Comprehensive Inspection and Interior Protection
The moment our mobile unit arrives at your location in the GTA, the absolute first step is safeguarding your SUV. A shattered back glass means thousands of tiny tempered glass cubes are scattered throughout your trunk. We begin by folding down the rear seats and applying heavy-duty protective canvas blankets over your upholstery, cargo floor, and the exterior rear bumper. We then apply specialized auto-body retention tape around the painted edges of the liftgate to ensure our metal extraction tools never accidentally scratch your vehicle's clear coat during the procedure.
Phase 2: Meticulous Glass Shard Extraction and Vacuuming
Because tempered back glass literally explodes upon impact, cleanup is one of the most vital steps of the service. We employ industrial-grade HEPA vacuums to thoroughly extract every visible piece of broken glass from the cargo area, seat crevices, and floor mats. Crucially, we also vacuum the internal cavity of the rear hatch door itself. If left uncleaned, thousands of glass shards trapped inside the metal liftgate will rattle endlessly every time you open the trunk, close the doors, or drive over a bump. At AlexWindshield, we go the extra mile to meticulously vacuum these hidden chambers, ensuring your interior is completely free of hazardous and annoying debris.
Phase 3: Hardware and Interior Door Panel Removal
To safely access the structural mounting points and wiring harnesses, we must carefully disassemble the interior side of the rear hatch. Our technicians use non-marring nylon trim tools to pop off the interior plastic tailgate panels without breaking the fragile retaining clips. This exposes the electrical connections for the rear defroster grid and the rear wiper motor. We gently disconnect the wiring harnesses, unbolt the heavy rear wiper arm from the outside using a specialized puller tool, and remove the wiper motor assembly from the inside. This leaves the perimeter of the liftgate bare and ready for old adhesive extraction.
Phase 4: Urethane Cutting and Pinchweld Preparation
Even though the glass is shattered, the tough polyurethane adhesive ring (the urethane bead) still clings stubbornly to the steel frame (pinchweld) of the Murano's liftgate. Using specialized cold knives and advanced power extraction cut-out tools, we carefully slice through the remaining adhesive. Once the perimeter is cleared of the larger glass chunks stuck in the glue, we use razor scrapers to trim the old urethane down to a consistent base layer of 1 to 2 millimeters. This thin layer of old adhesive acts as an ideal bonding substrate for the new urethane to grip onto.
Phase 5: Cleaning and Chemical Primer Application
A replacement back glass is only as strong as the chemical bond holding it in place. We treat the exposed pinchweld with a specialized, lint-free automotive glass cleaner to remove dirt, grease, and microscopic debris. Any accidental scratches down to the bare metal on the pinchweld (a common issue we rectify in older vehicles like the 2003-2008 Murano) are treated with a high-performance, rust-inhibiting pinchweld primer. We also meticulously clean and prime the black ceramic frit band on the inside edge of the new, premium replacement back glass. This chemical activator ensures an indestructible molecular bond between the new glass, the urethane, and the vehicle body frame.
Phase 6: Urethane Extrusion and Glass Setting
Using a heavy-duty electric caulking gun, we extrude a continuous, perfectly triangulated "V-bead" of premium OEM-grade polyurethane adhesive around the perimeter of the Murano's liftgate frame. The V-shape is critical—it ensures the adhesive compresses evenly when the glass is set, eliminating microscopic air pockets that cause devastating water leaks. Using heavy-duty suction cups, two master technicians perfectly align the heavy, sloped replacement glass over the hatch opening and gently compress it into the wet urethane. Because of the Murano's dramatic rear slope, we secure the glass with specialized retention tape to prevent any downward sliding while the adhesive begins its chemical cross-linking cure.
Phase 7: Reassembly, Reconnection, and Quality Assurance
Once the glass is locked into its precise position, the reassembly phase begins. We bolt the rear wiper motor back into place, reinstall the exterior wiper arm, and ensure it is perfectly aligned to wipe the correct arc across the new glass. We carefully reattach the electrical terminals to the new thermal defroster grid and test the circuit to guarantee you will have frost-free mornings. Finally, the interior liftgate trim panels are snapped firmly back into their factory positions. We perform a final streak-free wipe-down of the new glass, run a secondary vacuuming pass through the interior cargo area to catch any stray debris, and conduct a rigorous, multi-point quality control inspection.
Crucial Aftercare Instructions for Your New Nissan Murano Back Glass
The premium urethane adhesive we use requires a specific "Safe Drive-Away Time" (SDAT) to cure to optimal safety standards. To protect the integrity of your newly installed rear windshield, we strongly advise our clients to observe the following rules for the first 24 to 48 hours post-installation:
- Leave the Retention Tape Intact: Keep the blue auto glass tape in place for at least 24 hours to prevent the glass from shifting downward on the Z50's aggressively sloped hatch.
- Avoid High-Pressure Car Washes: Do not run your Murano through an automated car wash for at least two days; the high-pressure water jets and heavy scrubbers can compromise the curing urethane seal.
- Crack a Window: Keep a side window rolled down about an inch when closing the vehicle doors. This simple trick relieves sudden cabin air pressure spikes that could literally blow out the newly set back glass before the adhesive has fully hardened.
- Gentle Door Closing: Avoid aggressively slamming the driver or passenger doors, as well as the rear hatch itself, until the urethane has achieved a full structural cure.
Trust AlexWindshield: The GTA’s Premier Auto Glass Experts
When you drive a classic, iconic crossover like the 2003-2008 Nissan Murano, you should never trust its maintenance to just anyone. Your safety on the highway and your vehicle's long-term structural integrity require the steady hand and vast knowledge of a Master Technician. At AlexWindshield, we pride ourselves on delivering uncompromising quality, utilizing top-tier OEM-equivalent materials, and providing a seamless, stress-free customer experience from start to finish.
Our dedicated mobile auto glass units are fully stocked, expertly staffed, and ready to serve you anywhere in the Greater Toronto Area (GTA). Whether your back glass shattered overnight in your driveway in Vaughan, outside your office building in Markham, or while running errands in Richmond Hill, we bring the premium auto glass shop directly to you. Most importantly, every single auto glass replacement we perform is backed by our comprehensive Lifetime Warranty against water leaks, wind whistling, and workmanship defects, giving you ultimate peace of mind on the road.
Do not let a shattered rear windshield leave your vehicle exposed to the elements or compromise your family's safety. Contact AlexWindshield today to schedule your mobile Nissan Murano back glass replacement and experience the absolute pinnacle of auto glass restoration in the GTA.


