Restoring the Whisper-Quiet Cabin of Your XV30: Professional Vent Glass Replacement for the Lexus ES 300 and ES 330 (2002-2006)
The 2002-2006 Lexus ES 300 and ES 330 (internally known as the XV30 generation) are celebrated in the automotive world for their buttery-smooth ride quality, meticulously crafted interiors, and whisper-quiet cabins. These luxury sedans were engineered with heavy acoustic dampening to isolate you from the outside world. However, when the small but structurally crucial vent glass on your vehicle is shattered—often due to unfortunate break-ins, flying road debris, or severe weather—that serene driving experience is instantly compromised. Not only do you face deafening wind noise and the threat of water intrusion, but your vehicle also becomes highly vulnerable to theft. At AlexWindshield, we understand the specific engineering of early 2000s Lexus vehicles, and we deliver an exact, factory-level restoration to bring your luxury sedan back to its pristine condition.
Urgent and Reliable Mobile Service Across the Greater Toronto Area (GTA)
Driving a Lexus with a broken vent window is not just uncomfortable; it is a significant security risk. Because this specific glass panel is a common target for thieves trying to gain access to the interior door handle, rapid replacement is essential. AlexWindshield brings our state-of-the-art mobile auto glass shop directly to your driveway, office parking lot, or garage. We proudly provide expedited, premium mobile auto glass services across the Greater Toronto Area (GTA), with dedicated rapid-response routing specifically highlighting Vaughan, Richmond Hill, and Markham. You do not need to waste your day waiting in a repair shop; our Master Technicians come to you equipped with all the specialized tools, OEM-quality glass, and premium adhesives required to complete the job on-site.
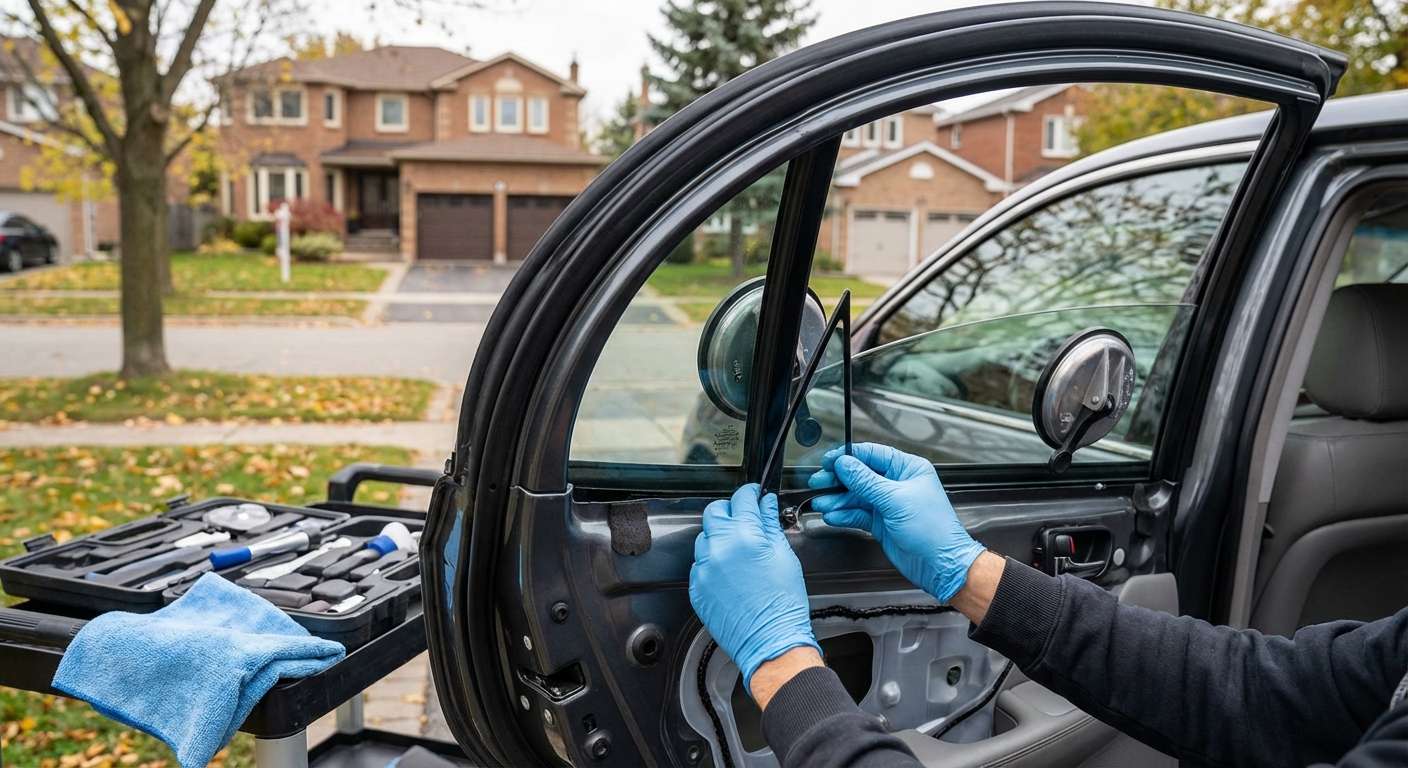
Master Technician’s Step-by-Step Vent Glass Replacement Process
Replacing the vent glass on a 2002-2006 Lexus ES 300 or 330 is not a simple "pop-in" procedure. It is a highly technical process that requires the partial disassembly of the rear door, manipulation of the window run channels, and precise bonding. As Master Technicians, we follow a strict, multi-point protocol to ensure absolute perfection.
Step 1: Pre-Installation Inspection and Interior Protection
The foundation of a flawless auto glass replacement is meticulous preparation. Lexus interiors feature premium leather, soft-touch plastics, and delicate woodgrain trim that must be preserved.
- Vehicle Assessment: We begin by inspecting the door frame, weather stripping, and surrounding paint for any secondary damage caused by the initial impact or break-in.
- Interior Shielding: We lay down heavy-duty, anti-slip drop cloths over your premium leather seats and floor mats.
- Exterior Masking: High-grade automotive masking tape is applied to the exterior painted surfaces surrounding the door frame to prevent any accidental scratches during the extraction and installation process.
Step 2: Precision Door Panel Removal and Component Disassembly
Because the vent glass is integrated into the door shell and secured by a vertical division bar, accessing the mounting points requires removing the interior door panel.
- Hardware Extraction: Using non-marring nylon trim tools, we carefully remove the cosmetic screw covers hidden behind the interior door latch and the armrest grab handle. We then extract the retaining screws using a precise Phillips or 10mm socket.
- Panel Detachment: We gently pop the perimeter retaining clips, ensuring none of the plastic fasteners are broken. If any age-brittled clips snap, we replace them with factory-equivalent hardware.
- Electrical Disconnection: The power window switches, courtesy lights, and speaker harnesses are carefully disconnected.
- Vapor Barrier Handling: We meticulously peel back the factory moisture barrier (vapor shield) without tearing it, exposing the inner cavity of the door shell.
Step 3: Thorough Vacuuming of Shattered Glass Shards
Automotive vent glass is made of tempered safety glass. When it breaks, it forcefully detonates into thousands of tiny, sharp cubes that fall deep into the mechanical components of the door.
- Interior Extraction: We use high-powered industrial vacuums with specialized crevice attachments to extract all glass shards from the seats, carpets, and floor mats.
- Door Shell Deep Clean: We vacuum the absolute bottom of the inner door cavity. Leaving even a few pieces of glass inside will result in an annoying rattling sound every time you close the door or drive over bumps in Vaughan or Markham.
- Mechanism Clearing: We inspect and clean the primary window regulator tracks, ensuring no glass fragments are grinding against the moving parts of your main roll-down window.
Step 4: Extracting the Damaged Vent Glass Frame and Division Bar
To safely insert the new vent glass, the structural track that separates the main window from the vent window must be loosened.
- Lowering the Main Glass: We temporarily reconnect the window switch to lower the main door glass, providing clearance.
- Unbolting the Division Bar: We locate and remove the 10mm bolts securing the vertical run channel (division bar) at the top of the door frame and the bottom of the door shell.
- Frame Extraction: We carefully peel back the exterior rubber encapsulation and remove the remnants of the broken vent glass. Any old, degraded adhesive or sealant holding the rubber molding to the pinch weld is systematically cut away.
Step 5: Surface Cleaning and Primer Application
A secure, leak-proof seal depends entirely on how well the mounting surface is prepped.
- Decontamination: We clean the bare metal pinch weld and the surrounding door frame with a specialized, alcohol-based automotive glass cleaner. This removes all dirt, grease, and old adhesive residue.
- Primer Application: We apply a high-performance black glass primer to the metal frame and, if necessary, to the frit band of the new vent glass. The primer application serves three critical functions: it prevents the bare metal from rusting, it protects the urethane adhesive from UV degradation, and it acts as a chemical bonding agent to ensure the adhesive grips the frame with maximum tensile strength.
- Flash-Off Time: We allow the primer to cure for the exact manufacturer-specified flash-off time.
Step 6: Precision Installation Using High-Quality Adhesive
With the frame perfectly prepped, it is time to install the brand-new, OEM-quality vent glass tailored specifically for your 2002-2006 Lexus ES.
- Adhesive Extrusion: We load a cartridge of premium, fast-curing automotive polyurethane adhesive into a specialized caulking gun. A continuous, uniform V-bead of this high-quality adhesive is applied directly to the mounting channel.
- Glass Seating: The new vent glass, complete with its fresh rubber encapsulation, is expertly guided into the door frame. We apply firm, even pressure to compress the adhesive bead, ensuring a watertight and airtight seal that mimics factory acoustics.
- Division Bar Re-securing: We immediately slide the vertical division bar back into place, ensuring the rubber weather stripping securely overlaps the new glass, and torque the 10mm bolts to exact factory specifications.
Step 7: Reassembly and Final Quality Checks
The final stage ensures your Lexus looks and functions exactly as it did before the damage occurred.
- Vapor Barrier Re-sealing: We reattach the plastic moisture barrier using fresh butyl tape where necessary to prevent future interior water leaks.
- Panel Installation: The interior door card is meticulously re-hung. All electrical harnesses (power windows, locks, lighting) are reconnected. Retaining screws and cosmetic caps are reinstalled securely.
- Operational Testing: We test the main roll-down window multiple times to verify that it glides smoothly in its track without binding against the newly installed vent glass frame.
- Final Polish: The new vent glass, as well as the surrounding windows, are polished to a streak-free shine using ammonia-free automotive glass cleaner.
The Importance of Professional Quality and Prompt Action
Ignoring a broken vent glass on your Lexus ES 300 or 330 can lead to severe secondary damage. Rainwater entering the exposed door cavity can short out your power window motors, damage the internal door lock actuators, and cause your premium leather interior to develop mold. Furthermore, DIY repairs using tape and plastic bags severely reduce your driving visibility and invite targeted break-ins. Trusting a Master Technician ensures that the structural integrity of the door is maintained, the acoustic insulation is restored, and the vehicle is secure against the harsh Canadian elements.
Trust AlexWindshield: Your GTA Auto Glass Experts
When it comes to preserving the luxury and safety of your vehicle, do not settle for subpar materials or rushed workmanship. AlexWindshield is recognized as the premier destination for comprehensive auto glass solutions across the Greater Toronto Area (GTA). Whether you are at home in Richmond Hill, at the office in Markham, or running errands in Vaughan, our fully equipped mobile service fleet will come directly to you.
Our commitment to excellence is unwavering. We utilize only industry-leading materials, from OEM-equivalent glass panels to advanced, fast-curing urethane adhesives. Because we believe in doing the job flawlessly the first time, every single auto glass replacement we perform is backed by our comprehensive Lifetime Warranty. This warranty covers you against any air leaks, water leaks, or manufacturer defects for as long as you own your Lexus. Do not let a shattered vent glass compromise your peace of mind or the luxury of your ES 300/330. Contact AlexWindshield today for swift, precise, and professional mobile auto glass replacement.


