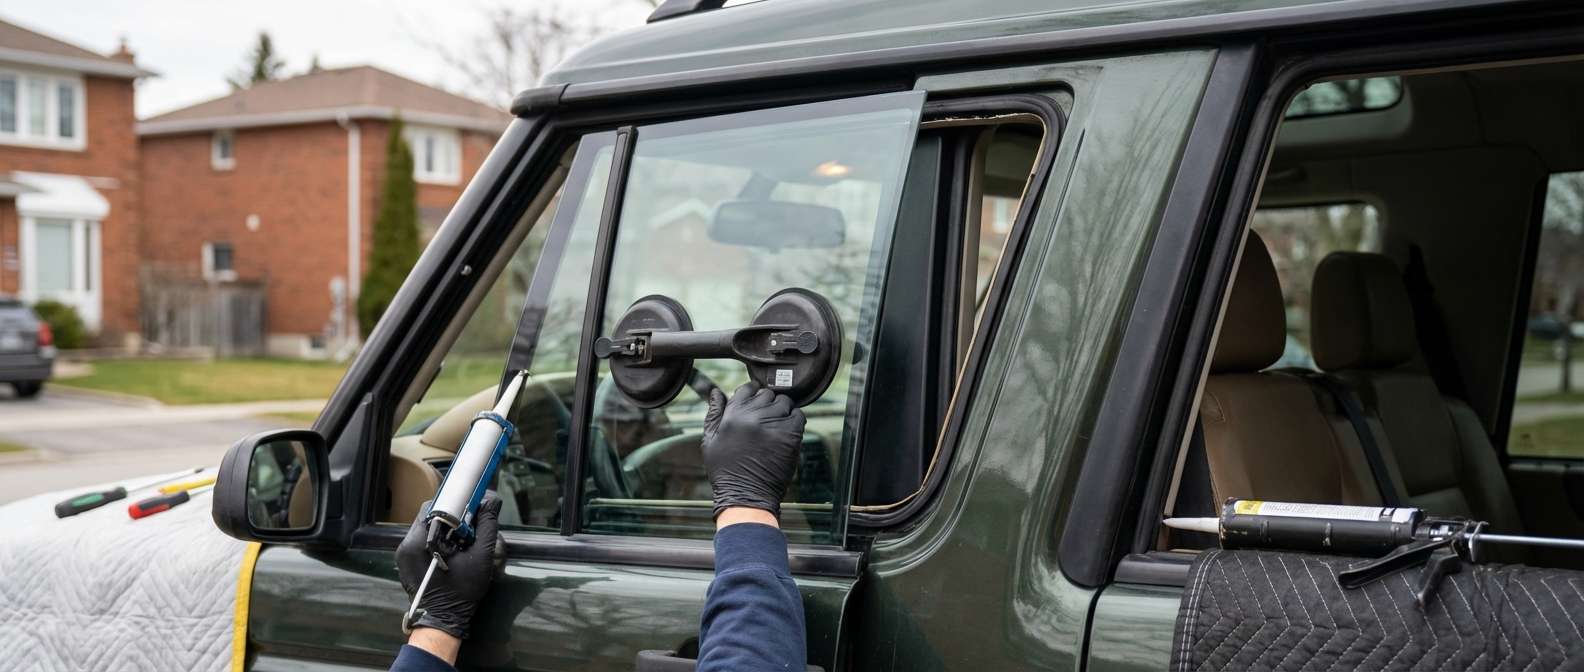
Fixed Rear Door Quarter Glass on the Discovery Series II
The rear door vent glass on this vehicle does not pivot or vent; it is a stationary, flat tempered pane locked into the aft section of the rear passenger door frame behind the main drop glass. Unlike modern unibody SUVs that bond side quarter glass directly to the outer bodywork using urethane, this vehicle relies on a full stamped steel window frame. The glass sits captive inside a perimeter EPDM rubber channel gasket, held rigid against a vertical metal division bar that separates the stationary quarter section from the motorized sliding window.
Because the Discovery Series II utilizes single-pane toughened glass here rather than laminated acoustic glass, an impact will shatter the piece completely into gravel-sized fragments. When sourcing aftermarket glass for this vehicle, matching the factory tint is critical. These vehicles left the factory with either the standard 70% light transmission green tint or deep privacy glass. Unlike the alpine roof glass or the tailgate window, this rear door quarter section contains no radio antenna elements, alarm loops, or heating wires.
The Vertical Division Bar and Water Intrusion Issues
A failed or broken vent window exposes several vulnerable components inside the door shell. The painted vertical division channel does double duty: the forward edge carries the felt run channel guiding the sliding window, while the rear face pinches the stationary quarter glass seal. Over time, these steel division bars suffer internal rust beneath the paint, which causes the metal to swell, pinch the moving window channel, and distort the rubber gasket seating the quarter glass.
When this perimeter seal cracks, perishes, or gets pushed out of alignment during glass breakage, water easily drains down the interior sash into the bottom cavity of the door. That persistent leak attacks the door latch mechanism, corrodes the electric window regulator scissor arms, and burns out the integrated door lock actuator. When you need this fixed quickly to stop rain soaking the carpet or shorting the door electronics, I typically arrive about an hour after a booking is confirmed with the replacement glass ready to mount.
Post-Installation Inspection Checklist
- Division Bar Rigidity: The vertical steel bar between the sliding glass and fixed glass must sit completely plumb without fore-and-aft wobble.
- Drop Glass Travel: The main rear window must glide smoothly past the division channel felt without catching, dragging, or kicking the glass off-track.
- EPDM Gasket Seating: The rubber channel seal must sit flush against the stamped metal door sash all the way around the vent pane, without folds, gaps, or pinching at the top corner.
- Tint Match: The new tempered glass must visually match the factory 70% green tint or dark privacy shade of the adjacent sliding window and upper alpine light.
- Lower Cavity Clearance: The bottom of the door shell interior must be cleared of broken tempered gravel so the bottom drain slots remain fully open.
- Interior Trim Re-engagement: All trim clips along the lower perimeter of the interior door card must be fully snapped into the door steel so the vapor barrier stays sealed.


