Restoring the Integrity of Your 2015-2021 Kia Sedona: The Ultimate Vent Glass Solution
Families rely heavily on the 2015-2021 Kia Sedona for its expansive interior, robust safety profile, and uncompromised road comfort. Recognized for its sleek "tiger-nose" grille and premium cabin feel, this third-generation minivan is the ultimate road-trip companion. However, when a vent glass—the smaller, specifically shaped window located near the front or rear doors—is shattered by a rogue stone on the highway, extreme temperature fluctuations, or an unfortunate vehicle break-in, that sanctuary of safety is instantly compromised. As a Master Technician at AlexWindshield, I have witnessed how a damaged vent window not only exposes your vehicle's interior to the harsh Canadian elements but also drastically increases cabin wind noise and compromises vehicular security. We understand that driving a family vehicle with broken glass is simply not an option.
Premium Mobile Auto Glass Services Across the Greater Toronto Area (GTA)
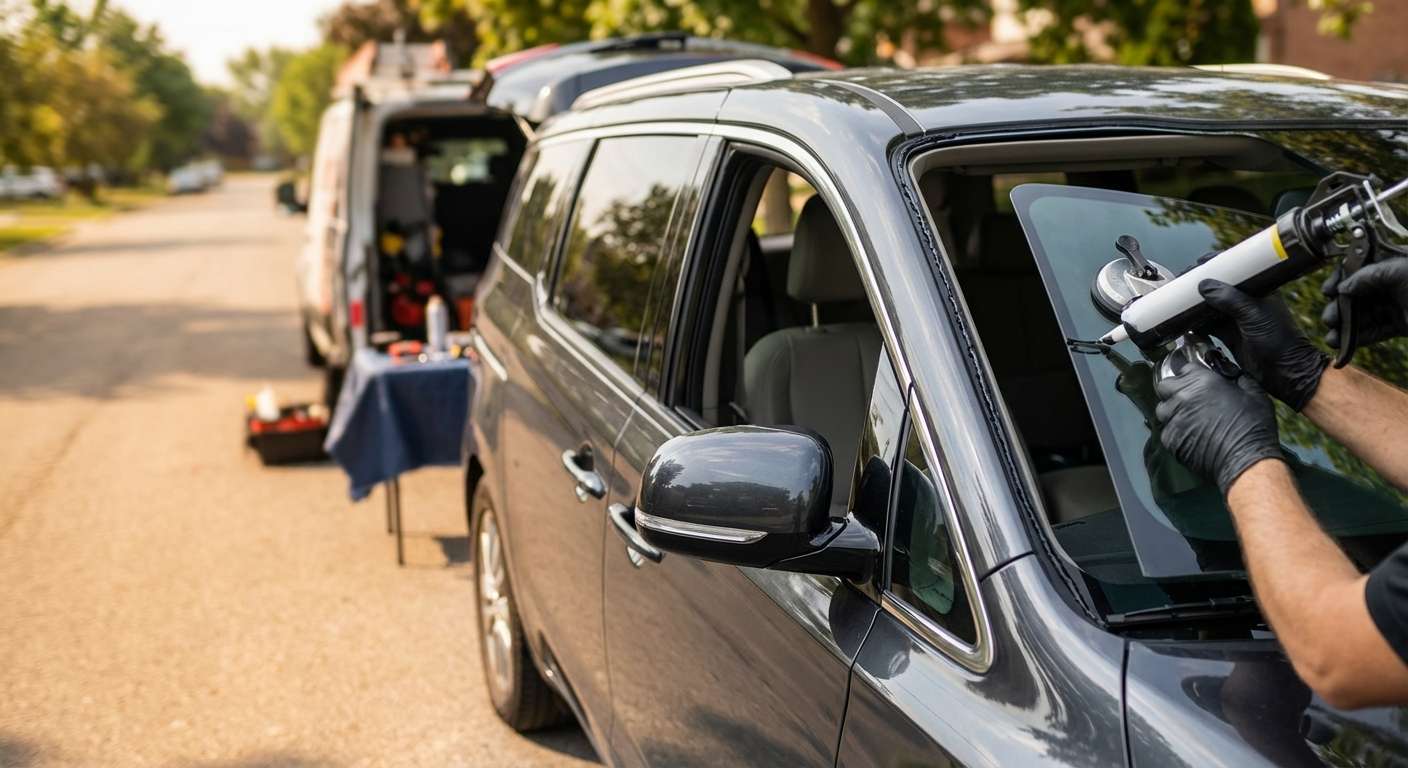
When your Sedona suffers auto glass damage, finding the time to drive to a repair shop and wait in a lobby can completely derail your day. That is why AlexWindshield brings the auto glass shop directly to your driveway, workplace, or anywhere you need us. We are proud to offer unparalleled mobile auto glass services across the Greater Toronto Area (GTA).
Whether you are parked at a shopping center in Vaughan, at your home in Richmond Hill, or at a corporate office in Markham, our fully equipped mobile service vans arrive on-site with everything required to perform a flawless vent glass replacement. We understand the specific local driving conditions of the GTA, from heavily salted winter roads to fast-paced highway driving, which is why we utilize only the highest grade materials designed to withstand the Ontario climate.
The Structural Importance of Kia Sedona Vent Glass
Many drivers assume that because a vent glass is small, its replacement is a simple, plug-and-play procedure. In reality, the vent glass on a 2015-2021 Kia Sedona is a critical structural component. Unlike older vehicles where vent windows were held in by basic rubber gaskets, modern Sedona vent windows are often encapsulated and securely bonded to the vehicle's frame using high-strength polyurethane. This bonded installation plays a significant role in:
- Acoustic Insulation: Keeping the cabin whisper-quiet for passengers by blocking out highway wind and road noise.
- Climate Control: Maintaining an airtight seal to ensure your minivan's heating and air conditioning systems operate efficiently.
- Vehicle Security: Providing a tough barrier against potential intruders.
- Structural Rigidity: Contributing to the overall strength of the vehicle's side-impact crash profile.
Our Master Technician A-to-Z Vent Glass Replacement Process
At AlexWindshield, we do not cut corners. Our vent glass replacement process is a highly technical, multi-step procedure that strictly adheres to OEM (Original Equipment Manufacturer) standards. Here is the detailed, step-by-step look at how we safely and securely replace the vent glass on your 2015-2021 Kia Sedona.
Step 1: Vehicle Preparation and Interior Protection
Before any tools touch your vehicle, our first priority is protecting the flawless interior of your Kia Sedona. We apply protective heavy-duty drop cloths over your leather or fabric seats, center console, and dashboard. The exterior paint surrounding the vent window frame is meticulously taped off using automotive-grade protective tape to ensure that no scratches or scuffs occur during the glass extraction process. Safety glasses and cut-resistant Kevlar gloves are standard protocol for our technicians from start to finish.
Step 2: Interior Panel Removal and Extensive Shard Vacuuming
When a tempered vent glass breaks, it shatters into thousands of tiny, sharp cubes that immediately scatter throughout the cabin and drop deep into the vehicle's door or quarter panel cavities. To address this, we carefully unclip and remove the interior door panels, weather stripping, and surrounding plastic trim pieces using specialized, non-marring nylon pry tools. Once the structural cavities are exposed, we deploy a high-powered industrial shop vacuum. We meticulously vacuum all broken glass shards from the seats, the floor mats, the window tracks, and deep inside the internal metal door frame. Ensuring that absolutely no glass remains is vital to prevent future rattling noises and to protect the safety of your passengers and children.
Step 3: Removing the Damaged Glass and Old Urethane
With the area cleaned and prepped, we move on to extracting the remaining glass and the old adhesive holding it in place. Using an auto glass cold knife or a specialized wire-cutting extraction system, we carefully slice through the old polyurethane bead that bonded the original vent glass to the pinchweld (the metal frame of the vehicle). The Master Technician then skillfully trims down the old urethane, leaving a highly uniform base layer of approximately 1 to 2 millimeters. This thin layer of existing urethane provides the ultimate bonding foundation for the new adhesive.
Step 4: Surface Cleaning and Chemical Preparation
A strong bond requires an immaculately clean surface. We utilize lint-free technicians' wipes and a specialized, alcohol-based auto glass cleaner to eliminate any dirt, moisture, road salt, or organic debris from both the vehicle's pinchweld and the frit (the black painted band) of the new replacement vent glass. This chemical preparation ensures that no contaminants will interfere with the chemical curing process of the new seal.
Step 5: Primer Application on the Pinchweld and New Glass
One of the most crucial steps in auto glass replacement is the application of the blackout primer. We apply a premium auto glass primer to any bare metal scratches on the pinchweld to permanently prevent the development of automotive rust. Simultaneously, the primer is applied to the edges of the new vent glass. The primer acts as a chemical bridge, actively promoting the adhesion between the glass, the metal, and the urethane. We strictly observe the manufacturer's required "flash-off" time, allowing the primer to dry completely to guarantee maximum chemical bonding strength and to protect the urethane from UV ray degradation.
Step 6: High-Quality Urethane Adhesive Application
At AlexWindshield, we exclusively use premium, fast-curing polyurethane adhesive. Using an electric power caulking gun, the technician applies a perfectly measured "V-bead" of urethane around the perimeter of the vehicle's window frame. The V-bead technique—a triangularly shaped extrusion of adhesive—is the industry gold standard. When the glass is compressed against it, the V-bead spreads perfectly evenly, ensuring an absolute airtight and watertight seal with zero gaps, completely eliminating the risk of water leaks or annoying wind whistling at high speeds.
Step 7: Precision Installation of the New Vent Glass
With the urethane applied, the new vent glass is carefully lifted and set into the frame. This step requires absolute precision, as the glass must be perfectly aligned with the Sedona's exterior body lines and interior trims. Once the glass is precisely positioned, we apply light pressure to seat it into the urethane bed. We then use specialized auto glass retention tape to securely hold the vent glass in its exact factory position while the chemical curing process begins. Following this, the interior door panels, weather stripping, and trim pieces are carefully reinstalled and locked back into their original configurations.
Step 8: Final Inspection and Safe Drive-Away Time
The final step involves a rigorous quality assurance check. We clean the newly installed glass to a brilliant, streak-free shine and inspect the flushness of the fitment. We then inform the client of the Safe Drive-Away Time (SDAT). Because we use top-tier fast-curing urethane, your Kia Sedona is typically safe to drive within an hour of the installation, ensuring that the structural integrity of your minivan meets or exceeds all federal safety standards.
Why Quality Vent Glass Matters for Your Kia
Installing subpar auto glass can result in optical distortion, poor fitment, and a high likelihood of seal failure. We source specifically designed, OEM-equivalent (Original Equipment Equivalent) glass for your 2015-2021 Kia Sedona. This guarantees that the specific curvature, factory tint matching, and acoustic properties mirror exactly what your minivan had when it rolled off the assembly line. Every curve and edge is engineered to seamlessly mesh with the Sedona's aerodynamics, preserving your vehicle's aesthetic and functional value.
Choose AlexWindshield: Your Trusted Auto Glass Experts
Dealing with broken auto glass is stressful, but getting it fixed shouldn't be. When you choose AlexWindshield, you are choosing decades of combined master-level technical expertise, total convenience, and absolute peace of mind. Our highly reviewed mobile auto glass services are specifically designed to cater to the busy lifestyles of families and professionals throughout the Greater Toronto Area (GTA), seamlessly covering Vaughan, Richmond Hill, and Markham.
Furthermore, we stand behind the precision and durability of our workmanship. Every vent glass replacement we perform is backed by our comprehensive Lifetime Warranty. This warranty covers any issues related to workmanship, including water leaks, air noises, and manufacturer defects in the glass itself, for as long as you own your vehicle. Don't compromise the safety and comfort of your family minivan. Trust the Master Technicians at AlexWindshield to deliver flawless, factory-grade auto glass solutions straight to your door.


