Reviving Your Family Fortress: The 2015-2021 Kia Sedona Back Glass Replacement
The 2015-2021 Kia Sedona (the YP generation) redefined the modern minivan, combining SUV-inspired aesthetics with a cavernous, family-focused interior and unparalleled safety ratings. At the rear of this robust family hauler is a heavily contoured, expansive liftgate glass that does much more than provide a view of the road behind you. It houses the intricate rear defroster grid essential for our harsh Canadian winters, serves as the mounting point for the rear wiper assembly, and plays a vital structural role in the vehicle's cabin integrity. When this rear window is compromised—whether by a stray golf ball, a break-in attempt, or an unexpected thermal shock—your family’s safety, security, and climate control are instantly compromised.
Because back windows are manufactured using tempered glass, they do not crack like a front windshield; they instantly detonate into thousands of tiny, pebble-like shards. Dealing with this mess requires far more than just slapping a new piece of glass into an opening. As a Master Technician at AlexWindshield, I have executed countless precision replacements on this specific vehicle. Below is our comprehensive, SEO-optimized guide detailing the meticulous A to Z process we employ for a flawless Kia Sedona back glass replacement.
Why Specialized Expertise is Crucial for Your Kia Sedona Rear Window
Replacing the back glass on a 2015-2021 Kia Sedona is a highly technical procedure that demands the touch of a seasoned professional. The liftgate of the Sedona is a complex ecosystem of electronics, motorized components, and interior trim pieces. A subpar installation can result in water leaks that destroy the power liftgate motor, failed defroster connections, or an irritating rattle from leftover glass shards hidden within the tailgate frame.
At AlexWindshield, we do not cut corners. We utilize OEM-equivalent or Original Equipment Manufacturer (OEM) glass, ensuring that the curvature, frit band (the black painted border), and defroster resistance perfectly match your Sedona’s factory specifications. Furthermore, our premium mobile service is designed to bring the auto glass shop directly to your driveway. We proudly provide top-tier auto glass solutions across the Greater Toronto Area (GTA), offering rapid response times to residents and businesses in Vaughan, Richmond Hill, and Markham.
Comprehensive Step-by-Step Back Glass Replacement Process
To guarantee a safe, leak-proof, and factory-fresh result, our Master Technicians follow a strict, standardized protocol for every 2015-2021 Kia Sedona rear window replacement. Here is the detailed breakdown of our process from start to finish:
Step 1: Pre-Installation Inspection and Vehicle Protection
Before any tools are utilized, we perform a thorough inspection of the vehicle's rear liftgate. We examine the tailgate frame for any pre-existing dents or paint damage. Next, we apply heavy-duty protective tape to the exterior paint surrounding the window opening to prevent any accidental scratches during the extraction process. Inside the vehicle, we lay down thick protective drop cloths over the third-row seating and the cargo area to catch any rogue glass fragments, protecting your Sedona’s upholstery from damage.
Step 2: Extensive Glass Clean-Up and Interior Panel Removal
When tempered back glass shatters, the fragments travel everywhere. Simply vacuuming the cargo floor is entirely insufficient. To perform a professional replacement on a Kia Sedona, we must safely remove the interior plastic trim panels from the rear liftgate door. Once the liftgate panel is carefully detached using specialized non-marring trim tools, we gain access to the inner cavity of the tailgate door.
- Industrial Vacuuming: We use high-powered industrial shop vacuums to extract every single piece of broken glass from the cargo area, the tracks, and the weather seals.
- Inner Cavity Extraction: We thoroughly vacuum the inside of the metal liftgate frame. If this step is skipped, the trapped glass shards will rattle aggressively every time you open and close the tailgate or drive over a bump.
Step 3: Disconnecting the Defroster and Wiper Assembly
With the area safely cleared of broken glass, we proceed to disconnect the vehicle's electrical components. We carefully unplug the spade connectors attached to the rear defroster grid. Next, we remove the 10mm or 12mm nut securing the rear wiper arm. Once the external arm is removed, we ensure the wiper motor shaft is clean and undamaged, prepping it for reassembly later.
Step 4: Removing the Old Urethane Bead
The shattered glass leaves behind a ring of original polyurethane adhesive bonded to the metal pinch weld. Using precision auto glass cut-out tools—such as a cold knife or a specialized powered extractor—we carefully slice through the remaining adhesive. We then trim the old urethane bead down to a uniform thickness of 1 to 2 millimeters. This thin layer of existing, fully cured urethane provides the ultimate bonding surface for the new adhesive, a technique known as a "full cut."
Step 5: Surface Preparation, Cleaning, and Primer Application
Surface preparation is the most critical step in ensuring a leak-proof bond. Any contamination on the pinch weld will lead to adhesive failure.
- Cleaning: We use an active, alcohol-based glass cleaner to remove dirt, grease, and debris from the pinch weld and the surrounding body panel.
- Preparing the New Glass: The replacement glass is meticulously cleaned, and the inner frit band is wiped down with an adhesion-promoting chemical prep agent.
- Primer Application: We apply a high-quality auto glass primer to any microscopic scratches on the bare metal of the pinch weld (to prevent future rust) and to the bonding area of the new glass. This primer must "flash" (dry) for a specific duration to chemically activate, ensuring an unbreakable bond with the urethane.
Step 6: Precise Installation Using High-Quality Adhesive
Once the primer is fully cured, it is time to lay the adhesive. At AlexWindshield, we strictly use premium, fast-curing, high-viscosity polyurethane adhesive. Using an electric caulking gun equipped with a V-notch nozzle, our Master Technicians run a continuous, flawless triangular bead of urethane around the entire perimeter of the pinch weld.
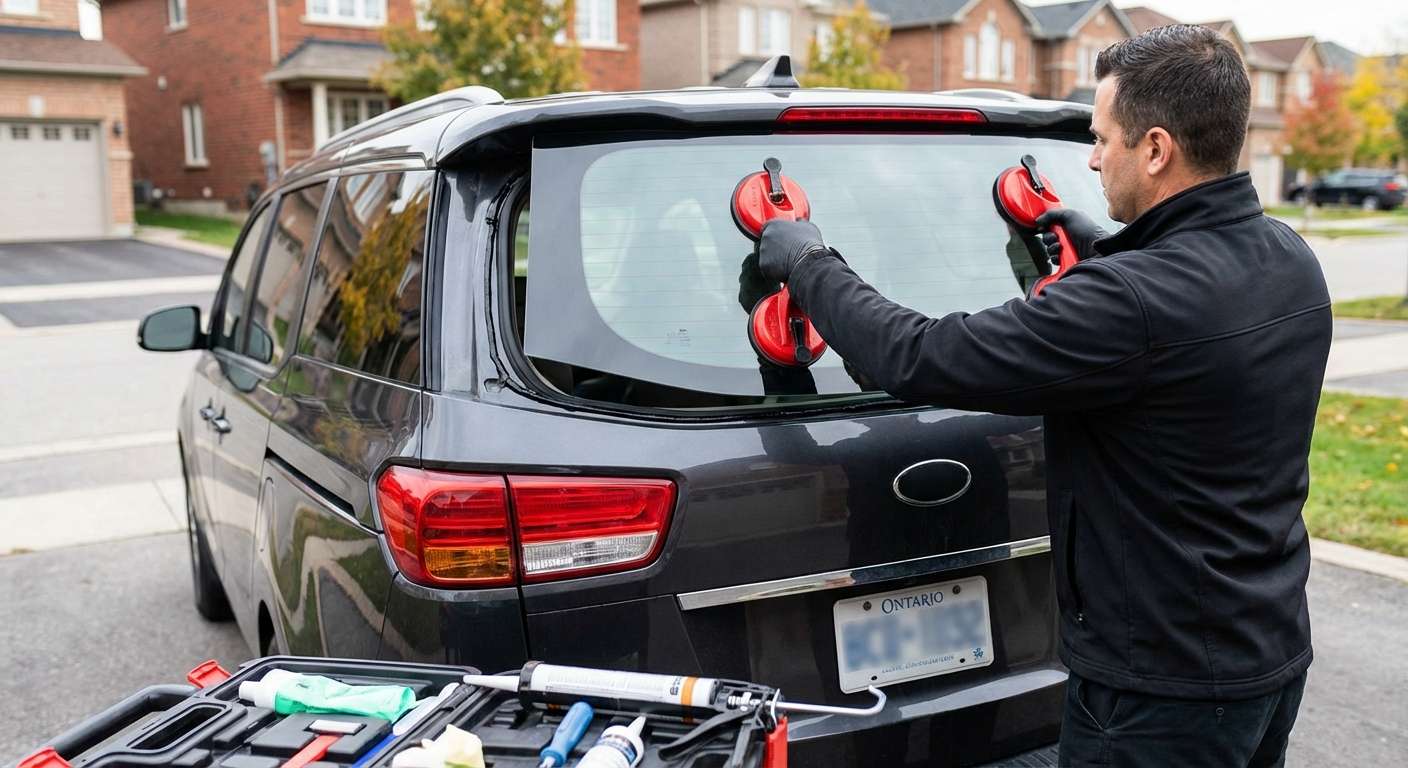
With the adhesive laid perfectly, we carefully lift the new Kia Sedona back glass. Using heavy-duty suction cups, we align the glass perfectly within the opening, taking care to respect the factory gap tolerances. We firmly "deck" the glass into the wet urethane, applying even pressure to ensure the adhesive compresses correctly against the frit band, creating an airtight, watertight seal.
Step 7: Reassembly, Reconnecting Components, and Final Cleanup
Once the glass is set, we immediately begin the reassembly phase. We carefully reconnect the rear defroster wiring to the newly integrated grid terminals. The rear wiper assembly is remounted, and the wiper arm is torqued to factory specifications to ensure a flawless sweep without binding. We then reinstall the interior liftgate trim panel, securing all clips without causing any damage. Finally, we clean the new back glass with premium foam glass cleaner, remove all exterior protective tape, and perform one last inspection of the interior to guarantee absolutely no glass shards remain.
The Importance of Proper Cure Time and Post-Installation Care
We pride ourselves on using advanced, fast-curing urethane adhesives that offer a Safe Drive-Away Time (SDAT) of as little as 30 to 60 minutes. However, it is essential to follow a few post-installation guidelines to ensure the longevity of your new back window:
- Leave the Tape: If any retention tape was used to hold the glass in perfect alignment, leave it on for at least 24 hours.
- Avoid Car Washes: Do not run your Kia Sedona through a high-pressure commercial car wash for at least 48 hours to allow the urethane to fully cure and off-gas.
- Crack a Window: For the first 24 hours, keep a side window cracked about half an inch when closing the doors. This prevents sudden air pressure spikes inside the cabin from pushing against the freshly curing seal of the rear glass.
Mobile Auto Glass Replacement Across the Greater Toronto Area
A shattered rear window makes your Kia Sedona undrivable. Driving with an open rear cabin exposes you to toxic exhaust fumes (the station wagon effect) and unpredictable weather. That is why AlexWindshield offers comprehensive, fully-equipped mobile auto glass repair and replacement services.
We bring our Master Technician expertise directly to your location. Whether your vehicle is parked in a residential driveway in Vaughan, stranded at a corporate parking lot in Richmond Hill, or sitting safely in a garage in Markham, our mobile fleet covers the entire Greater Toronto Area (GTA). You don't have to worry about the logistics of towing your Sedona to a shop; we arrive with the replacement glass, the high-quality adhesive, the industrial vacuums, and the expertise required to complete the job on-site.
Choose AlexWindshield for Your Kia Sedona Auto Glass Needs
When it comes to the safety and integrity of your family vehicle, do not settle for second best. Restoring the rear visibility and structural security of your 2015-2021 Kia Sedona demands precision, high-quality materials, and extensive technical knowledge.
At AlexWindshield, we are recognized as the trusted experts in auto glass across the GTA. We stand behind the flawless execution of our Master Technicians by offering an industry-leading Lifetime Warranty on our workmanship. This warranty guarantees that your newly installed back glass will be entirely free from wind noise, water leaks, and manufacturer defects for as long as you own your vehicle. If you are dealing with a shattered rear window, do not wait. Contact AlexWindshield today to schedule your mobile auto glass replacement, and let us restore your peace of mind and get your Kia Sedona back on the road safely.


