The Legacy of the Second-Generation Honda Odyssey and the Crucial Role of Vent Glass
The second-generation Honda Odyssey (1999-2004) completely revolutionized the North American minivan market. Introducing dual sliding doors, a powerful V6 engine, and the iconic fold-away third-row "Magic Seat," this platform became the gold standard for family transportation. Today, thousands of these durable, reliable vehicles are still actively serving families across the province. However, given their age and daily utility, preserving the integrity of their cabin is paramount. When the specific stationary vent glass—often located at the front of the front door or the forward section of the rear quarter—suffers impact damage or is shattered during a break-in, it instantly compromises the vehicle's security, climate control, and acoustic insulation. Because this glass is tempered, it shatters into thousands of tiny, granular pieces, leaving the interior entirely exposed to the elements and opportunistic theft.
At AlexWindshield, we understand the exact structural nuances of the 1999-2004 Honda Odyssey platform. Replacing a vent glass on this specific generation is not a simple "pop-in" job. It requires a highly technical approach, involving precise hardware disassembly, meticulous debris remediation, and professional chemical bonding to ensure a factory-tight seal. As a Master Technician, I have designed this comprehensive guide to outline exactly how our team restores your vehicle to its original condition.
Immediate Action Required: Why You Must Replace Broken Vent Glass Promptly
Driving your 1999-2004 Honda Odyssey with a shattered vent glass is not just a cosmetic issue; it is an active hazard to your vehicle's longevity and your family's safety. Here is why immediate vent glass replacement is critical:
- Interior Weather Protection: The GTA weather is unforgiving. A missing vent glass invites rain, snow, and humidity directly into your door cavity, potentially short-circuiting electrical components like power locks and window regulators.
- Vehicle Security: A broken vent glass is the most common entry point for vehicle break-ins. Replacing it immediately restores the physical barrier between your valuables and the outside world.
- Structural Integrity and Cabin Pressure: The vent glass works in tandem with the main roll-up window to stabilize the division bar. Without it, your main window may rattle, bind, or fail to operate properly.
- Acoustic Insulation: Even a small piece of missing glass creates massive wind noise at highway speeds, ruining the quiet ride the Honda Odyssey is known for.
Unrivaled Mobile Auto Glass Service Across the Greater Toronto Area (GTA)
We know that a shattered window throws a massive wrench into your daily schedule. That is exactly why AlexWindshield brings the repair shop directly to your driveway, office, or parking garage. Our premium mobile auto glass services are explicitly tailored to serve the entire Greater Toronto Area (GTA). Whether you are parked at a shopping center in Vaughan, at your home in the quiet subdivisions of Richmond Hill, or at a corporate office in Markham, our fully equipped mobile service vans arrive on-site with all the necessary tools, high-quality replacement glass, and premium adhesives.
Our rapid-response mobile units serving Vaughan, Richmond Hill, and Markham ensure that you never have to drive a compromised, drafty, and unsafe vehicle across the city to get it fixed. We handle the entire replacement process flawlessly on-site, allowing you to go about your day uninterrupted.
Master Technician's Guide: Step-by-Step Vent Glass Replacement Process for the 1999-2004 Honda Odyssey
To guarantee a permanent, leak-free, and visually perfect installation, our Master Technicians follow a stringent, multi-phase vent glass replacement protocol. Here is the detailed A-to-Z process we execute on your Honda Odyssey.
Phase 1: Comprehensive Preparation and Interior Protection
Before any tools touch your vehicle, preparation is our first priority. We begin by thoroughly inspecting the damage and isolating the work area. Heavy-duty protective drop cloths and moving blankets are draped over the Odyssey's plush cloth or leather seats, center console, and dashboard. We apply low-tack automotive masking tape to the exterior painted surfaces surrounding the door frame to ensure our tools never accidentally scratch your vehicle's clear coat. Protecting your interior from both glass dust and adhesive transfer is a non-negotiable step in our premium service.
Phase 2: Complete Glass Shard Remediation and Door Panel Removal
Because automotive vent glass is made of tempered safety glass, it violently shatters into thousands of tiny, cube-like shards upon impact. Simply sweeping the seats is never enough. Our technicians begin by meticulously removing the interior door panel of your Honda Odyssey. This involves carefully extracting the hidden Phillips screws behind the door handle bezel and armrest, safely un-clipping the perimeter retaining fasteners, and disconnecting the power window and lock wiring harnesses.
Once the door panel and the interior vapor barrier are safely moved aside, we gain full access to the inner door cavity. Using high-powered, industrial shop vacuums equipped with specialized micro-crevice tools, we extract every single shard of broken glass from the bottom of the door shell, the window regulator tracks, the rubber run channels, and the interior floorboards. Vacuuming all broken glass shards from the vehicle's interior and door mechanics is mandatory. Failing to do so will result in maddening rattling noises while driving and can cause the main window regulator cables to jam and snap in the future.
Phase 3: Hardware Disassembly and Old Glass Removal
With the door cavity clean, we proceed to dismantle the retaining hardware. The vent glass on this vehicle relies on a vertical metal division bar that separates it from the main roll-up window. We lower the main window glass entirely, unbolt the 10mm retaining bolts holding the division bar at the top and bottom of the door frame, and carefully slide the bar backward. If the remaining edge of the old vent glass is bonded to the pinchweld, we use specialized cold-knife tools and cut-out wire to slice through the old, hardened factory urethane. Every fragment of the old encapsulated glass edge is carefully extracted from the window frame.
Phase 4: Precision Surface Cleaning and Primer Application
The secret to a lifetime-guaranteed auto glass replacement lies in surface preparation. After the old glass is removed, the exposed metal pinchweld on your Honda Odyssey's door frame is carefully trimmed. We pare down the old urethane bead to a thin, uniform baseline of 1-2 millimeters, creating an ideal substrate for the new adhesive to grip. Next, we use a specialized, lint-free applicator and automotive-grade glass cleaner to scrub away all dirt, grease, and microscopic debris from the bonding area.
Once clean, we perform the critical primer application. We apply a high-tech, black automotive glass primer to any exposed bare metal scratches on the pinchweld to permanently prevent rust formation. We also apply a specialized glass primer to the bonding edge of the new vent glass. This chemical primer acts as a bonding agent and a UV blocker, ensuring that the sun's ultraviolet rays cannot penetrate the glass and degrade the adhesive over time.
Phase 5: Installation of the New Vent Glass Using High-Quality Adhesive
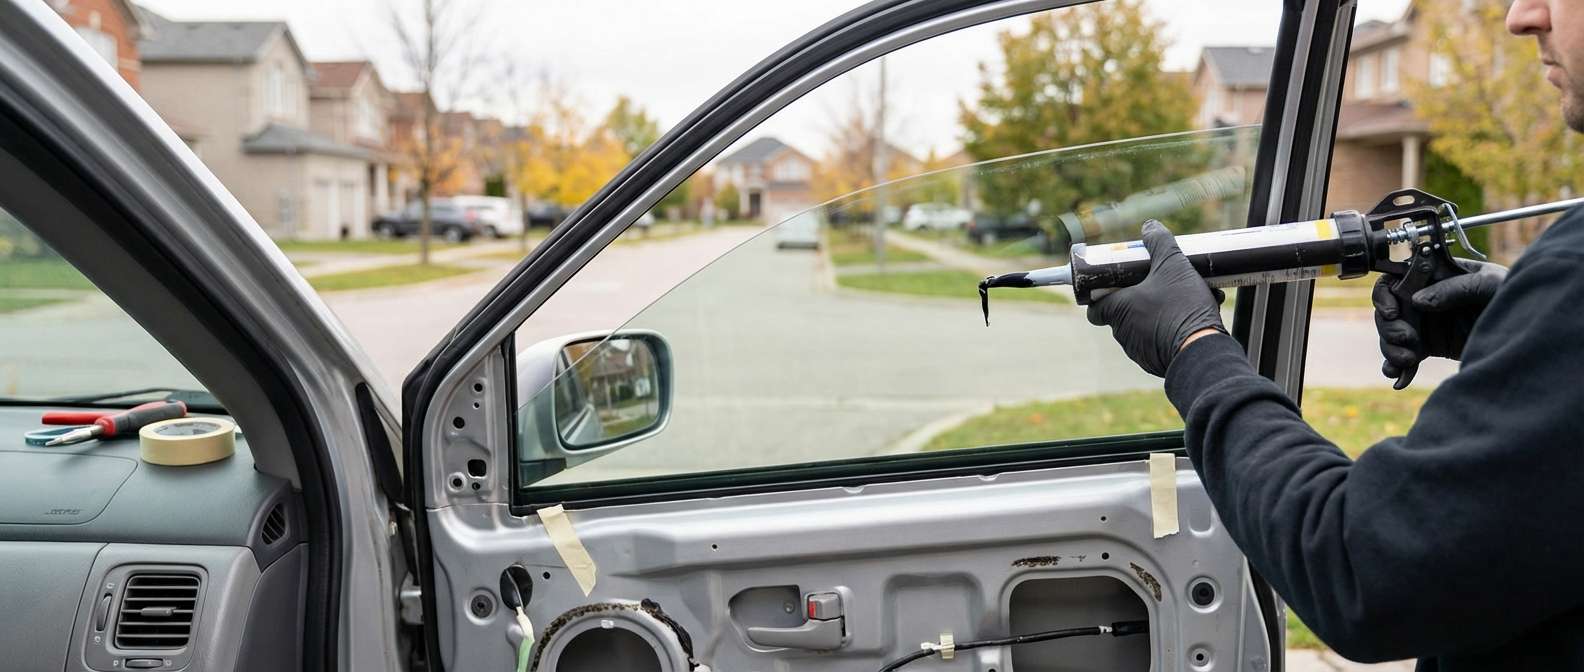
With the primer flashed and fully cured, we prepare to install the new, OEM-equivalent vent glass. We load an electric caulking gun with an advanced, fast-curing, high-quality adhesive (automotive polyurethane). We meticulously lay down a continuous, uniform, V-shaped bead of urethane along the inner track of the pinchweld. There is zero room for error here; any gaps in the adhesive bead will result in wind noise or water leaks.
Our technician then carefully guides the new vent glass into the door frame, slotting it perfectly into the upper corners and pressing it firmly into the fresh urethane bead. We reinstall the vertical division bar, ensuring the rubber weatherstripping perfectly overlaps the edges of the new vent glass, and tighten the 10mm retaining bolts to factory torque specifications. We secure the glass with specialized retention tape while the adhesive achieves its initial safe drive-away time curing phase.
Phase 6: Reassembly, Functional Testing, and Final Inspection
As the high-quality adhesive cures, we begin reassembling the door. We meticulously re-seal the plastic vapor barrier to prevent future water leaks into the cabin. The wiring harnesses for the window switch and locks are reconnected, and the interior door panel is gently snapped back into place and secured with its original screws. We perform a final, rigorous functional test: rolling the main window up and down repeatedly to ensure the division bar is perfectly aligned and that there is no binding or friction against the newly installed vent glass.
Finally, we perform a thorough post-installation cleanup. We clean the newly installed vent glass with a streak-free, ammonia-free foaming cleaner, wipe down your door panels, and complete one last visual inspection of the interior to ensure not a single glass shard or fingerprint is left behind.
Choose AlexWindshield: The GTA's Trusted Auto Glass Experts
When the unexpected happens to your 1999-2004 Honda Odyssey, do not trust the security and weatherproofing of your family vehicle to amateurs. At AlexWindshield, we combine decades of Master Technician expertise with the finest materials the industry has to offer. Our dedication to precision—from deep vacuuming glass shards to laying down the perfect bead of high-quality adhesive—sets us apart as the premier choice for auto glass repair.
We are immensely proud to offer unmatched, fully mobile auto glass services across the Greater Toronto Area (GTA), actively serving our communities in Vaughan, Richmond Hill, and Markham. We stand firmly behind our craftsmanship, which is why every single vent glass replacement comes backed by our comprehensive Lifetime Warranty against water leaks, wind noise, and manufacturer defects. For fast, reliable, and technically flawless auto glass replacement, contact AlexWindshield today and let our experts restore your vehicle to factory perfection.


