Restoring the Sky Above: Premium Sunroof Replacement for the 1999-2004 Honda Odyssey
The second-generation 1999-2004 Honda Odyssey remains a legendary staple of the ultimate family road trip. Revolutionizing the minivan market with its cavernous interior, reliable V6 powertrain, and fold-away third-row seating, this vehicle was often optioned with a premium power sunroof that bathed the cabin in fresh air and natural light. However, after two decades of enduring harsh seasonal elements, the factory sunroof is highly susceptible to environmental wear, seal degradation, and catastrophic shattering from sudden temperature shifts or rogue highway debris. When the sky literally falls into your family’s cabin, a generic patch job won't suffice. You need the unparalleled precision and technical mastery of AlexWindshield to restore your Odyssey to its factory-fresh glory.
Why the 1999-2004 Odyssey Sunroof Requires Expert Attention
Replacing a sunroof on a classic early-2000s Honda Odyssey is a highly complex procedure that goes far beyond a standard glass swap. Because this specific glass panel sits completely horizontally on the roof of the vehicle, it bears the direct, punishing brunt of ultraviolet rays, torrential rain, and heavy snow loads. Furthermore, sunroof panels are typically constructed from tempered auto glass. Unlike a front windshield that features a laminated PVB interlayer designed to hold cracked glass together, a compromised sunroof will instantly explode into thousands of tiny, sharp pieces upon impact.
This means that a sunroof failure is not just an aesthetic issue; it is an interior disaster that requires meticulous extraction, precision alignment, and heavy-duty mechanical cleaning to ensure the motorized tracks are not destroyed by hidden debris. At AlexWindshield, our Master Technicians understand the precise structural nuances of the 1999-2004 Honda Odyssey roof assembly.
The A to Z Technical Replacement Process: How We Do It
We do not cut corners. Our comprehensive, step-by-step sunroof replacement protocol ensures that your minivan is returned to you in pristine, watertight condition. Here is exactly how our senior technicians execute the replacement:
Step 1: Comprehensive Preparation and Protecting the Interior
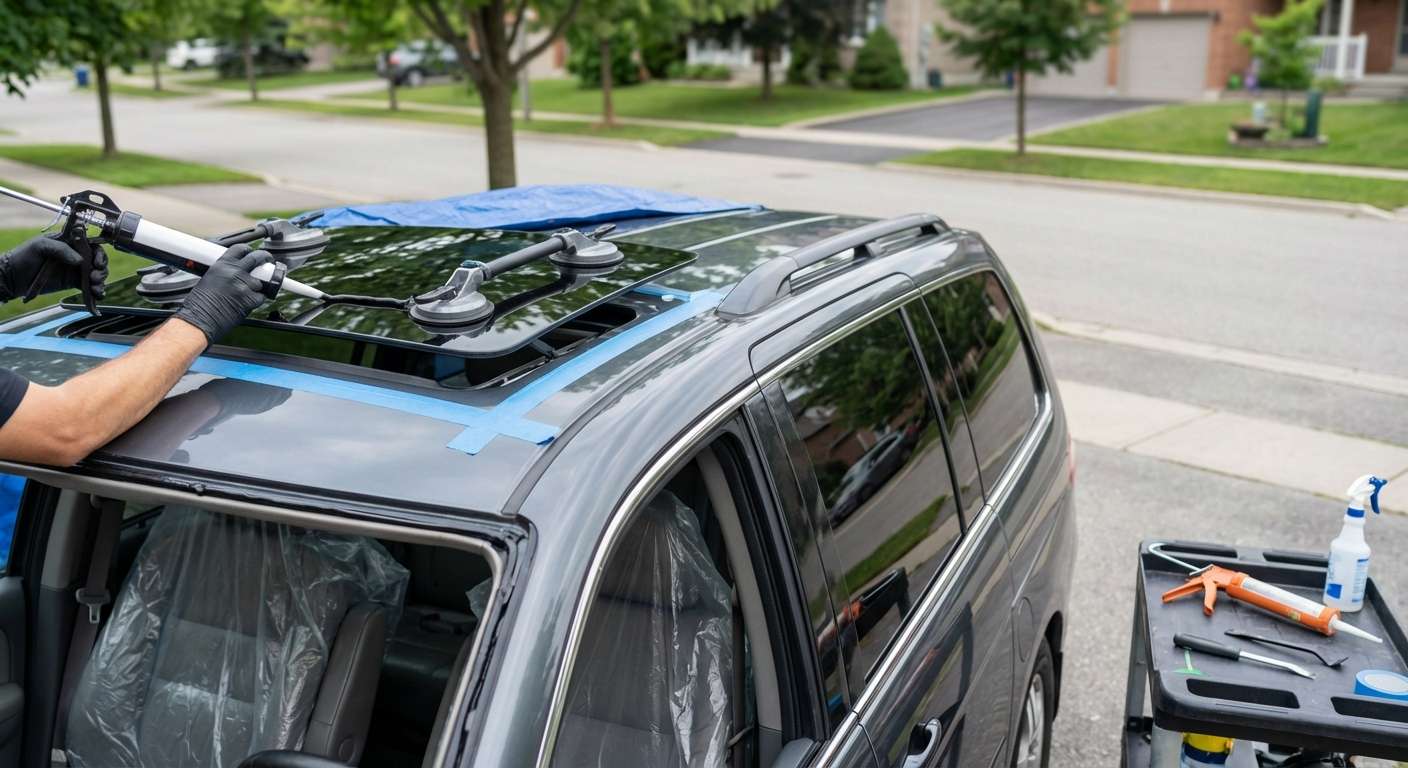
Before any tools are lifted, our absolute priority is protecting the interior of your Honda Odyssey. The early 2000s Odyssey features extensive cloth or leather seating, deep carpets, and vulnerable center console electronics. We begin by laying down heavy-duty, protective technician tarps across the front captain's chairs, the dashboard, and the center console area. We also apply protective shielding to the exterior roof paint surrounding the sunroof opening to prevent any accidental scratching from tools, belts, or extracted hardware during the repair process.
Step 2: Vacuuming All Broken Glass Shards from the Vehicle's Interior
Because sunroofs are made of tempered glass, a break means your cabin is suddenly filled with hazardous debris. A critical phase of our service involves vacuuming all broken glass shards from the vehicle's interior. Using high-powered industrial shop vacuums outfitted with specialized micro-crevice tools, we extract glass from the seats, the floor mats, the cup holders, and the AC vents. More importantly, we meticulously vacuum the delicate sunroof drainage channels and mechanical sliding tracks. Even a single shard of glass left inside the track mechanism can grind against the cables, stripping the sunroof motor gears and leading to a costly mechanical failure down the line.
Step 3: Accessing the Assembly and Removal of the Old Glass
Once the cabin and tracks are completely cleared of hazardous debris, we proceed with the removal of the old glass and its surrounding compromised framework. For the 1999-2004 Odyssey, this often requires partially dropping the front section of the interior headliner to access the sunroof motor, the drain tubes, and the primary mounting bolts. We carefully unclip the map light console and sun visors, gently lowering the headliner without creasing the two-decade-old fabric. We then unbolt the damaged glass bracket from the sliding regulator mechanism and safely extract the broken frame from the roof of the minivan.
Step 4: Surface Cleaning and Track Decontamination
A new piece of glass cannot properly seal against a dirty or oxidized surface. Our technicians perform an exhaustive surface cleaning of the entire sunroof opening. We utilize specialized, alcohol-based auto glass solvents to strip away twenty years of dirt, algae, old factory sealant, and built-up road grime from the roof’s aperture. We also flush the four corner drainage tubes of the Odyssey’s sunroof cassette to ensure that future rainwater flows down through the chassis pillars and out to the ground, rather than backing up and causing headliner leaks.
Step 5: Chemical Prep and Primer Application
To ensure a permanent, watertight bond for the new glass components and the surrounding weatherstripping framework, we must prepare the bare surfaces chemically. We perform a rigorous primer application along the bonding edges of the new replacement glass assembly and the receiving metal framework. This specialized auto glass primer serves a dual purpose: it acts as a chemical bridge that activates the adhesive for maximum grip, and it provides an impenetrable barrier against rust and corrosion on the vehicle's bare metal roof line.
Step 6: Installation of the New Glass Using High-Quality Adhesive
With the surfaces perfectly prepped and primed, we move to the most critical structural step: the installation of the new glass using high-quality adhesive. We utilize premium, OEM-grade, fast-curing automotive urethane. This advanced adhesive is applied in a perfect, continuous V-bead using a high-powered pneumatic caulking gun, ensuring there are absolutely no gaps or air bubbles in the seal. The new sunroof glass—precisely matched to the 1999-2004 Honda Odyssey factory dimensions and factory tint specifications—is then carefully lowered into the roof opening. We use heavy-duty suction cups to perfectly align the panel within millimeter tolerances, ensuring flush aerodynamics to prevent annoying wind whistling at highway speeds.
Step 7: Motor Calibration, Reassembly, and Quality Assurance Testing
After the glass is mechanically set and the urethane begins its rapid curing process, we reattach the sunroof mounting brackets to the sliding tracks. We then recalibrate the Odyssey’s sunroof motor, carefully testing the slide, tilt, and auto-close functions to ensure smooth, unhindered operation. The interior headliner, map lights, and sun visors are meticulously reinstalled to factory specifications. Finally, we conduct a high-pressure water test over the roof of the vehicle to absolutely guarantee that the new seal is 100% watertight before handing the keys back to you.
The Dangers of Ignoring a Damaged Odyssey Sunroof
Delaying a sunroof replacement on your aging Honda Odyssey can lead to a cascade of expensive secondary damages, including:
- Severe Water Damage: A breached sunroof will allow rainwater to pour directly into the cabin, soaking the headliner, ruining the carpet, and causing irreversible mold and mildew growth.
- Electrical System Failure: Water ingress from a shattered or poorly sealed sunroof can easily reach the map light wiring, the dashboard electronics, and the main interior fuse box, leading to catastrophic electrical shorts.
- Compromised Security: An open or broken sunroof is a direct invitation to theft, leaving your family's belongings completely unprotected.
- Structural Integrity Loss: The roof glass contributes to the overall rigidity of the vehicle’s cabin. Driving with missing or broken structural glass compromises your safety in the event of an accident.
Unmatched Mobile Service Across the Greater Toronto Area (GTA)
At AlexWindshield, we know that dealing with shattered auto glass is incredibly stressful, and driving a minivan with a compromised roof is both dangerous and highly uncomfortable. That is exactly why we offer premium, fully-equipped mobile auto glass replacement directly to your driveway, office, or designated safe location.
We proudly provide rapid, same-day or next-day service across the entire Greater Toronto Area (GTA). Whether you are parked at a busy shopping center in Vaughan, safely at your residential home in Richmond Hill, or at your corporate workplace in Markham, our Master Technicians bring the auto glass shop directly to you. Our mobile fleet is outfitted with all the specialized tools, heavy-duty vacuums, OEM-quality glass, and climate-controlled adhesives necessary to execute a flawless Honda Odyssey sunroof replacement on the spot, regardless of where you are located in the GTA.
Choose AlexWindshield: Your Trusted Auto Glass Experts
Your 1999-2004 Honda Odyssey has faithfully carried your family for thousands of miles, and it deserves the highest standard of technical care when its auto glass fails. Do not trust your sunroof replacement to inexperienced shops that use substandard adhesives or leave dangerous glass shards lurking in your carpets.
When you choose AlexWindshield, you are choosing unparalleled technical expertise, premium materials, and absolute peace of mind. Every single sunroof, windshield, and auto glass replacement we perform comes backed by our comprehensive, industry-leading Lifetime Warranty against leaks, wind noises, and manufacturer defects. If you are dealing with a shattered or leaking sunroof in Vaughan, Richmond Hill, Markham, or anywhere else in the GTA, contact AlexWindshield today. Let our dedicated Master Technicians secure your vehicle, protect your interior, and restore the perfect view of the sky above.


