Restoring the Legendary Minivan: Quarter Glass Replacement for the 1999-2004 Honda Odyssey
The second-generation Honda Odyssey, manufactured between 1999 and 2004, completely revolutionized the North American family vehicle market. With its powerful V6 engine, dual sliding doors, and innovative fold-away third-row "Magic Seat," it remains a beloved workhorse for families and contractors alike. However, the expansive rear quarter glass that provides excellent visibility and a sleek aerodynamic profile is highly vulnerable to side-impact collisions, vandalism, and kicked-up highway debris. When this specific pane shatters, it does not crack like a windshield; instead, being made of tempered safety glass, it violently explodes into thousands of tiny, sharp cubes that scatter throughout your cargo area and passenger cabin. At AlexWindshield, we combine elite technical expertise with premium materials to safely and perfectly restore your Odyssey’s structural integrity and aesthetic appeal.
Dedicated Mobile Auto Glass Service Across the Greater Toronto Area (GTA)
Driving with a missing or compromised rear quarter window is not an option, especially with the unpredictable Canadian weather. A blown-out window exposes your vehicle's interior to rain, snow, road salt, and opportunistic theft. Understanding the urgency of this situation, AlexWindshield brings our state-of-the-art auto glass shop directly to you. Our fully equipped mobile service units provide rapid, professional quarter glass replacement across the Greater Toronto Area (GTA). Whether your Odyssey is parked in a residential driveway in Vaughan, outside your workplace in Richmond Hill, or at a shopping center in Markham, our Master Technicians arrive ready to perform a flawless, factory-quality replacement on-site.
The Master Technician's Blueprint: A-to-Z Quarter Glass Replacement
Replacing the rear quarter glass on a 1999-2004 Honda Odyssey is a highly technical procedure that requires much more than simply gluing a new piece of glass to the frame. The Odyssey's quarter glass often features encapsulated moldings and integrates closely with the interior C and D-pillar trim panels. As senior auto glass specialists, we follow a strict, manufacturer-approved replacement protocol to ensure permanent adhesion, total weatherproofing, and maximum passenger safety.
Step 1: Vehicle Pre-Inspection and Cabin Protection
Before any tools are deployed, our technicians conduct a thorough pre-inspection of the damage. We check the surrounding body panels for scratches or dents that may have occurred when the glass broke. To protect your Odyssey's interior, we lay down heavy-duty drop cloths over the third-row seating and the cargo bay. We also apply high-tack automotive protection tape around the exterior window frame to shield your vehicle's paint from our cutting tools.
Step 2: Interior Panel Removal and Intensive Glass Shard Vacuuming
Because the quarter glass is composed of tempered safety glass, an impact causes it to shatter into thousands of granular pieces. To perform a proper replacement, we must first safely manage this debris. Our technicians carefully unclip and remove the interior plastic trim panels, including the C-pillar and D-pillar covers, as well as the seatbelt anchor escutcheons where necessary. Removing these interior door and body panels gives us direct access to the glass mounting points and the inner body cavity. Next, we use high-powered industrial shop vacuums to extract every single glass shard from the cabin, paying special attention to the deep rear cargo well where the Odyssey’s fold-away seats are stowed, as well as inside the hidden body panels where broken glass can cause annoying rattles down the road.
Step 3: Precision Removal of the Damaged Glass and Encapsulation
With the interior secured and the mounting points exposed, we proceed to remove the remaining glass and the old encapsulation molding. Using specialized auto glass extraction tools—such as a cold knife, heavy-duty wire systems, or powered oscillating cut-out tools—we carefully slice through the original factory polyurethane bead that holds the quarter glass frame to the vehicle's pinchweld. We maintain strict blade control to ensure we do not damage the structural steel of the vehicle body.
Step 4: Pinchweld Preparation and Rust Prevention
Once the old glass frame is removed, the most critical phase of the installation begins: surface preparation. We use a sharpened push knife to trim the existing polyurethane track down to a thin, uniform base layer of approximately 1 to 2 millimeters. This provides an ideal bonding surface for the new adhesive. We then thoroughly clean the entire pinchweld using a specialized, alcohol-based auto glass cleaner to remove all dirt, grease, and moisture. If any bare metal is exposed during the old adhesive removal, we immediately treat it with an anti-corrosion primer to guarantee that rust will never form beneath your new window.
Step 5: Advanced Primer Application
Adhesion failure is the primary cause of wind noise and water leaks in substandard auto glass replacements. To prevent this, we apply an advanced, fast-drying black glass primer to both the vehicle's pinchweld and the ceramic frit band (the black painted border) of the new, OEM-quality replacement quarter glass. This primer acts as a chemical bonding agent, essentially fusing the glass, the urethane adhesive, and the steel frame together on a molecular level. We allow the primer to flash (dry) for the exact duration specified by the chemical manufacturer.
Step 6: Extruding High-Quality Polyurethane Adhesive
At AlexWindshield, we never compromise on our bonding agents. We utilize only premium, industry-leading automotive polyurethane adhesives that meet or exceed original equipment manufacturer (OEM) safety standards. Using a heavy-duty electric caulking gun, our technician extrudes a perfect, continuous "V-bead" of urethane along the vehicle's pinchweld. The V-shape is crucial; it ensures that as the glass is pressed into place, the adhesive collapses evenly, creating a watertight, void-free seal that provides immense structural rigidity.
Step 7: Precision Glass Installation and Alignment
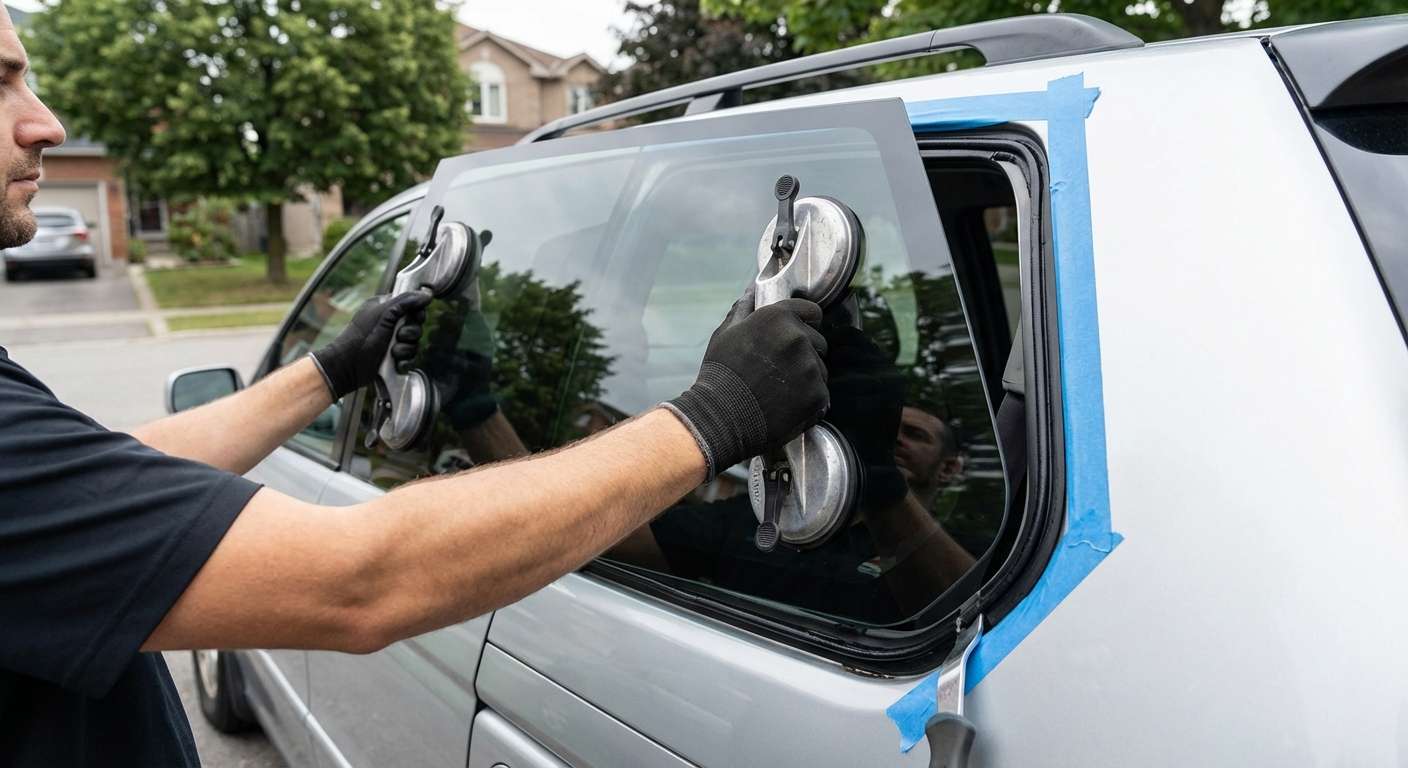
The 1999-2004 Honda Odyssey quarter glass is a large, unwieldy pane. Using heavy-duty vacuum suction cups, our Master Technician carefully lifts the newly primed glass and aligns it precisely with the vehicle's frame. We gently but firmly press the glass into the fresh urethane bead. We double-check all alignment gaps to ensure they perfectly match the factory specifications, guaranteeing optimal aerodynamics and maintaining the aesthetic lines of your Odyssey. Automotive retention tape is then applied to hold the glass securely in place while the urethane begins its curing process.
Step 8: Reassembly, Final Cleanup, and Curing
With the glass perfectly set, we carefully reinstall all the interior trim panels, seatbelt anchors, and weather stripping. We perform a secondary, meticulous vacuuming of the vehicle interior to ensure absolute safety for your passengers. Finally, we clean all the exterior auto glass, leaving your Honda Odyssey looking pristine. We then inform you of the Safe Drive Away Time (SDAT)—the specific time required for the advanced urethane to cure sufficiently so the vehicle can be safely operated.
Why Immediate Replacement is Crucial for Your Honda Odyssey
Ignoring a shattered quarter glass on your minivan can lead to severe consequences. At AlexWindshield, we strongly advise immediate replacement for several critical reasons:
- Passenger Safety: The structural integrity of the cabin is compromised without all glass panels properly bonded. An open quarter window also poses a severe hazard to third-row passengers.
- Security Risks: A shattered quarter glass provides thieves with instant, unhindered access to your vehicle's cabin, putting your personal belongings and the vehicle itself at risk.
- Weather Damage: Rain, snow, and humidity can rapidly destroy your Odyssey's interior upholstery, damage electrical components, and promote the growth of harmful mold within the carpets.
- Fuel Efficiency: Driving with a missing window drastically alters the aerodynamics of the vehicle, creating drag that forces your engine to work harder and consume more fuel.
The AlexWindshield Guarantee: Excellence in Auto Glass
Your 1999-2004 Honda Odyssey has faithfully served your family for years, and it deserves the highest standard of care when it comes to auto glass replacement. By choosing AlexWindshield, you are partnering with elite technicians who understand the specific architectural nuances of your vehicle. We pride ourselves on offering seamless, stress-free mobile auto glass services directly to your location in Vaughan, Richmond Hill, Markham, and throughout the entire GTA.
We stand firmly behind the quality of our craftsmanship and the superiority of our materials. That is why every quarter glass replacement performed by AlexWindshield is backed by our comprehensive Lifetime Warranty against leaks, wind noise, and manufacturer defects. Don't let a shattered window compromise the safety and comfort of your daily drive. Trust the true auto glass experts to deliver precision, convenience, and unparalleled reliability. Choose AlexWindshield today, and let us bring your Honda Odyssey back to perfect condition.


