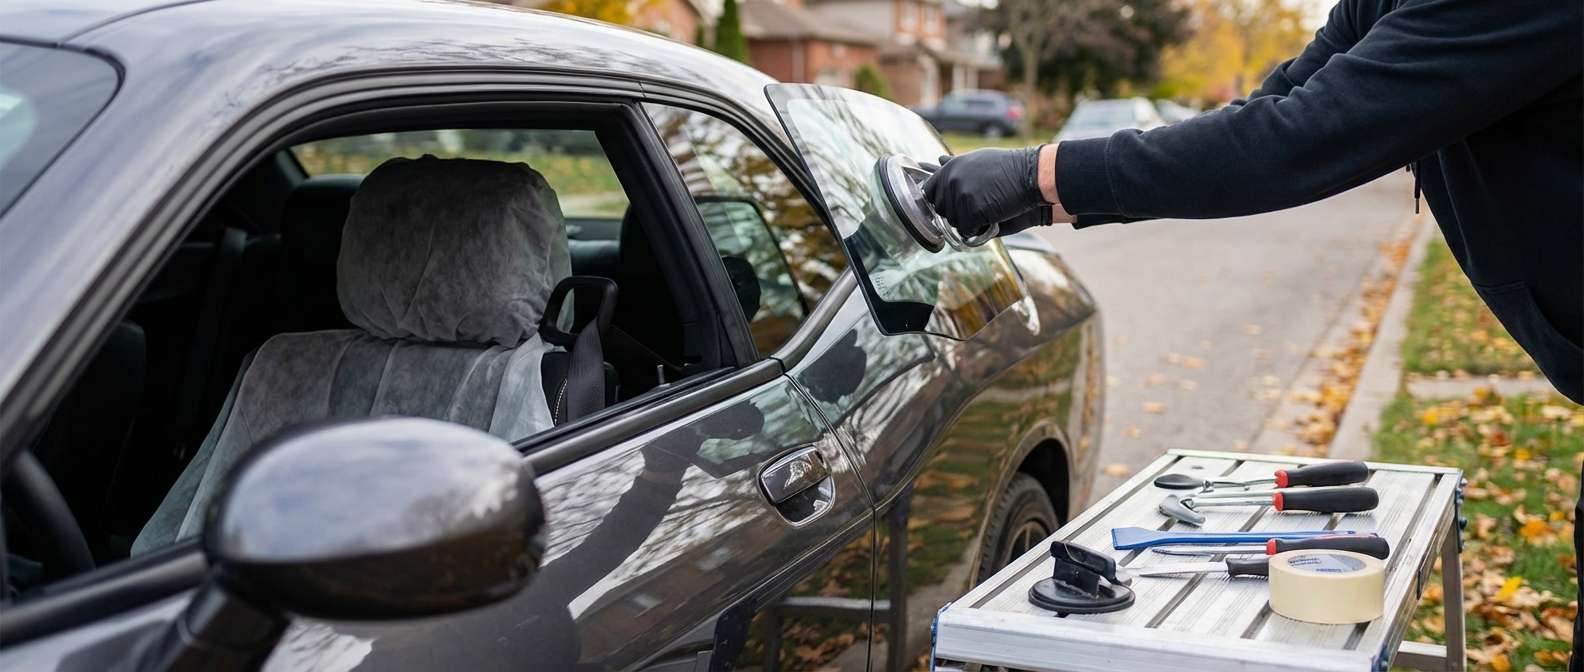
The Unmistakable Profile of Mopar Muscle: Dodge Challenger Vent Glass Replacement (2008-2023)
The Dodge Challenger, produced between 2008 and 2023, is a modern resurrection of pure American muscle. Boasting an unmistakable silhouette characterized by its aggressive shoulders, wide stance, and a low, sweeping roofline, every inch of this vehicle is designed to turn heads. A crucial, yet often overlooked, element of this iconic side profile is the rear vent glass—frequently referred to as the quarter glass. When this specific piece of automotive glass is shattered by debris, vandalism, or a collision, it completely disrupts the aerodynamic flow, aesthetic appeal, and security of your prized Mopar machine. Because this glass is tempered, a break doesn't just result in a crack; it explodes into thousands of tiny pieces that infiltrate every crevice of your vehicle's interior.
At AlexWindshield, we understand that your Challenger is more than just a car; it is a statement piece. We don't just replace auto glass; we meticulously restore the structural integrity, security, and aggressive spirit of your vehicle. As a Master Technician, I have designed our vent glass replacement process to exceed dealership standards, utilizing premium materials and advanced installation techniques to ensure your Dodge Challenger returns to the road in flawless condition.
Premier Mobile Auto Glass Services Across the Greater Toronto Area (GTA)
Dealing with a shattered vent glass is a high-stress situation. Driving with an open cabin exposes your vehicle's premium interior to the harsh Ontario weather, road debris, and potential theft. That is why AlexWindshield brings our state-of-the-art mobile auto glass shop directly to your location. Whether your Challenger is parked safely in a residential garage in Vaughan, outside a corporate office in Markham, or at a shopping plaza in Richmond Hill, our master technicians provide seamless, on-the-spot replacements throughout the Greater Toronto Area (GTA).
The Technical Complexity of Challenger Vent Glass
Unlike standard roll-up door windows that sit on a mechanical track, the 2008-2023 Dodge Challenger vent glass is a structurally bonded component. It is encapsulated in specialized rubber and hard plastic moldings and glued directly to the vehicle's steel frame (the pinch weld) using industrial-grade urethane. This means the replacement process is highly technical. It requires cutting through tough polyurethane, meticulously preparing the raw metal surface, and applying chemical bonding agents to ensure a permanent, watertight, and wind-proof seal. A sloppy installation can lead to horrific wind noise at highway speeds, severe water leaks that damage your interior, and accelerated rust formation on your vehicle's body.
Our Master Technician's A-to-Z Vent Glass Replacement Process
To guarantee a flawless factory finish, AlexWindshield strictly adheres to a comprehensive, step-by-step replacement protocol. Here is exactly how we restore your 2008-2023 Dodge Challenger.
Phase 1: Extensive Interior Protection and Glass Shard Mitigation
Because automotive vent glass is made of tempered safety glass, an impact causes it to shatter into thousands of blunt, granular chunks. Our absolute first priority is protecting the interior of your Challenger.
- Interior Masking: We lay down heavy-duty, scratch-resistant protective blankets over your leather or cloth seats, center console, and rear seating area to prevent accidental cuts or scuffs during the repair.
- Deep Vacuuming: We deploy an industrial-strength HEPA vacuum to meticulously extract all broken glass shards from the vehicle's interior. We vacuum the seats, the floor mats, down inside the seatbelt buckles, and across the rear parcel shelf to ensure no dangerous debris is left behind.
- Exterior Taping: We apply automotive-grade protective tape around the exterior painted body lines surrounding the vent glass to ensure our cutting tools never make contact with your Challenger's clear coat.
Phase 2: Interior Trim and Door Panel Removal
To properly access the structural mounting points and the inner pinch weld of the Challenger's vent glass, we must address the interior framework.
- Trim Detachment: Using specialized, non-marring nylon pry tools, our technicians carefully unclip and remove the interior rear quarter panels and the C-pillar trim.
- Hardware Removal: We locate and remove any hidden retaining bolts or factory locator pins that secure the encapsulated vent glass module to the vehicle’s chassis.
- Internal Vacuuming: Once the interior door panels and quarter trim are removed, we perform a secondary vacuuming. Glass shards inevitably fall deep into the inner body cavities of the car. Removing these hidden shards is critical to prevent annoying rattling noises every time you accelerate or hit a bump in the road.
Phase 3: Precision Removal of the Old Glass and Urethane
With the interior stripped back and protected, we proceed to the extraction of the damaged glass frame.
- Urethane Cutting: We utilize advanced cold knives and specialized wire-cutting systems to slice through the dense, factory-applied polyurethane adhesive holding the original vent glass frame in place.
- Module Extraction: Once the adhesive bond is severed, we safely pull the remaining glass, encapsulated molding, and rubber weatherstripping away from the vehicle body.
- Pinch Weld Trimming: We use carbon steel scraper blades to meticulously trim down the old urethane bead on the vehicle's frame, leaving exactly 1 to 2 millimeters of existing adhesive. This "bed" serves as the perfect foundation for the new chemical bond.
Phase 4: Surface Cleaning and Chemical Primer Application
The secret to a lifetime bond is flawless surface preparation. Skipping this step leads to leaks and dangerous rust.
- Surface Cleaning: We wipe down the pinch weld and surrounding frame with an alcohol-based, lint-free automotive surface cleaner to remove all dirt, grease, and microscopic contaminants.
- Applying the Primer: This is a mandatory safety step. We carefully brush a high-performance glass primer over any bare metal scratches on the pinch weld and directly onto the bonding surface of the new encapsulated vent glass. This primer promotes molecular adhesion and acts as an impenetrable barrier against rust—a critical feature for vehicles driven in the salt-heavy winters of the Greater Toronto Area (GTA).
Phase 5: High-Quality Adhesive Application and Glass Installation
With the frame primed and ready, we move to the precision installation of your new vent glass.
- Urethane Extrusion: We load our electric caulking guns with premium, fast-curing automotive urethane—the absolute best high-quality adhesive on the market. We lay down a perfectly uniform, continuous "V-bead" of adhesive around the perimeter of the pinch weld.
- Precision Setting: Handling the new Dodge Challenger vent glass with specialized suction cups, we carefully align the locator pins and press the glass firmly into the wet urethane.
- Flush Alignment: We apply calculated pressure to ensure the exterior plastic and rubber moldings sit perfectly flush with the Challenger's muscular body lines, guaranteeing optimal aerodynamics and eliminating the risk of highway wind whistle.
Phase 6: Reassembly, Final Cleanup, and Quality Assurance
The physical installation is complete, but our master technicians are not done until your vehicle looks like it just rolled off the showroom floor.
- Interior Reassembly: We carefully reinstall the interior rear quarter panels, C-pillar trim, and door panel components, ensuring every factory clip snaps back into its precise location without any loose gaps.
- Final Glass Cleanup: We treat the newly installed vent glass, as well as the surrounding exterior windows, with a streak-free, foaming auto glass cleaner.
- Third and Final Vacuum: We perform one last pass with the vacuum across your entire interior, verifying that 100% of the broken glass shards have been successfully eradicated from your vehicle.
Why Timely Vent Glass Replacement is Crucial for Your Challenger
Many drivers underestimate the importance of the rear vent glass. Driving a 2008-2023 Dodge Challenger with a shattered quarter window exposes you to severe risks. First, it completely breaches vehicle security, granting thieves easy access to your interior door handles and belongings. Second, without a sealed cabin, rain and moisture will quickly saturate your interior upholstery and electronic wiring harnesses, leading to catastrophic mold and electrical failures. Finally, the aerodynamic drag caused by an open rear vent hole at highway speeds will destroy your cabin acoustics, causing intense pressure buffeting that makes driving highly uncomfortable.
Trust AlexWindshield for Unmatched Expertise and a Lifetime Warranty
When it comes to servicing modern American muscle, precision, patience, and premium materials are non-negotiable. At AlexWindshield, we pride ourselves on being the absolute best in the business. By choosing our specialized mobile services, you bypass the hassle of towing your vehicle or sitting in a dirty mechanic's waiting room. Whether you are at home in Vaughan, working in Richmond Hill, or out in Markham, our fully equipped service vans come directly to you.
We stand firmly behind the quality of our craftsmanship and the superiority of our materials. That is why every single vent glass replacement performed by AlexWindshield is backed by our comprehensive Lifetime Warranty. This warranty guarantees that your new installation will be free from wind noises, water leaks, and manufacturer defects for as long as you own your Dodge Challenger. Do not let a broken window ruin the aggressive profile and secure cabin of your Mopar. Contact AlexWindshield today and let our Master Technicians restore your vehicle with precision, passion, and unparalleled expertise.


