Precision Vent Glass Replacement for BMW X1 2012-2015 (E84)
The BMW X1 (E84), produced between 2012 and 2015, represents a unique chapter in the compact luxury crossover segment. It combines the driving dynamics of the 3-Series with the utility of an SAV. However, nothing disrupts the sleek lines and interior sanctuary of your Ultimate Driving Machine quite like a shattered vent glass. Often the victim of road debris or, more unfortunately, targeted break-ins due to its size and proximity to the door lock, a broken rear vent glass requires immediate, expert attention. At AlexWindshield, we do not view this as a simple patch-up job; we view it as a restoration of your vehicle’s structural integrity and security.
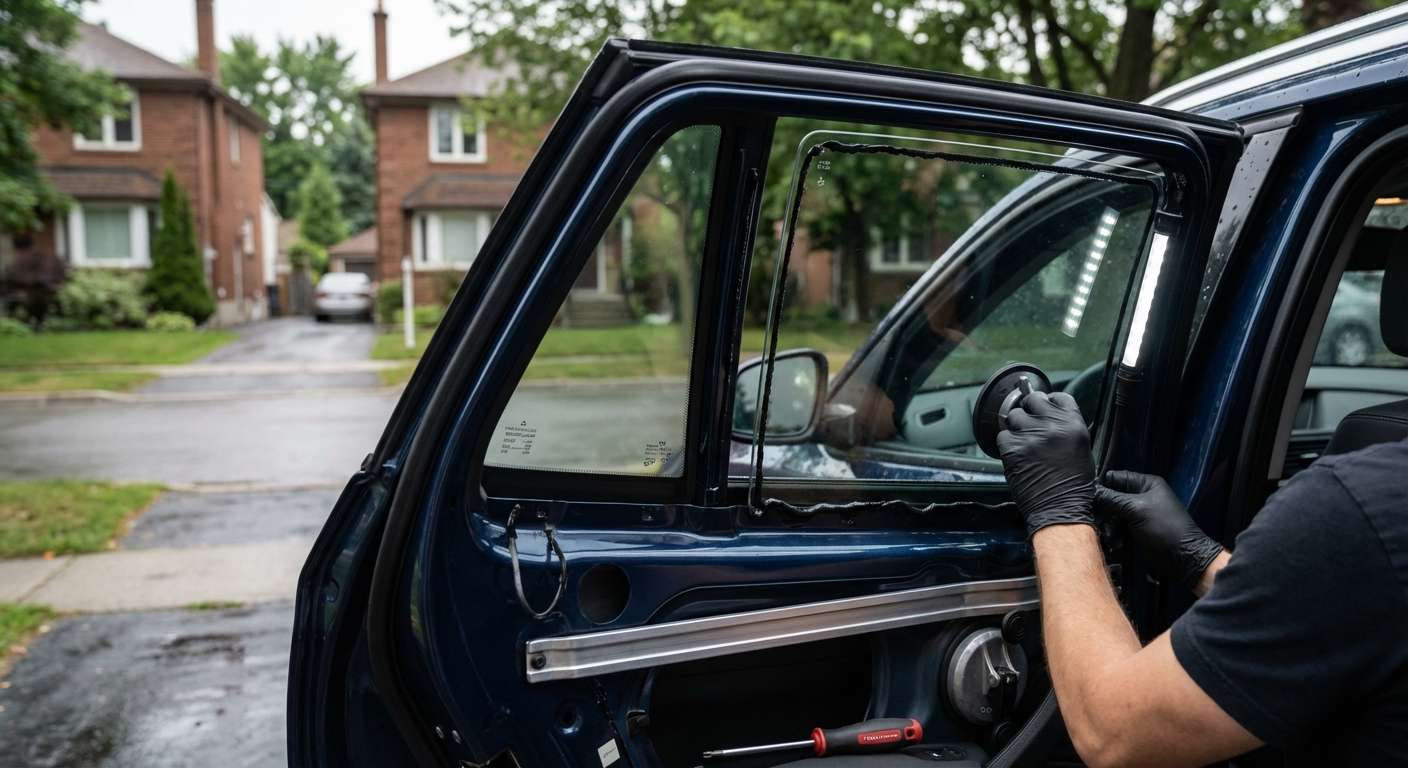
Replacing the vent glass on a BMW is significantly more complex than standard side windows. Unlike the main "drop glass" that moves up and down, the vent glass is a stationary piece integrated tightly into the door frame, often separated by a rigid division bar. Improper installation can lead to wind noise, water leaks, and a compromised security barrier. As Master Technicians serving the Greater Toronto Area (GTA), we bring OEM-level precision to your driveway.
Why the BMW X1 E84 Vent Glass Requires Specialized Care
The vent glass on the BMW X1 E84 is not merely a cosmetic filler; it is a structural component of the rear door assembly. It utilizes tempered safety glass designed to shatter into granular chunks upon impact to protect occupants. However, when this glass breaks, those granules migrate everywhere—inside the door panel, into the window regulator mechanism, and deep into the carpet fibers.
Furthermore, BMW engineering utilizes specific Torx fasteners, intricate clip systems, and high-quality vapor barriers that must be handled with extreme care. Generalist glass shops often damage the delicate interior door clips or tear the vapor barrier, leading to future moisture buildup inside the cabin. At AlexWindshield, we understand the distinct anatomy of the E84 chassis.
Detailed Step-by-Step Replacement Protocol
As a Master Technician, I adhere to a rigorous, multi-stage process for every BMW X1 vent glass replacement. This is not a rushed job; it is a surgical procedure performed on your vehicle. Below is the comprehensive A-to-Z workflow we utilize to ensure factory-spec results.
Phase 1: Site Preparation and Interior Protection
Before a single tool touches your BMW, we secure the environment. Mobile auto glass service requires discipline.
- Exterior Protection: We apply high-grade protective tape to the painted exterior door frame and the B and C pillars. This prevents accidental scratches from glass shards or tools during the removal process.
- Interior Shielding: We cover the rear leather seats and flooring with heavy-duty protective coverings. This catches falling debris and prevents glass dust from embedding into your upholstery.
- Initial Assessment: We inspect the window regulator (the motor that moves the main glass) to ensure the impact that broke the vent glass did not damage the lifting mechanism.
Phase 2: Door Panel Removal and Disassembly
To access the mounting points of the vent glass on the E84, the interior door card must be removed. This is a delicate process requiring specific BMW trim tools.
- We locate and remove the decorative trim strips on the door handle to reveal the hidden Torx screws.
- Using a non-marring pry tool, we carefully pop the perimeter clips holding the door panel to the metal door skin. BMW clips are notoriously tight; we apply calculated pressure to release them without snapping the plastic heads.
- We disconnect the Bowden cable (the internal door latch release cable) and all electrical harnesses for the window switch and speakers.
- The door panel is removed and stored in a safe, clean location to prevent scuffing.
Phase 3: Vapor Barrier and Debris Extraction
This step distinguishes a professional installation from a "quick fix." Broken tempered glass inside a door cavity is a rattle waiting to happen.
- Vapor Barrier Management: We carefully peel back the foam vapor barrier. The butyl adhesive BMW uses is extremely sticky; we preserve this adhesive so the barrier can be resealed perfectly later, ensuring no water enters the cabin.
- Vacuuming the Cavity: Using a high-powered industrial vacuum with a flexible crevice tool, we reach deep into the bottom of the door shell. We vacuum out every shard of broken glass.
- Manual Inspection: We manually feel inside the door frame to ensure no glass is stuck in the grease of the window regulator tracks.
- Cabin Cleanup: We thoroughly vacuum the rear seats, the floor mats, and the carpet underneath the mats to ensure the vehicle is safer than when we arrived.
Phase 4: Division Bar and Main Glass Manipulation
On the BMW X1 (2012-2015), the vent glass cannot simply be pushed in. The "division bar" (the vertical pillar separating the main window from the vent window) must often be manipulated.
- We lower the main drop glass to a specific service position.
- We remove the run channel rubber seals to expose the mounting bolts of the division bar.
- We loosen the top and bottom bolts securing the division bar to the door frame.
- By carefully shifting the division bar, we create the necessary clearance to extract the remains of the old vent glass gasket and prepare the frame for the new glass.
Phase 5: Surface Preparation and Primer Application
Whether the vent glass is encapsulated or bonded, the mating surface must be chemically pure to ensure a leak-proof seal.
- Decontamination: We clean the metal pinch weld and the glass channel using an alcohol-based reacting agent to remove road grime, old adhesive residue, and grease.
- Priming (If Bonded): If the specific trim level of your X1 utilizes a bonded vent glass, we apply a high-quality black primer to any exposed metal scratches (to prevent rust) and to the glass border. This primer acts as the chemical bridge between the glass and the adhesive.
Phase 6: Installation and Urethane Bonding
This is the critical moment of installation.
- Adhesive Application: We apply a precise bead of high-modulus, non-conductive urethane. For BMWs, we use premium Sika or Dow adhesives that meet European safety standards. This adhesive supports the structural rigidity of the roof and door frame.
- Glass Insertion: The new vent glass is carefully angled and slid into the frame. We ensure the rubber encapsulation lips sit flush against the exterior bodywork for a wind-noise-free finish.
- Securing the Division Bar: Once the glass is seated, we slide the division bar back into its original factory position. We tighten the Torx bolts to the specific torque settings required by BMW to ensure the main window still tracks up and down smoothly without binding.
Phase 7: Reassembly and Quality Control
The job isn't done until the car looks untouched.
- We reinstall the window run channels and rubber seals, lubricating them with silicone spray to ensure smooth operation.
- We test the main window operation multiple times to guarantee no friction or "auto-reverse" safety triggers are occurring.
- The vapor barrier is reheated (if necessary) and pressed firmly back into place to seal the door interior.
- The door panel is re-hung, clips are snapped in, and all Torx screws are tightened.
- A final glass clean is performed using ammonia-free cleaner to leave a streak-free, crystal-clear finish.
Serving the Heart of the GTA
We know that when your window is broken, you cannot safely drive the vehicle to a shop, especially in the unpredictable Canadian weather. That is why AlexWindshield brings the repair shop to you. Our mobile units are fully equipped workshops on wheels.
We are proud to offer this specialized BMW service across the entire Greater Toronto Area. Our primary service hubs include:
- Vaughan: From Kleinburg to Woodbridge, we are the local choice for luxury auto glass.
- Richmond Hill: We service all neighbourhoods, ensuring your BMW X1 is secure in your driveway.
- Markham: Fast response times for Unionville and surrounding business districts.
- Toronto & GTA: We cover the wider metro area, providing convenience without compromise.
The AlexWindshield Guarantee
Replacing the vent glass on a BMW X1 (E84) is a technical task that demands patience, specific knowledge of German automotive assembly, and the right tools. A generic repair can lead to water leaking into your door speakers or wind whistling at highway speeds. Don't take that risk.
At AlexWindshield, we stand behind our craftsmanship. We offer a Lifetime Warranty on our workmanship for as long as you own the vehicle. This covers you against air leaks, water leaks, and molding retention issues. When you choose us, you are choosing a Master Technician who treats your BMW with the respect it deserves.
Secure your vehicle today. Trust the experts at AlexWindshield to restore your BMW X1 to factory perfection.


