Restoring the Structural Integrity of Your BMW X1 (E84): Premier Back Glass Replacement
The BMW X1 (2012-2015), known internally as the E84 chassis, marked a pivotal moment in the evolution of the compact luxury crossover. Built upon the robust foundation of the BMW 3 Series Touring, this vehicle combines Bavarian driving dynamics with everyday utility. However, the sophisticated design of the E84’s rear liftgate, complete with its integrated spoiler, rear wiper assembly, and complex defroster grid, makes it particularly vulnerable when the rear windshield is compromised. Unlike a minor chip in a front windshield, a damaged back glass on a BMW X1 typically results in a catastrophic shattering event due to the nature of tempered safety glass.
At AlexWindshield, we understand that a shattered rear window is more than just an aesthetic blemish; it is an immediate security risk and a hazard to the vehicle's interior electronics. Our approach to Back Glass Replacement for the BMW X1 2012-2015 is rooted in factory-grade precision. As Master Technicians, we do not simply "swap glass"; we restore the vehicle's safety envelope, ensuring that the heating elements, radio antenna diversity systems, and rear wiper mechanics function exactly as designed by BMW engineers.
The Complexity of Tempered Glass in the BMW X1
The rear glass of your BMW X1 E84 is constructed from tempered safety glass. Unlike the laminated glass found in your windshield (which holds together when cracked), tempered glass is heat-treated to withstand high impact. However, when the surface tension is broken, it is designed to shatter into thousands of small, pebble-like pieces. This is a safety feature intended to prevent large shards from injuring passengers, but it presents a unique challenge during replacement.
When the back glass of your X1 shatters, glass shards do not simply fall onto the trunk floor. They migrate. They find their way into the crevices of the trunk liner, into the locking mechanism of the tailgate, and most critically, inside the hollow metal shell of the liftgate itself. If not removed with obsessive attention to detail, these shards will cause a persistent "rattling" noise every time you close the trunk or drive over a bump in Vaughan or Richmond Hill.
Comprehensive Replacement Process: The AlexWindshield Standard
Our protocol for replacing the back glass on a BMW X1 involves a meticulous, multi-stage process. We bring the shop to you, servicing the entire Greater Toronto Area (GTA), but our mobile service does not compromise on technical rigor. Below is the step-by-step technical breakdown of how we handle your E84.
Phase 1: Site Preparation and Interior Protection
Before any tools touch your BMW, we prioritize the protection of your luxury interior. Glass shards from a shattered rear window are incredibly sharp and abrasive.
- Exterior Stabilization: We apply high-grade collision wrap to any remaining glass held in the frame to prevent it from crumbling further during the initial inspection.
- Interior Shielding: We deploy heavy-duty protective covers over the rear cargo area, the back of the rear seats, and the bumper. This ensures that no falling glass scratches your leather upholstery or the paint on your rear bumper during the extraction process.
Phase 2: Disassembly of Rear Hatch Components
The BMW X1 E84 features a rear wiper motor that mounts through the glass. This adds a layer of complexity to the removal process that requires specialized knowledge.
- Wiper Assembly Removal: We carefully remove the rear wiper arm cover, the retaining nut, and the arm itself. We then disengage the outer grommet and seal that protects the wiper motor shaft.
- Spoiler and Trim Assessment: On certain E84 trim levels, the upper spoiler may overlap the glass bonding area. We assess if the spoiler requires loosening to access the upper pinch weld without damaging the paint.
- Interior Panel Removal: This is a mandatory step that many budget shops skip. We carefully pop the retaining clips of the interior plastic tailgate trim (liftgate liner). This panel must be removed to access the electrical connectors for the defroster and antenna, and crucially, to access the broken glass inside the door frame.
Phase 3: The "Deep Clean" and Shard Extraction
This is where AlexWindshield distinguishes itself from generalist glass shops. The shattering of tempered glass fills the internal cavity of your rear hatch with debris.
- Cavity Vacuuming: With the interior panel removed, we insert flexible vacuum attachments into the drainage holes and access ports of the metal liftgate structure. We painstakingly vacuum out every shard of glass to ensure a rattle-free ride.
- Cabin Cleanup: We thoroughly vacuum the trunk carpet, the spare tire well, and the rear seats. We use high-powered industrial vacuums to pull glass dust out of the carpet fibers.
Phase 4: Old Adhesive Removal and Pinch Weld Prep
Once the vehicle is clean, we focus on the bonding surface, known as the pinch weld.
- Urethane Excision: Using the "Cold Knife" technique or reciprocating powered cutters, we slice the existing urethane bead down to approximately 1-2mm. This old urethane serves as the best base for the new bond.
- Corrosion Inspection: We inspect the metal frame for any scratches or rust. If the pinch weld was scratched during the removal of the old glass, we treat it with a rust-inhibiting primer to prevent future corrosion under the glass.
- Contaminant Removal: The bonding surface is cleaned with a specialized bonding agent to remove road grease, silicone, and dirt that could compromise the adhesive's strength.
Phase 5: Primer Application and Electrical Prep
A secure bond relies on chemical preparation.
- Glass Priming: We apply a specific glass activator and primer to the frit band (the black ceramic edge) of the new BMW X1 back glass. This primer blocks UV light from degrading the adhesive and promotes molecular bonding.
- Body Priming: Any exposed metal on the pinch weld is primed with a "black-out" body primer.
- Electrical Setup: We transfer or install new connectors for the rear defogger grid and the diversity antenna system, ensuring connectivity is tested before the glass is set.
Phase 6: Adhesive Application and Glass Installation
We use only high-modulus, non-conductive urethane adhesives that meet or exceed OEM specifications for BMW.
- The V-Bead Method: We apply the urethane in a high-profile "V" shape. This ensures that when the glass is compressed, the glue spreads evenly without air pockets, mimicking the factory robot installation.
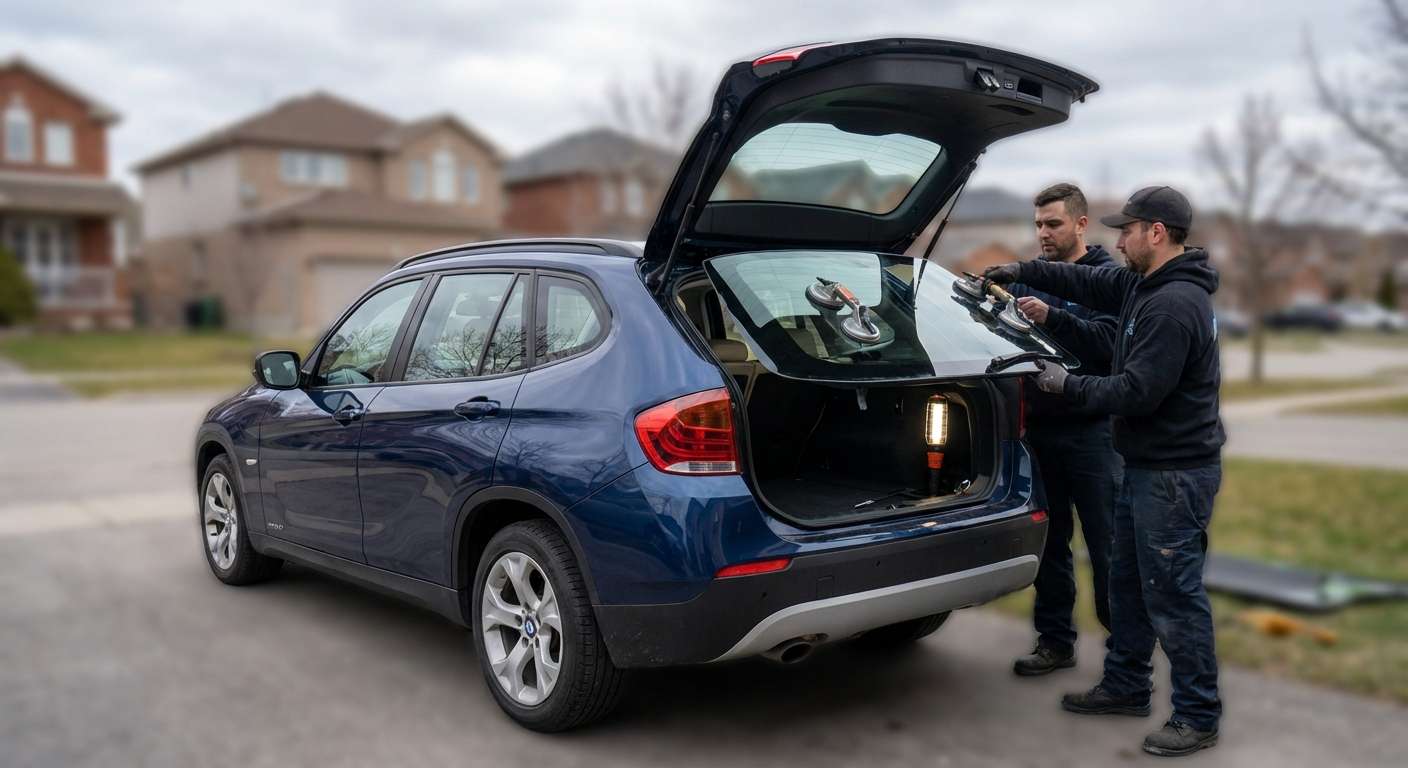
- Setting the Glass: Using dual suction cups, two technicians (or one aided by a setting tool) carefully align the glass with the body of the X1. We pay strict attention to the E84’s specific VIN notch and roofline alignment to ensure the gaps are symmetrical on the left and right sides.
- Wiper Re-Integration: Once the glass is seated, we align the wiper motor shaft through the designated hole, installing a fresh rubber grommet to ensure a water-tight seal around the wiper mechanism.
Phase 7: Reassembly and Final Quality Control
The job is not done until the vehicle is reassembled to showroom condition.
- Panel Reinstallation: The interior liftgate panels are snapped back into place, ensuring all clips are engaged and no wires are pinched.
- Wiper Arm Calibration: We reinstall the rear wiper arm and test it to ensure it parks correctly and sweeps the full arc without hitting the spoiler or the paint.
- Leak Test: We perform a visual inspection and, after the safe drive-away time has passed, a water test to guarantee the seal is hermetic.
Serving the Heart of the GTA: Vaughan, Markham, and Richmond Hill
Whether you are parked at the Vaughan Mills shopping center, working in the tech hubs of Markham, or residing in the residential avenues of Richmond Hill, a shattered back window leaves your BMW exposed to the harsh Canadian elements. Rain, snow, and humidity can quickly damage the sensitive electronics in your trunk and dashboard.
AlexWindshield specializes in Mobile Auto Glass Service. We do not require you to drive your compromised vehicle to a shop. Our mobile units are fully equipped workshops on wheels, capable of performing this complex replacement in your driveway or office parking lot. We understand the local geography and the urgency required when a vehicle is unsecure.
Why BMW Owners Choose AlexWindshield
Driving a BMW X1 implies a standard of quality, and your repair services should reflect that. Cheap, generic glass installations often result in wind noise, water leaks, and defrosters that fail after a single winter season. Worse yet, improper removal of broken glass can leave you with a permanent rattle in your tailgate.
At AlexWindshield, we offer:
- OEM-Quality Glass: We use glass that matches the curvature, tint, and heating element resistance of the original equipment.
- Lifetime Warranty: We stand behind our workmanship. Our warranty covers you against leaks and manufacturer defects for as long as you own your vehicle.
- Master Technicians: Our team is trained specifically on European vehicles, understanding the nuances of the E84 chassis.
Don't let a shattered back glass compromise the safety or value of your BMW X1. Trust the experts who treat your car with the respect it deserves.
Contact AlexWindshield today to schedule your mobile replacement in the GTA. restore your view, secure your vehicle, and get back on the road with confidence.


