The BMW i3 (I01) is Not Just a Car; It’s a Carbon-Fiber Masterpiece That Demands Expert Glass Care
The BMW i3, produced between 2014 and 2021, represents a paradigm shift in automotive engineering. With its revolutionary LifeDrive architecture and Carbon Fiber Reinforced Plastic (CFRP) passenger cell, this vehicle is distinct from any other car on the road. Consequently, when you suffer damage to the vent glass or fixed side glass, standard repair methods simply do not apply. You cannot treat an i3 like a standard steel-body sedan. The structural rigidity and the unique bonding requirements of the CFRP frame require a Master Technician who understands the delicate balance of this electric vehicle's design.
At AlexWindshield, we specialize in the complexities of European electric vehicles. Replacing the vent glass on a BMW i3 (I01 chassis) requires precision, specialized tools, and a deep understanding of how the glass integrates with the vehicle's unique coach-door system. Whether you are located in Vaughan, Richmond Hill, or Markham, our mobile specialists bring dealership-level expertise directly to your driveway.
Understanding the Role of Vent Glass in Your BMW i3
The vent glass (often referred to as the quarter glass or fixed door glass) on the BMW i3 serves more than just an aesthetic purpose. Due to the vehicle's lack of a traditional B-pillar (when both front and rear coach doors are open), the structural integrity of the glass contributes to the overall cabin silence and climate control efficiency. When this glass is shattered due to vandalism, road debris, or accident, it compromises the vehicle's security and exposes the intricate eco-friendly interior materials to the elements.
Unlike roll-down windows, the vent glass is permanently bonded to the vehicle's frame using high-strength automotive urethane. Replacing it is a surgical procedure that involves disassembling interior components, removing shattered remnants, and creating a chemically perfect bond for the new glass.
Service Availability: Mobile Auto Glass Replacement in the GTA
We understand that driving a BMW i3 with a broken window is not safe or practical. That is why AlexWindshield operates a robust mobile service fleet across the entire Greater Toronto Area (GTA). We recognize that i3 owners in Vaughan, Richmond Hill, and Markham expect prompt, professional service that respects their time.
Our mobile units are fully equipped workshops on wheels. We carry onboard power, high-end vacuum extraction systems, and climate-controlled storage for our adhesives to ensure they perform perfectly even in Canadian weather conditions. You do not need to tow your vehicle to a shop; we come to you.
Step-by-Step Technical Process: BMW i3 Vent Glass Replacement
As Master Technicians, we follow a rigorous protocol when working on the I01 chassis. The BMW i3 interior utilizes sustainable materials like kenaf fibers and open-pore eucalyptus wood, which are easily stained or damaged if mishandled. Here is our detailed, A-to-Z process for restoring your vehicle:
1. Site Preparation and Vehicle Protection
Before touching the glass, we secure the work area. Because vent glass is tempered, it typically shatters into thousands of small cubes. Our first priority is protecting the undamaged areas of your vehicle.
- We apply heavy-duty protective covers to the exterior paintwork surrounding the window frame to prevent scratches from tools or glass debris.
- We cover the driver and passenger seats, steering wheel, and center console with protective plastic.
- On the BMW i3, the rear "coach doors" must be opened to access the glass properly. We secure the door in an open position to allow for 360-degree access to the window frame.
2. Interior Disassembly and Door Panel Removal
To access the bottom edge of the vent glass and ensure all broken glass is removed, we must partially or fully remove the interior door panel (trim). This is a delicate step on the i3 due to the recycled lightweight materials used in the door cards.
- Using non-marring nylon pry tools, we carefully release the clips holding the interior door panel.
- We disconnect the electrical harnesses for the door release mechanisms and speakers.
- We remove the vapor barrier (water shield) carefully to access the inner door cavity. This step is critical; if the vapor barrier is torn, water can leak into the cabin later.
3. Critical Glass Debris Extraction
This is where amateur shops fail. Shattered tempered glass falls deep into the door cavity. If left behind, it rattles incessantly and can jam the door latch mechanisms or damage electrical wiring.
- We use a high-powered industrial vacuum with flexible crevice attachments to reach the deepest corners of the door shell.
- We manually inspect the window channels and rubber runs to ensure no shards are embedded in the felt.
- We utilize compressed air to dislodge hidden glass fragments from the locking mechanism, followed by a secondary vacuum pass.
- AlexWindshield Guarantee: We do not stop until the interior is free of glass shards.
4. Removal of the Old Glass and Adhesive
Once the area is clean, we proceed to remove the bonding agent that held the old glass.
- We use the "Full Cut" method. Using a specialized cold knife or an oscillating cut-out tool, we slice through the existing urethane bead close to the vehicle frame.
- Extreme care is taken not to damage the Carbon Fiber Reinforced Plastic (CFRP) frame or the surrounding aluminum skin. Unlike steel, CFRP requires specific handling to avoid delamination.
- We trim the old urethane down to a thickness of approximately 1-2mm. This remaining thin layer serves as the best possible base for the new adhesive to bond to.
5. Surface Preparation and Priming
A windshield or vent glass is only as safe as the glue holding it in. Chemical preparation is the most important part of the installation.
- We clean the bonding surface of the new glass with a specialized glass cleaner to remove manufacturing oils and release agents.
- We treat the new glass ceramic band (the black edge) with an activator to open the pores of the surface.
- We apply a high-quality black primer to both the vehicle’s pinchweld (if exposed) and the glass. This primer prevents UV degradation of the adhesive and promotes molecular bonding.
- We inspect the vehicle frame for any scratches. Although the i3 frame doesn't rust like steel, any abrasion to the paint or coating is sealed with primer to maintain factory specifications.
6. Adhesive Application
We use only OEM-grade, high-modulus, non-conductive urethane adhesives (such as Sika or Dow). Non-conductive adhesive is vital for the BMW i3 to ensure there is no interference with the vehicle's complex antenna and sensor systems.
- The urethane is heated to the optimal temperature in our mobile unit.
- We apply a triangular bead of adhesive directly to the glass or the vehicle frame (depending on the specific i3 mounting requirement for that model year) using a high-ratio battery-operated caulk gun for a consistent, seamless bead.
- We ensure the "deck height" of the glue matches factory specs so the glass sits flush with the body panels, reducing wind noise.
7. Installation and Setting
Precision is key. The gap margins on a BMW i3 are tight.
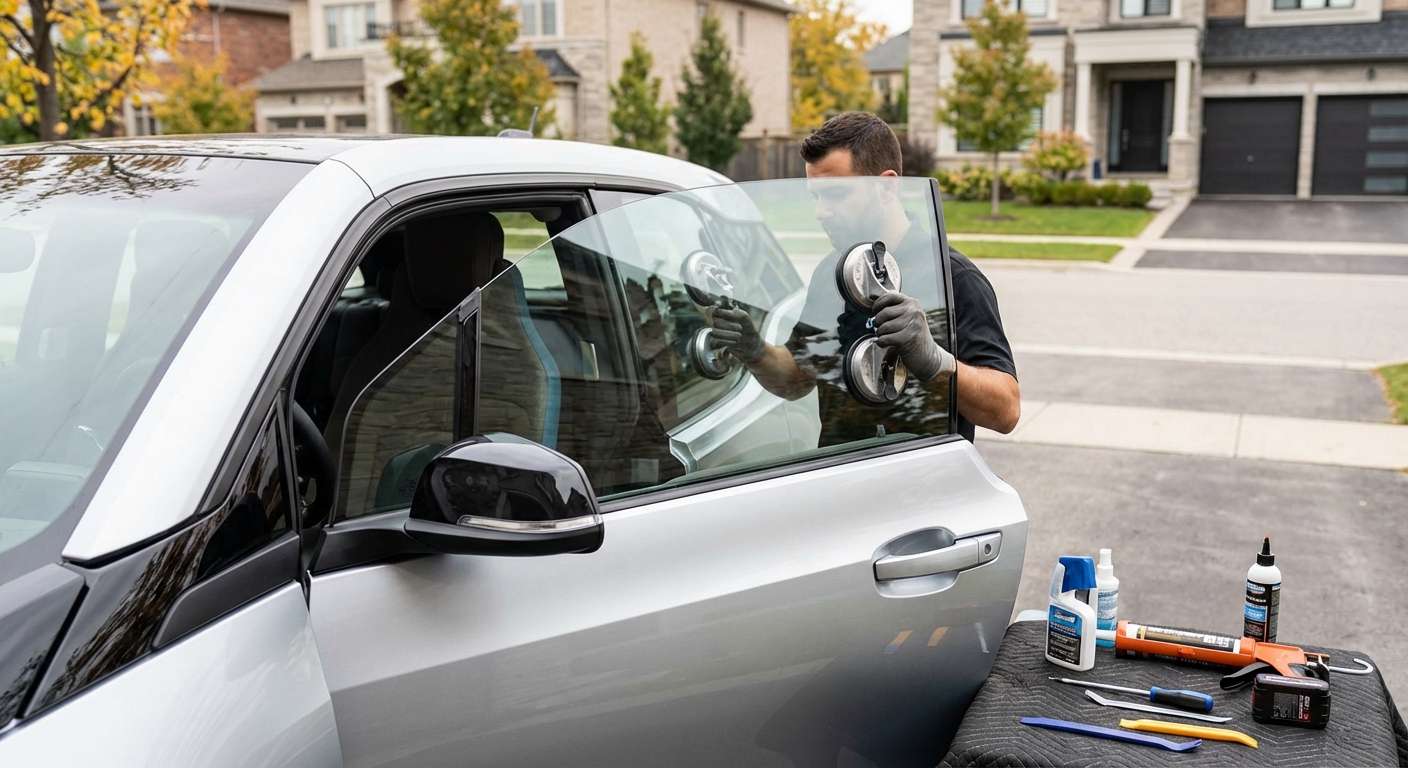
- Using heavy-duty suction cups, the Master Technician carefully maneuvers the new vent glass into the aperture.
- We press the glass firmly into the adhesive to wet out the bond and ensure a watertight seal.
- We check the alignment against the surrounding body lines and the roofline to ensure perfect symmetry.
- Retention tape is applied to hold the glass in position while the adhesive begins its initial cure.
8. Reassembly and Final Inspection
Once the glass is set, we reverse the disassembly process.
- The vapor barrier is resealed to the door frame to prevent moisture ingress.
- The door panel is reinstalled, ensuring all clips snap correctly into place and the door handle functions smoothly.
- We perform a final vacuum of the vehicle interior, checking seats and floor mats one last time.
- We clean the new glass inside and out to a streak-free shine.
Why the 'Mobile' Aspect Matters for BMW Owners
Time is the ultimate luxury. For residents of Richmond Hill and Vaughan, navigating traffic to drop off a car for a 2-hour service is an inconvenience. By choosing AlexWindshield, you eliminate the waiting room. We perform this complex vent glass replacement while you work from home or attend meetings. Our mobile technicians carry everything required to perform a factory-spec installation on-site, including the specific Torx and trim tools required for BMWs.
ADAS Considerations for Side Glass
While vent glass replacement typically does not require the recalibration of the forward-facing cameras used in Windshield replacement, the BMW i3 is a high-tech vehicle. During our service, we ensure that no side sensors or door-mounted electronics were disturbed during the vacuuming and panel removal process. If your repair involves a mirror or side-view camera being disconnected, we verify its functionality before completing the job.
Trust AlexWindshield: The GTA's Premier Auto Glass Experts
Your BMW i3 is an investment in sustainable luxury, and it deserves specialized care. Don't trust the intricate carbon fiber structure and complex door mechanisms to a generalist. At AlexWindshield, we combine technical mastery with local convenience.
We proudly serve the communities of Vaughan, Richmond Hill, Markham, and the wider Greater Toronto Area. We stand behind our craftsmanship with an industry-leading guarantee.
The AlexWindshield Promise:
- Lifetime Warranty: We offer a lifetime warranty on our workmanship against wind noise, water leaks, and loose moldings for as long as you own the vehicle.
- OEM Quality Glass: We use glass that meets or exceeds Original Equipment Manufacturer standards for safety, tint, and clarity.
- Certified Technicians: Our team is trained specifically in modern vehicle bonding procedures.
If your BMW i3 requires vent glass replacement, contact AlexWindshield today. Experience the difference of a Master Technician working on your vehicle.


