The BMW i3: Restoring Vision to a Masterpiece of Carbon Fiber and Glass
The BMW i3 (I01), produced between 2014 and 2021, is not merely a vehicle; it is a statement of futuristic engineering. With its distinct LifeDrive architecture featuring a Carbon Fiber Reinforced Plastic (CFRP) passenger cell, the i3 requires a specialized touch that goes beyond standard auto repair. The rear aesthetic of this electric vehicle is defined by its expansive, gloss-black all-glass tailgate appearance. When the back glass of your i3 shatters, it disrupts the seamless "smartphone-on-wheels" look and compromises the vehicle's structural integrity and security. At AlexWindshield, we understand that replacing the rear glass on an i3 is a precision operation, not a generic repair.
Whether you are commuting through the busy streets of Vaughan, parked at a tech campus in Markham, or residing in the quiet suburbs of Richmond Hill, a shattered rear windshield requires immediate professional attention. The back glass on the i3 houses the defroster grid, accommodates the rear wiper assembly, and acts as a critical barrier against the harsh Canadian elements. Our team of Master Technicians specializes in the complexities of BMW electric vehicles, ensuring your replacement meets the strict OEM specifications required for this unique hatchback.
Why BMW i3 Back Glass Replacement Requires Expert Hands
The rear hatch of the BMW i3 is unlike traditional steel liftgates. The glass is bonded to a composite structure, requiring specific adhesives and primers that are compatible with the materials used in the i3’s lightweight construction. An improper installation can lead to water leaks damaging the high-voltage battery electronics located in the rear floor, or wind noise that ruins the silent EV driving experience.
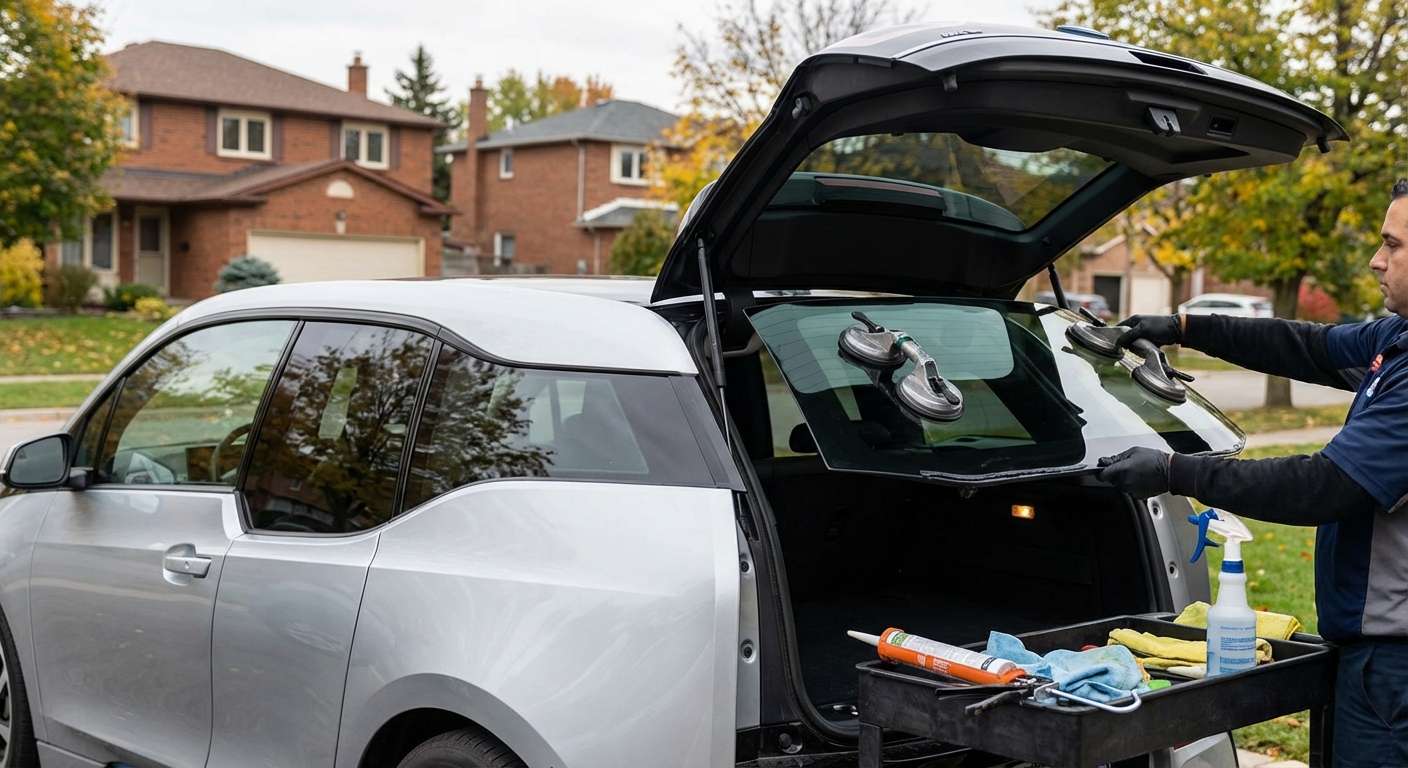
Residents across the Greater Toronto Area (GTA) trust AlexWindshield because we bring the repair facility to your doorstep. We recognize that driving a vehicle with shattered rear glass is dangerous and illegal. Our mobile auto glass service covers the entire region, ensuring that whether you are in Richmond Hill or downtown Vaughan, a fully equipped mobile unit is ready to restore your vehicle to factory condition.
Detailed Step-by-Step Replacement Process
Replacing the back glass on a 2014-2021 BMW i3 is an intricate process. As Master Technicians, we follow a rigorous protocol to ensure safety, adhesion quality, and cosmetic perfection. Below is the A-to-Z procedure we utilize for every i3 back glass replacement.
Step 1: Site Preparation and Safety Assessment
Upon arriving at your location in Markham, Vaughan, or elsewhere in the GTA, our technician first assesses the damage. We inspect the extent of the shattering and check for damage to the rear wiper motor, the high-mount brake light, and the surrounding body panels. We then deploy protective covers over the rear bumper and the rear quarter panels to prevent scratches from falling glass or tools.
Step 2: Disassembly of Rear Components
The BMW i3 rear glass integrates closely with the wiper system and interior trim. The disassembly phase involves:
- Wiper Arm Removal: Carefully removing the rear wiper arm and the grommet seal that passes through the glass.
- Interior Trim Removal: We access the interior of the tailgate (hatch) to remove the plastic trim panels. This exposes the wiper motor assembly and the electrical connectors for the rear defroster and antenna systems.
- Spoiler Inspection: On the i3, the upper spoiler sits directly above the glass. We inspect this area to ensure the replacement glass will slide in without interference.
- Disconnecting Electronics: We carefully unplug the heating element connectors and any diversity antenna connections attached to the glass surface.
Step 3: Containment and Vacuuming (Critical Step)
When tempered back glass shatters, it explodes into thousands of pebble-sized shards. On a hatchback like the i3, these shards fall directly into the cargo area, often migrating into the crevices of the rear seats and the battery access cover.
We perform a comprehensive debris removal process:
- Using a powerful industrial-grade vacuum, we remove all glass from the trunk floor, cargo mat, and rear seats.
- We remove the interior tailgate panels to vacuum shards that have fallen inside the rear hatch door structure. If left inside, these shards cause an annoying rattling noise every time the hatch is opened or closed.
- We ensure the wiper motor mechanism is free of glass dust which could cause mechanical failure.
Step 4: Removal of the Old Glass and Urethane
Once the area is clean and accessible, we proceed to remove the remaining glass and the old adhesive bead.
- Cutting the Bond: Using a specialized cold knife or a fiber-wire cutting system (to protect the vehicle's paint and composite frame), we slice through the existing polyurethane adhesive.
- Trimming the Bead: After the glass is removed, the old urethane left on the pinch weld (the metal or composite frame) must be trimmed down to a precise height, usually 1-2mm. This provides a fresh, level base for the new adhesive to bond to.
Step 5: Surface Preparation and Priming
The longevity of the replacement depends entirely on surface preparation. BMW requires specific chemical protocols:
- Cleaning: The bonding surface is cleaned with a specialized contaminant-removing agent to eliminate dirt, grease, and silicone residue.
- Priming the Pinch Weld: Any bare metal or scratches on the composite frame caused during removal are treated with a black primer. This prevents corrosion (on metal parts) and ensures the adhesive grabs the frame securely.
- Priming the New Glass: The new BMW i3 specific back glass is cleaned, and a glass activator/primer is applied to the frit band (the black ceramic border). This prepares the glass to chemically fuse with the urethane.
Step 6: Adhesive Application and Installation
We use only high-modulus, non-conductive Sika or Dow automotive urethane. This is critical for the i3 to maintain its structural rigidity.
- The V-Bead: We apply a high-profile V-shaped bead of urethane directly to the glass or the vehicle frame (depending on the specific replacement requirement for the I01 chassis). The V-shape ensures that when the glass is compressed, the glue spreads evenly without air bubbles.
- Setting the Glass: Using heavy-duty suction cups, two technicians (or one using a specialized setting tool) carefully lift the new glass and place it onto the vehicle.
- Alignment: The glass is immediately adjusted to ensure equal gaps on the left and right sides, proper alignment with the roof spoiler, and flush fitment with the tail lights.
Step 7: Reassembly and Post-Install Checks
Once the glass is set, the process is wrapped up with meticulous reassembly:
- The rear wiper motor is secured, and the wiper arm is reattached through the new glass grommet.
- The defroster tabs are reconnected and tested to ensure continuity.
- Interior trim panels are snapped back into place.
- A final vacuum is performed to catch any stray shards dislodged during installation.
- The glass is cleaned inside and out to a streak-free shine.
Service Availability in the Greater Toronto Area
Driving with a taped-up rear window is not a sustainable solution, especially given the unpredictable weather in Southern Ontario. AlexWindshield is proud to offer our premium services across the entire GTA. We have dedicated mobile units servicing:
- Vaughan: From Woodbridge to Maple, we can perform replacements in your driveway or office parking lot.
- Richmond Hill: Whether you are near Yonge Street or Bayview, our technicians are minutes away.
- Markham: We service the entire tech corridor and residential areas of Unionville and beyond.
Our mobile vans are fully equipped workshops. We bring the power, the tools, the vacuum systems, and the lighting required to perform a dealership-quality installation at your convenience.
The Importance of OEM Quality Glass
For a vehicle as sophisticated as the BMW i3, the quality of the glass affects more than just visibility. It impacts the thermal efficiency of the cabin (crucial for EV range) and the operation of the rear heating elements. At AlexWindshield, we utilize OEM (Original Equipment Manufacturer) or OEE (Original Equipment Equivalent) glass. This ensures:
- Perfect Fitment: The curvature of the glass matches the unique body lines of the i3 perfectly.
- Electrical Integrity: The defroster grid has the correct resistance to clear ice quickly without overloading the electrical system.
- Tint and Clarity: The glass matches the factory tint level of the rear side windows for a uniform look.
Trust AlexWindshield for Your BMW i3
Your BMW i3 represents a commitment to sustainability and advanced technology. Don't compromise that investment with a sub-par repair job. A back glass replacement involves handling complex electronics, managing broken glass hazards, and ensuring a waterproof seal on a composite body.
At AlexWindshield, we stand behind our craftsmanship. We offer a Lifetime Warranty on our workmanship, covering you against wind noise, water leaks, and loose moldings for as long as you own the vehicle. We handle the insurance paperwork, provide transparent pricing, and treat your vehicle with the care it deserves.
Ready to restore your BMW i3? Contact AlexWindshield today to schedule your mobile back glass replacement in Vaughan, Richmond Hill, Markham, or anywhere in the GTA. Drive with confidence knowing your vehicle has been serviced by the true experts in auto glass.


