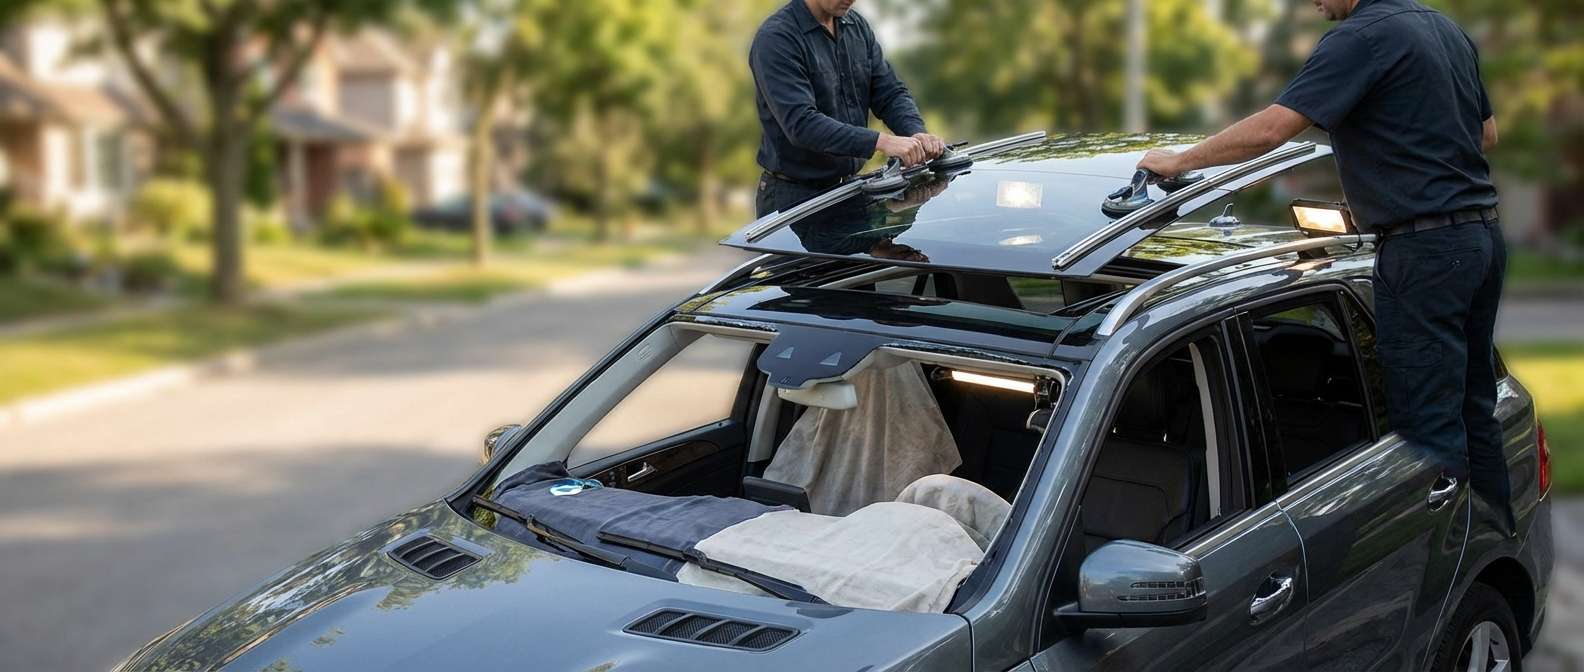
Restoring the Skyward View: Expert Sunroof Replacement for the 2016-2019 Mercedes-Benz GLE-Class (W166)
The 2016-2019 Mercedes-Benz GLE-Class (W166 generation) is a masterclass in luxury SUV engineering, often featuring a sweeping, expansive panoramic sunroof that bathes the premium cabin in natural light while offering unparalleled acoustic insulation. However, when an unexpected rogue rock on the highway or a sudden, extreme thermal shock compromises this highly engineered glass panel, the resulting shatter can instantly turn your meticulously crafted luxury sanctuary into a stressful nightmare. Replacing the sunroof on a luxury European vehicle is not a standard plug-and-play operation; it requires the precision of a master technician, a deep understanding of Mercedes-Benz structural tolerances, and an uncompromising commitment to safety and quality.
At AlexWindshield, we specialize in luxury auto glass restoration. When the sky falls in on your GLE-Class, our seasoned technicians are ready to execute a flawless, factory-grade replacement. We understand the complex integration of the W166's electronic sunshade, the pinch-protection motor calibration, and the highly specific aerodynamic curvature required to eliminate wind noise at highway speeds.
The Complexity of the Mercedes-Benz W166 Sunroof System
The sunroof on the 2016-2019 GLE-Class is more than just a piece of glass; it is a dynamic, structural component of the vehicle's roofline. It features specialized UV-reflective coatings to protect your leather interior from sun fade and incorporates precisely calibrated tracking mechanisms. Depending on your specific trim, the W166 may feature a standard mechanical sliding sunroof or a bonded panoramic glass roof with a fixed rear panel and a dynamic front panel. A catastrophic failure of either requires immediate, professional intervention to prevent water ingress, electrical failure in the overhead console, and damage to the delicate headliner.
Why Choose AlexWindshield for Your GLE-Class Sunroof Replacement?
Luxury vehicles demand elite care. Attempting a subpar repair on a Mercedes-Benz can lead to chronic water leaks, malfunctioning motors, and a compromised driving experience. Our approach at AlexWindshield is rooted in precision, utilizing strictly OEM-equivalent or genuine Mercedes-Benz glass, industry-leading urethane adhesives, and factory-approved installation protocols.
Furthermore, we bring our master-level expertise directly to you. We proudly offer comprehensive mobile auto glass services across the Greater Toronto Area (GTA). Whether your sunroof shatters while you are parked in a residential driveway in Vaughan, outside a corporate office park in Markham, or while shopping in Richmond Hill, our fully equipped mobile service fleet arrives with the tools, the glass, and the expertise required to secure your vehicle on-site.
Master Technician's Guide: Step-by-Step Sunroof Replacement Process from A to Z
To give you total peace of mind, we maintain complete transparency regarding our technical procedures. Replacing a shattered sunroof—particularly the bonded or mechanically integrated panels on a Mercedes-Benz GLE-Class—is a highly methodical process. Here is the exact, step-by-step protocol our master technicians follow to ensure a flawless installation.
Step 1: Meticulous Interior Protection and Preparation
A shattered sunroof introduces thousands of sharp glass fragments into a premium interior. Before any structural work begins, protecting your vehicle's cabin is our absolute priority.
- Protective Drapery: We lay down heavy-duty, scratch-resistant drop cloths across the dashboard, center console, and premium leather seats.
- Steering Wheel and Shifter Covers: Specialized protective sheaths are applied to the steering wheel and gear selector to prevent accidental scratches from technician gear or glass dust.
- Exterior Masking: Automotive-grade protective tape is applied to the painted roofline surrounding the sunroof opening to safeguard the clear coat against any accidental scuffs during the extraction and installation process.
Step 2: Extensive Glass Cleanup and Shard Vacuuming
When a sunroof shatters, the tempered glass breaks into thousands of granular pieces that infiltrate the vehicle's deepest crevices. Leaving even a single shard in the mechanical tracks can cause catastrophic failure of the new sunroof motor.
- Initial Debris Removal: We carefully extract the large, remaining chunks of tempered glass still clinging to the sunroof frame.
- Industrial HEPA Vacuuming: We utilize high-powered, industrial vacuums with specialized micro-crevice tools to extract every single broken glass shard from the vehicle's interior. We meticulously vacuum the leather seat seams, the carpet, and the floor mats.
- Track and Cassette Evacuation: The most critical step is vacuuming the sunroof cassette and the drainage tracks. We use compressed air and micro-vacuums to blow out and extract hidden shards lodged in the mechanical greased channels of the W166's roof rails.
- Door Panel Inspection: If the sunroof shattered while the windows were slightly open, shards may have fallen into the window tracks. If necessary, we will remove the interior door panels and vacuum all broken glass shards from the internal door cavities to prevent future rattling.
Step 3: Removing the Overhead Components and Old Frame
With the interior secure and the glass debris cleared, we proceed to dismantle the retaining hardware holding the compromised sunroof system in place.
- Hardware Detachment: Using specialized Torx drivers, we carefully remove the accordion trim and the mechanical fasteners holding the dynamic sliding panel to the track mechanism.
- Wire Harness Disconnection: We safely disconnect the overhead control console, ensuring the rain sensors and sunroof motor wiring harnesses are securely isolated.
- Cutting the Urethane Bond (For Fixed Panoramic Panels): If the damage involves the rear fixed panel of the panoramic roof, we use advanced cold-knife technology and specialized wire-cutting systems to cleanly slice through the factory polyurethane adhesive bonding the old glass to the chassis, ensuring zero damage to the vehicle's pinch weld.
Step 4: Surface Cleaning and Track Decontamination
A perfect installation requires a biologically and chemically clean surface. The structural integrity of the new adhesive bond relies entirely on this preparation stage.
- Old Adhesive Trimming: We trim the existing factory urethane bead down to a precise 1-2 millimeter thickness, creating the perfect substrate for the new adhesive to bond with.
- Track Degreasing: The mechanical sliding tracks are completely degreased to remove old, contaminated lubricant that has been mixed with glass dust.
- Chemical Decontamination: We use an alcohol-based, lint-free cleaning solution to scrub the pinch weld, the roof perimeter, and the mounting brackets, removing all dirt, wax, and environmental contaminants.
Step 5: Primer Application and Moisture Sealing
To prevent rust and ensure the new adhesive creates a molecular bond with the vehicle, professional primer application is mandatory.
- Scratch Remediation: Any microscopic scratches on the painted pinch weld (the metal frame supporting the glass) are immediately treated with a specialized anti-corrosion primer.
- Glass Preparation: The frit band (the black ceramic border) of the new, premium replacement glass is meticulously cleaned and chemically activated.
- Urethane Primer Application: A high-performance, OEM-approved glass primer is applied to both the pinch weld and the glass perimeter. This primer acts as a chemical bridge, ensuring the adhesive bonds permanently while acting as a total barrier against moisture ingress.
Step 6: Installation Using High-Quality Adhesive and Mechanical Fastening
Setting the glass onto the 2016-2019 GLE-Class requires absolute precision to ensure zero wind noise and perfect aerodynamic alignment.
- Applying the Adhesive Bead: For bonded panels, we apply a continuous, perfectly triangulated bead of high-quality, fast-curing urethane adhesive using an advanced pneumatic caulking gun. This ensures consistent thickness and eliminates the risk of air gaps that cause water leaks.
- Precision Setting: Utilizing heavy-duty suction cups and a two-man master technician team, the new luxury sunroof glass is gently lowered into the exact factory position.
- Mechanical Alignment: For the dynamic front sliding panel, we bolt the glass into the track using the factory Torx screws. We use precise millimeter gauges to ensure the glass sits perfectly flush with the vehicle's roofline—slightly lower at the front and slightly higher at the rear—to eliminate aerodynamic whistling at highway speeds.
Step 7: Motor Initialization and Electronic Calibration
Modern Mercedes-Benz vehicles rely heavily on complex electronic control units (ECUs). Simply bolting in the glass is not enough; the vehicle's computer must learn the dimensions of the new glass.
- Reconnecting the Harnesses: All overhead console wiring is reconnected and secured to prevent rattling.
- Pinch-Protection Calibration: We perform a strict software initialization sequence. This trains the sunroof motor to recognize the closed and fully open positions. It also calibrates the anti-pinch safety sensor, ensuring the glass immediately retracts if an obstruction (like a hand or branch) is detected during closure.
- Track Lubrication: We apply genuine, specialized Mercedes-Benz synthetic track grease to the newly cleaned rails, ensuring whisper-quiet, buttery-smooth operation.
Step 8: Water Testing and Drain Tube Verification
Before handing the keys back to you, we must guarantee that your luxury vehicle is entirely impervious to the harsh Canadian weather.
- Drain Tube Clearing: We test the four critical drainage tubes located in the corners of the W166 sunroof cassette. We pour controlled amounts of water to ensure it drains safely behind the wheel wells and not into the cabin.
- Pressurized Leak Test: We run a pressurized water test over the newly installed glass, the cured high-quality adhesive, and the weatherstripping to confirm absolute structural and waterproof integrity.
Mobile Auto Glass Services Across the Greater Toronto Area (GTA)
A shattered sunroof shouldn't force you to take a day off work or pay for expensive towing. AlexWindshield brings our state-of-the-art auto glass shop directly to your location. Our premium mobile service is tailored to accommodate the busy schedules of our clients across the Greater Toronto Area (GTA).
If you are dealing with auto glass damage in Vaughan, our dispatch unit can be at your driveway with all the necessary OEM-grade materials. If you work in the bustling tech hubs of Markham, we can perform the entire A-to-Z replacement right in your corporate parking lot. For our clients in Richmond Hill, you can enjoy the comfort of your home while our master technicians painstakingly restore your Mercedes-Benz GLE-Class to factory-new condition. We handle the traffic, the logistics, and the heavy lifting, ensuring your luxury SUV is safe to drive as quickly and conveniently as possible.
Trust AlexWindshield for Your GLE-Class Sunroof Replacement
Your 2016-2019 Mercedes-Benz GLE-Class (W166) was engineered for perfection, and its auto glass service should reflect that exact standard. Do not trust your luxury vehicle's structural integrity to generalists. At AlexWindshield, we combine highly specialized master technician knowledge, the industry's finest urethane adhesives, and an uncompromising dedication to detail to deliver a sunroof replacement that rivals the original factory assembly.
We stand confidently behind our craftsmanship, which is why every replacement is backed by our comprehensive Lifetime Warranty against leaks, wind noise, and installation defects. When you demand safety, convenience, and perfection, choose the experts who know your Mercedes-Benz inside and out. Contact AlexWindshield today to schedule your mobile auto glass service anywhere in the GTA, and let us restore the skyward view in your ultimate driving machine.


