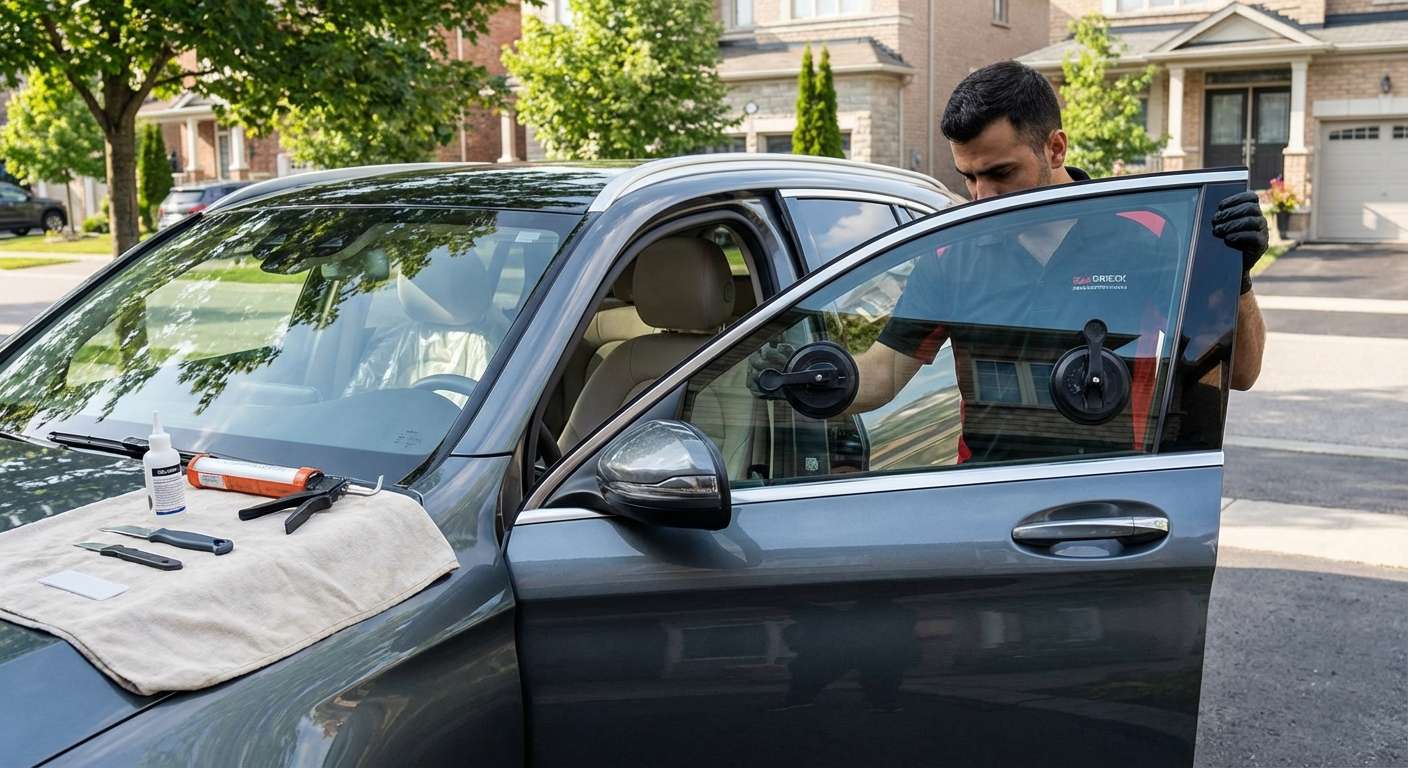
Restoring Luxury: Expert Vent Glass Replacement for the Mercedes-Benz GLC-Class 2016-2022 (X253)
The Mercedes-Benz GLC-Class (X253), commanding the roads between 2016 and 2022, seamlessly blends refined German luxury with rugged SUV versatility. Its cabin is a sanctuary of whisper-quiet acoustics, premium materials, and precise climate control. However, when the delicate yet essential vent glass is shattered—whether by an unfortunate break-in or a stray piece of highway debris—that meticulously engineered environment is instantly compromised. As a master technician, I understand that replacing the vent glass on a luxury vehicle like the GLC-Class is not a simple patch job; it requires a deep understanding of Mercedes-Benz architecture, exacting precision, and premium materials.
At AlexWindshield, we specialize in bringing top-tier, dealership-level auto glass solutions directly to your doorstep. A broken vent window exposes your premium leather interior to unpredictable weather, invites security risks, and creates unbearable wind noise at highway speeds. Leaving it compromised is simply not an option for a vehicle of this caliber.
Mobile Auto Glass Excellence Across the Greater Toronto Area (GTA)
We know that your time is valuable, and driving a Mercedes-Benz GLC with a shattered window to a repair shop is both unsafe and inconvenient. That is exactly why our fully equipped mobile service fleet travels across the Greater Toronto Area (GTA) to perform professional replacements on-site. Whether you are parked at a corporate office in Markham, running errands near the shopping districts of Vaughan, or safely parked in your residential driveway in Richmond Hill, our master technicians bring the shop to you. We arrive with all the specialized tools, OEM-quality glass, and premium adhesives required to execute a flawless repair without disrupting your day.
Why OEM-Quality Matters for Your X253 Vent Glass
The vent glass on the 2016-2022 GLC-Class is more than just a piece of glass; it is a structural component of the door assembly that contributes to the vehicle's aerodynamic profile and cabin soundproofing. Utilizing substandard aftermarket glass can lead to mismatched factory window tint, improper curvature, and compromised acoustic insulation. We source only the highest quality replacement vent glass that perfectly matches the strict specifications of your Mercedes-Benz X253. This ensures that the aesthetic continuity, structural integrity, and luxury feel of your SUV are completely restored.
The Technical A-Z: Our Step-by-Step Vent Glass Replacement Process
As a senior master technician, I approach every vent glass replacement with a strict adherence to industry best practices and Mercedes-Benz technical guidelines. Because a vent window is a side-door glass component, a shattered pane requires extensive interior disassembly and rigorous safety protocols. Here is our comprehensive, step-by-step methodology:
Step 1: Comprehensive Damage Assessment and Interior Protection
Before any tools are lifted, we secure the vehicle's interior. The cabin of a GLC-Class features high-end materials like MB-Tex or genuine Nappa leather, open-pore wood trims, and delicate aluminum accents. We lay down heavy-duty protective drop cloths over the seats, center console, and floor mats. We also apply specialized automotive masking tape around the exterior door frame to protect the vehicle’s clear coat and paint from accidental scratches during the extraction and installation phases.
Step 2: Expert Removal of Interior Door Panels and Trim
To access the mounting points of the vent glass and clean out the debris, the interior door panel must be carefully removed. Mercedes-Benz utilizes highly engineered fastening systems, hidden Torx screws, and robust retaining clips. Using specialized non-marring nylon pry tools, we delicately detach the door trim, taking exceptional care not to damage the ambient lighting strips, Burmester speaker grilles, or window control modules. Once the electronic wiring harnesses are safely disconnected, the door panel is set aside in a secure location.
Step 3: Extensive Glass Shard Cleanup and Vacuuming
Vent glass is crafted from tempered safety glass, meaning that upon impact, it violently shatters into thousands of tiny, pebble-like shards. These dangerous shards inevitably fall into the deep cavities of the vehicle door shell, the tracks of the primary roll-down window, and across the interior cabin. Leaving even a few pieces behind will cause an infuriating rattling noise whenever you drive or close the door, and it can eventually jam the main window regulator mechanism. We deploy high-powered, industrial HEPA vacuums equipped with specialized micro-crevice tools to meticulously extract every single shard of broken glass from the inner door shell, the window tracks, the interior carpets, and the seat crevices.
Step 4: Removal of the Old Glass Frame and Residual Urethane
Depending on the specific positioning (front or rear door vent glass), the glass is often encapsulated and secured by both physical bolts and industrial polyurethane adhesive. We first remove any retaining bolts and carefully extract the weather-stripping and rubber run-channels. If the glass is urethane-bonded to the pinch weld, we utilize a precision cold knife or a specialized wire-cutting system to slice through the old, hardened adhesive. The shattered glass and its mounting frame are then fully extracted from the vehicle.
Step 5: Surface Preparation and Primer Application
A flawless installation heavily depends on the preparation of the bonding surface. We carefully trim the existing urethane bead down to a uniform 1-2 millimeters, ensuring a flat base for the new adhesive. The exposed pinch weld is then thoroughly cleaned using a specialized, alcohol-based glass and surface cleaner to remove all dirt, grease, and microscopic contaminants. Next, we apply a high-quality automotive-grade primer to any areas of bare metal. This crucial step not only promotes an unbreakable chemical bond between the adhesive and the vehicle frame but also acts as an aggressive rust inhibitor, protecting your GLC's frame for years to come.
Step 6: Precision Installation Using High-Quality Adhesive
With the surface primed and ready, we prepare the new OEM-quality vent glass. The mounting surface of the new glass is treated with a specialized glass activator. We then apply a perfectly uniform, triangular V-bead of premium, fast-curing polyurethane adhesive around the perimeter of the bonding area. This high-grade adhesive is engineered to meet or exceed OEM safety standards, offering incredible tensile strength and rapid safe-drive-away times. The new vent glass is carefully guided into the door frame, aligned with millimeter precision to ensure a perfect, flush fit with the surrounding body lines. We firmly press the glass into the adhesive, establishing an airtight, watertight seal that eliminates any risk of highway wind noise or water leaks.
Step 7: Reassembly of Door Components and Final Inspection
Once the vent glass is permanently secured, we reverse the disassembly process. The weather-stripping and window run-channels are reinstalled. We then meticulously reattach the interior door panel, ensuring every electronic harness for the ambient lighting, speakers, and window switches is securely reconnected. Every hidden Torx screw is torqued to factory specifications, and fresh retaining clips are used if necessary to guarantee the panel sits perfectly tight without any squeaks. We then perform a final functionality test, rolling the primary door window up and down to ensure the tracks are completely clear of debris and moving smoothly. A final polish of the new vent glass using ammonia-free cleaner leaves your Mercedes-Benz looking showroom ready.
The Importance of Professional Execution
Attempting a DIY repair or trusting an uncertified shop with your 2016-2022 Mercedes-Benz GLC-Class can result in disastrous consequences. Improperly bonded vent glass can unexpectedly detach at highway speeds, allow rainwater to short-circuit sensitive door electronics, or cause premature rust in the vehicle's door shell due to a lack of proper priming. By utilizing specialized technicians who understand the intricate anatomy of German luxury vehicles, you safeguard your investment and your safety.
Choose AlexWindshield for Unmatched Auto Glass Expertise
Your Mercedes-Benz deserves nothing less than perfection. At AlexWindshield, we pride ourselves on delivering an elite, hassle-free customer experience tailored to the high standards of luxury vehicle owners. Our comprehensive mobile services ensure that whether you are at home in Vaughan, at your workplace in Markham, or visiting family in Richmond Hill, the ultimate auto glass solution is always just a phone call away.
We stand confidently behind our craftsmanship, which is why every installation we perform is backed by our comprehensive Lifetime Warranty. This warranty guarantees that your newly installed vent glass will be entirely free from manufacturer defects, air leaks, and water leaks for as long as you own your vehicle. Trust the senior master technicians at AlexWindshield to restore the security, silence, and sophisticated beauty of your Mercedes-Benz GLC-Class today.


