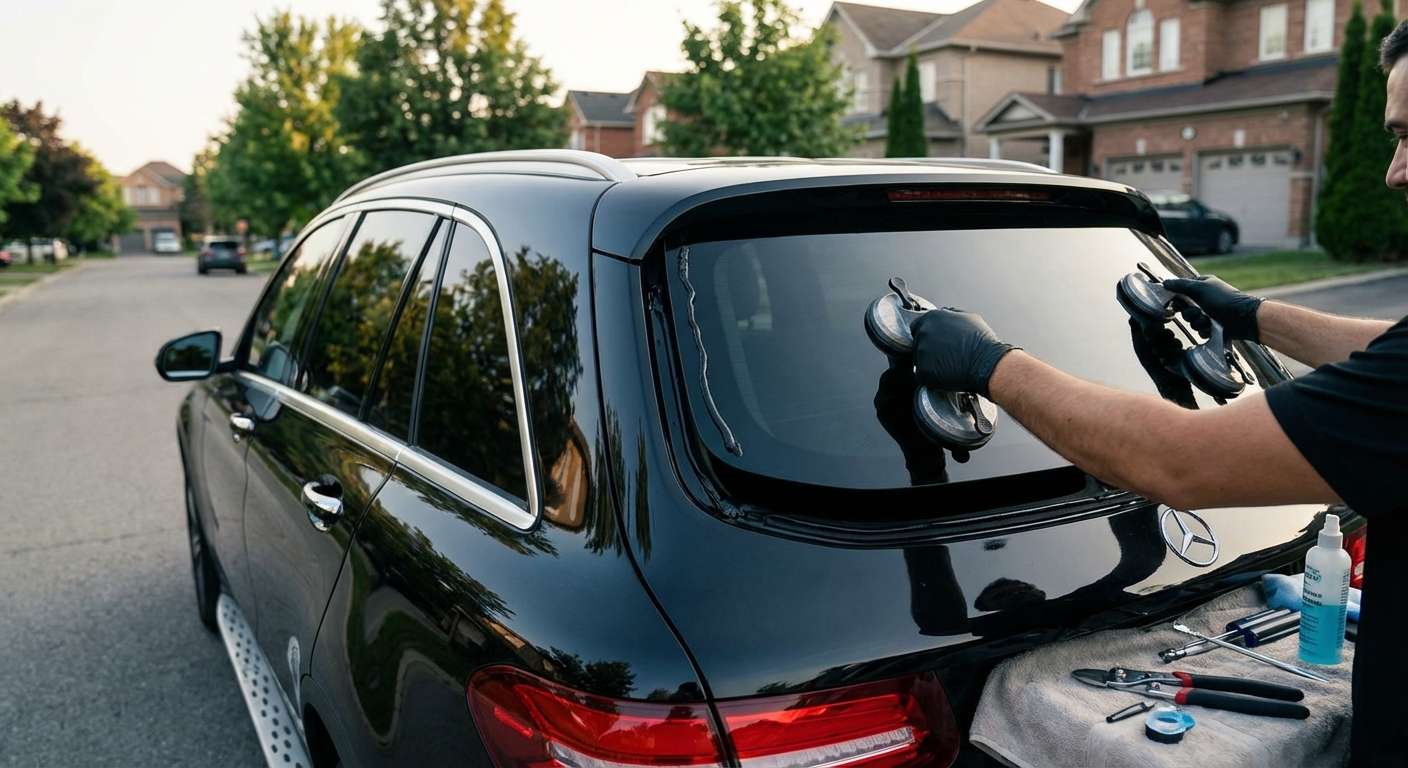
Restoring the Elegance of Your Mercedes-Benz GLC-Class 2016-2022 (X253)
The Mercedes-Benz GLC-Class 2016-2022 (X253) redefined the compact luxury crossover segment with its aerodynamic contours, whisper-quiet cabin, and state-of-the-art integrated technology. However, when the back glass of your luxury SUV shatters, that pristine sanctuary is instantly compromised. Unlike a standard windshield that cracks and stays intact, tempered rear glass is designed to explode into thousands of tiny, blunt pebbles upon impact. This leaves your luxurious interior exposed to the elements, compromises the security of your vehicle, and disables crucial features like the rear defroster and integrated antenna systems. When facing such a stressful situation, you need a Master Technician who understands the intricate engineering of German luxury vehicles.
Expert Auto Glass Service Across the Greater Toronto Area (GTA)
Driving a premium vehicle with a shattered rear window is not just a safety hazard; it is a major inconvenience. At AlexWindshield, we bring top-tier, dealership-level expertise directly to your doorstep. Our premium mobile auto glass replacement services are available throughout the Greater Toronto Area (GTA). Whether you are parked at your home in Vaughan, at your office in Richmond Hill, or running errands in Markham, our fully equipped mobile service vehicles arrive with everything needed to execute a flawless, permanent back glass replacement on your Mercedes-Benz GLC-Class.
Understanding the X253 GLC-Class Rear Glass Complexity
Replacing the back glass on a Mercedes-Benz is never a simple "slap and glue" job. The rear liftgate window of the 2016-2022 GLC-Class is a highly engineered component. It features factory-matched deep privacy tint to protect your cabin from UV rays, integrated defogger thermal lines for harsh Canadian winters, and embedded radio/GPS antenna connections. As a Master Technician, I ensure that the replacement glass meets strict Original Equipment Equivalent (OEE) or Original Equipment Manufacturer (OEM) standards, ensuring that every electrical connection and curvature aligns perfectly with your vehicle's factory specifications.
Our Master Technician A-to-Z Replacement Process
Precision is paramount when working on the X253 chassis. Below is the comprehensive, step-by-step technical process we follow at AlexWindshield to ensure your Mercedes-Benz is restored to perfection.
Step 1: Complete Vehicle Protection and Meticulous Glass Cleanup
Because the rear glass is tempered, a break results in thousands of glass shards scattering throughout your cargo area, rear seats, and deep inside the mechanical crevices of the tailgate. Before any installation begins, preparation and cleanup are our primary focus.
- Interior Protection: We begin by laying down heavy-duty protective drop cloths over your premium leather rear seats, center console, and trunk carpet to prevent any accidental scratches.
- Exterior Taping: We apply automotive-grade protective tape along the painted edges of the power liftgate to protect the Mercedes-Benz clear coat during the extraction process.
- Tailgate Panel Removal: To do the job right, we carefully unclip and remove the interior plastic trim panels of the rear liftgate. Glass shards inevitably fall down into the tailgate cavity, which can later cause annoying rattles or jam the automatic trunk latch mechanism.
- Deep Vacuuming: Using high-powered industrial shop vacuums, we extract every single shard of broken glass from the trunk lining, the folded rear seats, and the exposed internal cavity of the tailgate door. We do not leave a single piece of broken glass behind.
Step 2: Disconnection of Integrated Electronics
With the area safely cleared of debris, we focus on the electrical components attached to the remnants of the old glass.
- Defroster Grid: We carefully detach the electrical terminal connectors that power the rear heated window grid, ensuring the wiring harness is not stretched or damaged.
- Antenna Modules: We disconnect the integrated FM/AM and GPS antenna lines that run seamlessly through the factory glass, securing the delicate wiring out of the way for the extraction.
Step 3: Precision Removal of the Old Glass and Urethane
Even though the center of the glass has shattered, the outer perimeter of the glass remains bonded to the vehicle's frame by an incredibly strong factory polyurethane adhesive.
- Urethane Cutting: We utilize advanced wire-cutting systems and specialized cold knives to carefully slice through the original bead of polyurethane. This modern technique ensures zero stress is placed on the aluminum and steel components of your liftgate.
- Fragment Extraction: Once the adhesive bond is broken, we safely lift away the remaining ring of shattered glass that is stuck to the frame, disposing of it in our secure recycling bins.
Step 4: Pinch Weld Preparation and Surface Cleaning
The structural integrity of your new back glass relies entirely on the chemical bond between the new glass, the adhesive, and the vehicle's frame (the pinch weld). Preparation here is non-negotiable.
- Trimming the Bead: We precisely trim the existing old polyurethane down to a thin, uniform base layer of 1 to 2 millimeters. This provides the ideal foundational substrate for the new adhesive to grip.
- Surface Decontamination: We meticulously clean the pinch weld with a specialized, alcohol-based pre-cleaner to remove all dust, dirt, and microscopic moisture that could compromise the seal.
- Applying the Primer: We apply an advanced, fast-drying active glass primer to any bare metal spots on the frame to completely rust-proof the area. We also apply a specialized frit primer to the black ceramic band of the new replacement glass to promote a flawless chemical cross-linking bond with the new urethane.
Step 5: High-Quality Adhesive Application and Glass Installation
The installation phase requires a steady hand, premium materials, and an exact understanding of Mercedes-Benz structural tolerances.
- High-Modulus Urethane: We apply a continuous, precise V-bead of premium, High-Modulus, Non-Conductive (HMNC) auto glass adhesive around the perimeter of the liftgate. This specific type of urethane is mandatory for modern luxury vehicles to prevent electrical interference with the glass antennas and to maintain the rigid structural integrity of the roofline.
- Setting the Glass: Using heavy-duty suction cups, we carefully lift the new, primed back glass into position. It is gently pressed into the urethane bead, ensuring the exact depth and alignment are achieved so that the glass sits perfectly flush with the aerodynamic lines of your GLC-Class.
- Securing Placement: We use specialized retention tape to hold the glass firmly in place while the chemical curing process begins, preventing any micro-shifting.
Step 6: Reassembly, Reconnection, and Final Inspection
The final step is putting your sanctuary back together and ensuring every technological feature functions exactly as it did before the damage occurred.
- Reconnecting Electronics: We plug the factory wiring harnesses back into the new rear defroster tabs and antenna terminals, testing the connections to guarantee optimal conductivity.
- Reinstalling Trim Panels: We carefully reassemble the interior liftgate panels, snapping every factory clip back into its rightful place to ensure a tight, factory-fresh fit with zero squeaks or rattles.
- Secondary Vacuum and Polish: We perform a final, meticulous sweep with the vacuum to ensure the cabin is immaculate. Finally, we clean the new back glass with streak-free, ammonia-free glass cleaner to deliver a crystal-clear finish.
The Importance of Safe Drive-Away Time (SDAT)
At AlexWindshield, your safety is our ultimate priority. After the installation is complete, we strictly adhere to the manufacturer's Safe Drive-Away Time (SDAT) for the urethane adhesive. Because we use rapid-curing, high-quality sealants, your Mercedes-Benz GLC-Class will be safe to drive shortly after the installation is complete. This advanced adhesive ensures that, in the event of an accident, the rear glass will not blow out, maintaining the structural crush-resistance of your vehicle's cabin.
Trust AlexWindshield for Unmatched Quality and Convenience
Replacing the back glass on a sophisticated luxury vehicle like the Mercedes-Benz GLC-Class (X253) demands a level of precision, cleanliness, and technical knowledge that standard glass shops simply cannot provide. You need a team that respects the engineering of your vehicle and values your time.
Whether you need emergency cleanup and replacement in Vaughan, a scheduled appointment at your workplace in Richmond Hill, or a weekend repair at your home in Markham, AlexWindshield is your premier choice for mobile auto glass solutions across the GTA. We eliminate the hassle of waiting in a dingy repair shop by bringing our master-level service directly to you.
Don't let a shattered rear window compromise the safety, security, and beauty of your Mercedes-Benz. Choose the local experts who guarantee their craftsmanship. Contact AlexWindshield today to experience seamless, professional mobile auto glass replacement backed by our industry-leading Lifetime Warranty against leaks, wind noise, and workmanship defects. Let us restore your luxury vehicle to its pristine, factory condition so you can get back on the road with complete peace of mind.


