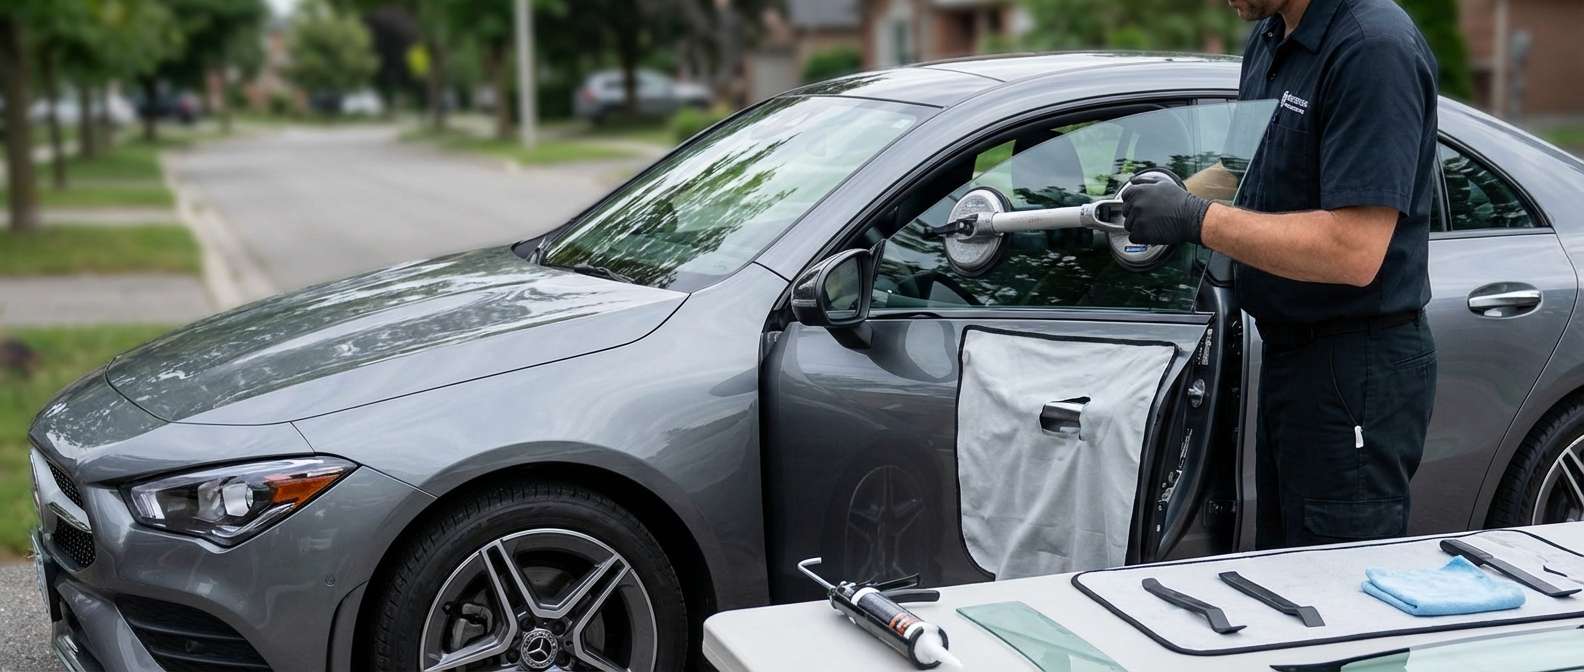
Restoring the Sleek Profile of Your Luxury Coupe: Mercedes-Benz CLA-Class Vent Glass Replacement
The 2020-2027 Mercedes-Benz CLA-Class commands attention on every road with its aggressive shark-nose fascia, sweeping coupe-like roofline, and signature frameless doors. This aerodynamic masterpiece relies on seamless transitions between metal and glass to maintain its whisper-quiet cabin and striking aesthetic. However, that elegant profile is instantly compromised the moment your vent glass is shattered by road debris, severe weather, or an attempted break-in. Unlike standard sedans, the intricate architecture of the CLA’s door and quarter panel assemblies makes vent glass replacement a highly specialized task that demands the precision of a master technician.
At AlexWindshield, we understand that your luxury vehicle requires more than just a quick fix; it requires meticulous care, OEM-quality materials, and flawless execution. Driving with a broken vent glass not only exposes your premium interior to the harsh Canadian elements but also creates an immediate security risk and ruins the structural aerodynamics of your vehicle. As the leading experts in luxury auto glass, we are here to provide an unparalleled replacement experience tailored specifically for the Mercedes-Benz CLA-Class 2020-2027.
Why Choose AlexWindshield for Your Mercedes-Benz Auto Glass Needs?
When dealing with a highly engineered German luxury vehicle, generic auto glass shops often fall short. The frameless door design and complex electronic sensors embedded within the door panels of the CLA-Class require a technician who understands Mercedes-Benz engineering inside and out. AlexWindshield combines decades of hands-on expertise with state-of-the-art tools to deliver absolute perfection.
Furthermore, we know that your time is incredibly valuable. That is why we offer comprehensive mobile auto glass services across the entire Greater Toronto Area (GTA). Whether you are parked at your corporate office in Markham, relaxing at your home in Vaughan, or visiting a shopping center in Richmond Hill, our fully equipped mobile service fleet brings the auto glass shop directly to you. We guarantee a seamless, weather-tight installation without you ever having to disrupt your busy schedule.
The A-Z Vent Glass Replacement Process for the 2020-2027 CLA-Class
As a Master Technician, I cannot stress enough the importance of following a strict, step-by-step protocol when replacing the vent glass on a modern Mercedes-Benz. A single misstep can lead to wind noise, water leaks, or damage to the interior trim. Here is our detailed, uncompromising process for restoring your CLA-Class.
Step 1: Comprehensive Damage Assessment and Interior Protection
Before any tools are lifted, we begin with a thorough inspection of the damage. Because vent glass is typically made of tempered glass, it shatters into thousands of tiny, sharp cubes upon impact. Our first priority is to protect your vehicle's luxurious interior.
- We lay down heavy-duty protective drop cloths over the premium synthetic leather or MB-Tex upholstery.
- The center console, steering wheel, and floor mats are covered to prevent any accidental scratches.
- We apply specialized automotive masking tape around the exterior window frame to protect the vehicle's high-gloss paint and delicate chrome or black-optic trim pieces.
Step 2: Careful Removal of Door Panels and Trim Components
To properly install a new vent glass and clear out the debris, accessing the internal cavity of the door is mandatory. The 2020-2027 CLA-Class features complex interior door panels housing ambient lighting wiring, window switches, and premium audio speakers.
- Using specialized non-marring nylon trim tools, we carefully unclip the decorative trim pieces and locate the hidden Torx screws securing the door panel.
- We gently pry the door card away from the frame, ensuring none of the plastic retaining clips are broken.
- The electrical connectors for the ambient lighting, speaker system, and door locks are safely decoupled.
- The moisture barrier (vapor deflector) is meticulously peeled back, ensuring the butyl adhesive remains intact for a perfect reseal later.
Step 3: Complete Broken Glass Extraction
When a vent glass breaks, gravity pulls hundreds of glass shards down into the door cavity. If left inside, these shards will rattle every time you close the door and can get caught in the window regulator track, causing catastrophic damage to the main window mechanism.
- We utilize high-powered, industrial-grade shop vacuums equipped with specialized micro-nozzles to reach deep into the absolute bottom of the door shell.
- We thoroughly vacuum the main window tracks, the window regulator gears, and the inner door seams to extract every single piece of shattered glass.
- The entire passenger cabin, including the seats, carpets, and crevices between the cushions, is meticulously vacuumed to ensure your absolute safety and comfort.
Step 4: Frame Preparation and Surface Cleaning
With the old glass completely cleared out and the frame exposed, preparation is the key to a watertight seal.
- We remove any remaining chunks of original urethane adhesive from the pinch weld using a specialized oscillating cold knife, shaving it down to a thin, even layer of 1-2 millimeters.
- The exposed metal and the surrounding window channel are cleaned with an alcohol-based, industry-grade surface cleaner to remove dust, dirt, and oily residues.
- If the pinch weld has any bare metal exposed from the removal process, we apply an anti-corrosion primer to prevent future rust from forming inside your door frame.
Step 5: Glass Preparation and Primer Application
At AlexWindshield, we only use OEM-equivalent or genuine Mercedes-Benz vent glass to ensure a perfect color match, acoustic dampening, and precise curvature.
- The new vent glass is aggressively cleaned using a lint-free cloth and glass prep solvent.
- We apply a specialized glass primer (also known as a frit primer) to the bonding edge of the new glass. This chemical promoter alters the molecular surface of the glass, allowing the urethane adhesive to bond with maximum tensile strength.
- The primer is allowed to flash (dry) for the exact manufacturer-specified time to ensure optimal chemical cross-linking.
Step 6: High-Quality Urethane Adhesive Application
The adhesive is the only thing holding your vent glass in place against high winds and structural flex. We never cut corners on our bonding agents.
- We load a high-viscosity, fast-curing automotive urethane adhesive into an electric caulking gun.
- A uniform, continuous V-bead of urethane is meticulously applied around the perimeter of the vent glass mounting frame. The height and width of this bead are carefully controlled to prevent any messy squeeze-out while guaranteeing a flawless, watertight seal.
Step 7: Precision Installation of the New Vent Glass
With the adhesive laid down, the window of opportunity is short. The installation requires a steady hand and perfect alignment.
- Using heavy-duty suction cups, the new vent glass is guided perfectly into the vehicle's frame.
- We apply gentle, even pressure around the edges to compress the urethane bead, ensuring it makes full contact with both the pinch weld and the glass frit.
- Specialized retention tape is applied to hold the glass firmly in place and prevent any micro-shifting while the urethane goes through its initial chemical cure.
Step 8: Reassembly and Final Quality Inspection
Once the glass is locked into position, we reverse the disassembly process with the utmost care.
- The moisture barrier is perfectly resealed to prevent any future water ingress into the cabin.
- All electronic connectors for the ambient lighting, window switches, and speakers are reconnected and tested for full functionality.
- The interior door panel is carefully aligned and snapped back into place, and all Torx screws and cosmetic trim pieces are secured.
- We perform a final, comprehensive clean of the new glass using premium, streak-free glass cleaner and conduct a rigorous quality assurance check to ensure the frameless window seal aligns perfectly with the newly installed vent glass.
Unmatched Convenience: Mobile Auto Glass Services Across the GTA
Dealing with shattered auto glass is stressful enough; getting it repaired shouldn't be. AlexWindshield is proud to offer top-tier mobile auto glass services specifically designed for the busy lives of our clients across the Greater Toronto Area (GTA).
We understand that a broken vent glass leaves your luxury vehicle vulnerable. That is why our mobile dispatch units are fully equipped with all the premium tools, glass inventory, and weather-shielding equipment necessary to perform a flawless installation right in your driveway or parking lot. Whether you are commuting through Vaughan, enjoying a weekend at home in Richmond Hill, or working out of a commercial complex in Markham, our expert technicians will arrive promptly, secure your vehicle, and execute the replacement with dealership-level precision. You save time, avoid the hassle of towing or driving a compromised vehicle, and get back on the road safely and quickly.
Book Your CLA-Class Vent Glass Replacement Today
Your Mercedes-Benz CLA-Class was engineered for excellence, and it deserves a replacement service that reflects that same standard. Do not trust your luxury vehicle to just anyone. Our rigorous attention to detail, from meticulously vacuuming out every broken shard to applying high-grade urethane, ensures that your car is returned to you in pristine, factory-fresh condition.
When you choose AlexWindshield, you are choosing the most trusted expert for auto glass in the Greater Toronto Area (GTA). We stand proudly behind our craftsmanship, which is why every single vent glass replacement we perform comes backed by our comprehensive Lifetime Warranty against leaks, wind noise, and workmanship defects. Protect your investment, restore your peace of mind, and experience the ultimate in mobile automotive glass repair. Contact AlexWindshield today to schedule your 2020-2027 Mercedes-Benz CLA-Class vent glass replacement!


