Restoring the Avant-Garde Elegance: Land Rover Range Rover Velar (2018-2027) Back Glass Replacement
The Land Rover Range Rover Velar, spanning the 2018 to 2027 model years, is a masterclass in reductive design and British automotive engineering. With its flush deployable door handles, sweeping roofline, and distinctively elegant rear profile, the Velar is engineered to turn heads while delivering uncompromising luxury. However, when the rear glass is shattered—whether due to a severe temperature fluctuation, a rogue projectile on the highway, or an unexpected impact—that flawless aesthetic is instantly compromised. Beyond the visual disruption, a broken back glass exposes your luxury SUV’s premium interior to the elements, creates a significant security vulnerability, and disables vital rear visibility and defrosting functions. When dealing with a vehicle of this caliber, generic repair methods simply will not suffice.
As a Master Technician at AlexWindshield, I understand that executing a Range Rover Velar back glass replacement requires a meticulous, manufacturer-approved approach. The rear tailgate of the Velar houses complex integrated technologies, including the rear wiper assembly, intricate defrost grids, and advanced antenna systems. Restoring your SUV to its original factory condition demands specialized tools, premium materials, and an unwavering attention to detail.
Why the Range Rover Velar Requires Specialized Auto Glass Expertise
Unlike standard windshields which are typically made from laminated glass, the back glass of your Range Rover Velar is constructed from high-strength tempered glass. By design, tempered glass is manufactured to shatter into thousands of small, granular, pebble-like pieces upon impact, rather than breaking into dangerous, jagged shards. While this is an essential safety feature to protect passengers, it creates a highly complex cleanup and replacement process. Furthermore, the 2018-2027 Velar models feature seamlessly integrated tailgate designs where the glass fits perfectly flush with the rear spoiler and body panels to optimize aerodynamics.
Attempting a subpar replacement can lead to wind noise, severe water leaks, rattling glass shards trapped inside the tailgate cavity, and malfunctioning rear defrosters. At AlexWindshield, our senior technicians utilize advanced diagnostics and premium OEM-quality replacement glass to ensure every function operates flawlessly post-installation.
Our Master Technician A-to-Z Back Glass Replacement Process
To ensure your Range Rover Velar is returned to you in pristine condition, we adhere to a strict, multi-stage installation protocol. Here is the detailed, step-by-step process we execute for every back glass replacement.
Step 1: Comprehensive Pre-Inspection and Interior Protection
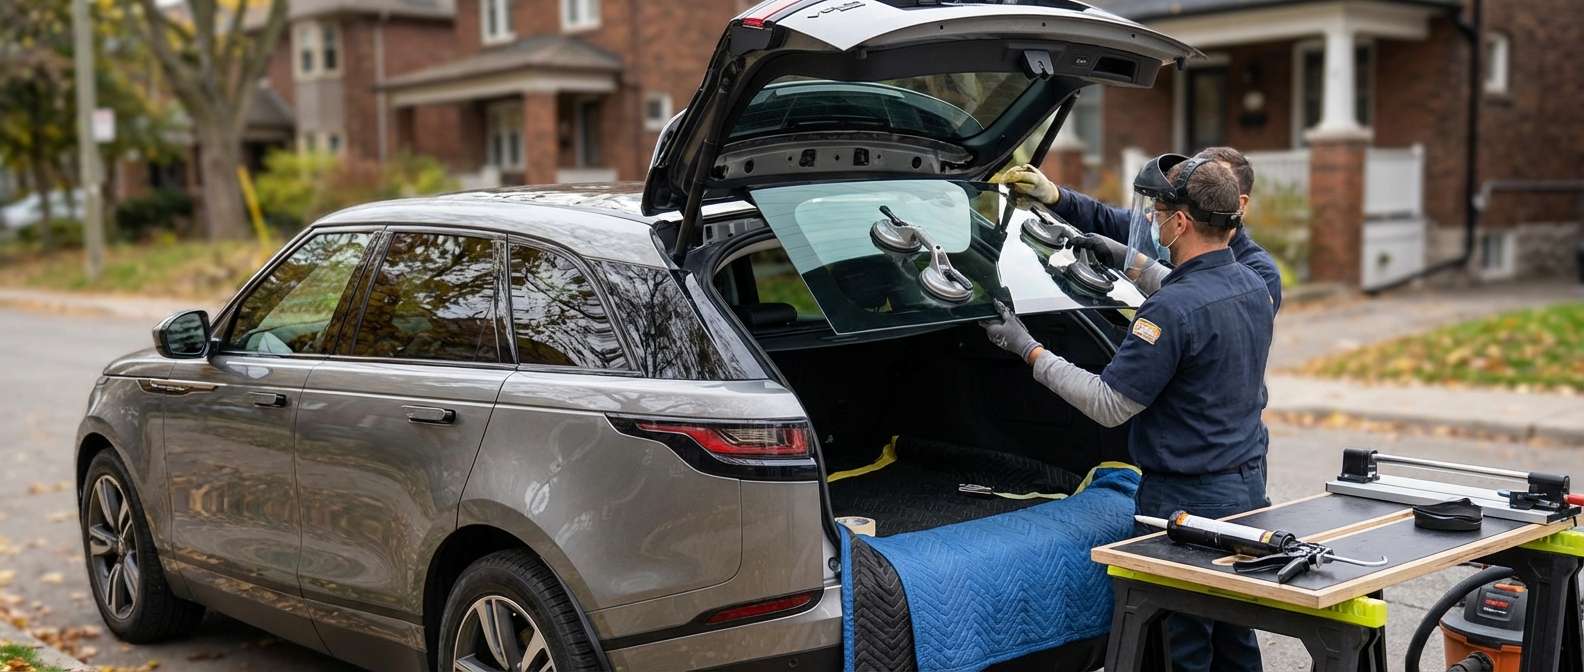
Before any physical work begins, we conduct a thorough pre-inspection of the tailgate, rear spoiler, and surrounding bodywork to assess the extent of the damage. We document any existing scratches on the paint to ensure complete transparency. Next, we meticulously protect the luxury interior of your Velar. We drape heavy-duty protective blankets over the rear cargo area, back seats, and exterior bumper. We also apply automotive-grade masking tape around the perimeter of the tailgate's exterior to shield the Velar’s flawless paint from accidental tool contact during the extraction process.
Step 2: Careful Removal of Tailgate Trims and Rear Wiper Assembly
To access the bonding area and properly clean out the shattered glass, we must disassemble the interior components of the tailgate. Using specialized, non-marring nylon pry tools, we carefully remove the interior tailgate trim panels, ensuring the fragile retaining clips are not damaged. We then carefully unbolt and extract the rear wiper arm and motor assembly. All electrical connections—including the defrost grid terminals and any integrated antenna wiring—are safely disconnected and secured out of the way.
Step 3: Meticulous Vacuuming and Glass Shard Removal
Because the back glass is tempered, thousands of glass granules inevitably fall into the interior of the cargo area and down inside the hollow cavity of the tailgate door itself. This is a critical step that cannot be rushed. Using high-powered industrial shop vacuums fitted with specialized micro-crevice tools, we extract every visible piece of broken glass from the cargo bay, carpets, and seating folds. More importantly, we vacuum deep inside the exposed tailgate panel cavity. Failing to remove these hidden shards would result in a highly irritating rattling noise every time you open the hatch or drive over a bump. We guarantee a completely shard-free environment.
Step 4: Extracting the Damaged Glass and Old Urethane
Once the area is clean and safely prepped, we move on to the extraction phase. If the glass is fully shattered, we clear away the remaining attached chunks from the perimeter. Using a specialized cold knife and an advanced wire cutting system, we carefully slice through the original, hardened urethane adhesive that bonds the glass to the vehicle’s pinch weld. We systematically work our way around the entire frame until the channel is completely freed of the old glass frame.
Step 5: Pinch Weld Preparation and Primer Application
A new piece of glass is only as strong as the bond that holds it. We carefully trim down the remaining old urethane on the pinch weld to a thin, uniform base of approximately 1-2 millimeters, creating the perfect foundation for the new adhesive. The channel is then thoroughly cleaned with specialized chemical agents to remove any dirt, moisture, or grease. If any bare metal is exposed during the cutting process, we apply a high-quality, anti-corrosive auto glass primer. This critical step prevents future rust formation and ensures a molecular bond between the vehicle frame and the new urethane.
Step 6: Premium Adhesive Application and Precision Glass Installation
With the frame prepped, we prepare the new OEM-quality back glass. The interior bonding edge of the new glass is treated with a specialized glass prep and primer. We then apply a precise, continuous V-bead of advanced, fast-curing automotive urethane adhesive directly onto the pinch weld using an electric caulking gun. Using heavy-duty suction cups, two of our technicians carefully align the new back glass, hovering it precisely over the tailgate opening before setting it down. The glass is gently but firmly pressed into the urethane bed to ensure a perfect, watertight, and airtight seal that aligns flawlessly with the Velar’s exterior bodylines.
Step 7: Reassembly, Curing, and Final Testing
While the advanced urethane begins its curing process to meet the strict Safe Drive Away Time (SDAT), we begin reassembly. The rear wiper motor and arm are reinstalled and torqued to factory specifications. The defrost grid connectors and antenna wires are securely reattached. Next, we carefully snap the interior tailgate trim panels back into their original positions. Finally, we conduct a rigorous quality assurance test. We test the rear wiper functionality, verify the continuity of the defrosting grid, and perform a final cleanup of the vehicle, applying a streak-free glass cleaner to the newly installed back glass.
Premium Mobile Auto Glass Services Across the Greater Toronto Area (GTA)
Driving a luxury vehicle with a shattered back window is not only dangerous, but it also leaves your high-end SUV vulnerable to theft and weather damage. We understand that your time is incredibly valuable, which is why we bring our master-level services directly to your doorstep. We proudly offer premium, fully equipped mobile auto glass services across the Greater Toronto Area (GTA).
Whether you are parked at your home driveway in the scenic neighborhoods of Vaughan, at your corporate office in the bustling business sectors of Richmond Hill, or out running errands in the vibrant communities of Markham, our mobile fleet is ready to deploy. We bring the exact same high-tech equipment, premium glass, and climate-controlled adhesives that we use in-shop directly to your location in the GTA, ensuring your 2018-2027 Range Rover Velar receives dealership-level care without the inconvenience of a dealership waiting room.
The AlexWindshield Advantage: Unmatched Quality and a Lifetime Warranty
Your Land Rover Range Rover Velar is an investment in unparalleled luxury and performance, and it deserves to be treated by specialized experts who respect its engineering. By choosing our dedicated team, you are opting for absolute precision, uncompromised safety, and an esthetically perfect finish.
At AlexWindshield, we are deeply committed to setting the highest standard for auto glass replacement in the industry. As the most trusted expert for mobile auto glass services in the GTA, we stand firmly behind the caliber of our workmanship and the quality of our materials. That is why every single back glass replacement we perform is backed by our comprehensive Lifetime Warranty. This industry-leading guarantee covers you against any air leaks, water leaks, or manufacturer defects for as long as you own your Velar. Trust AlexWindshield to restore your vehicle’s safety, security, and avant-garde beauty with master craftsmanship you can rely on.


