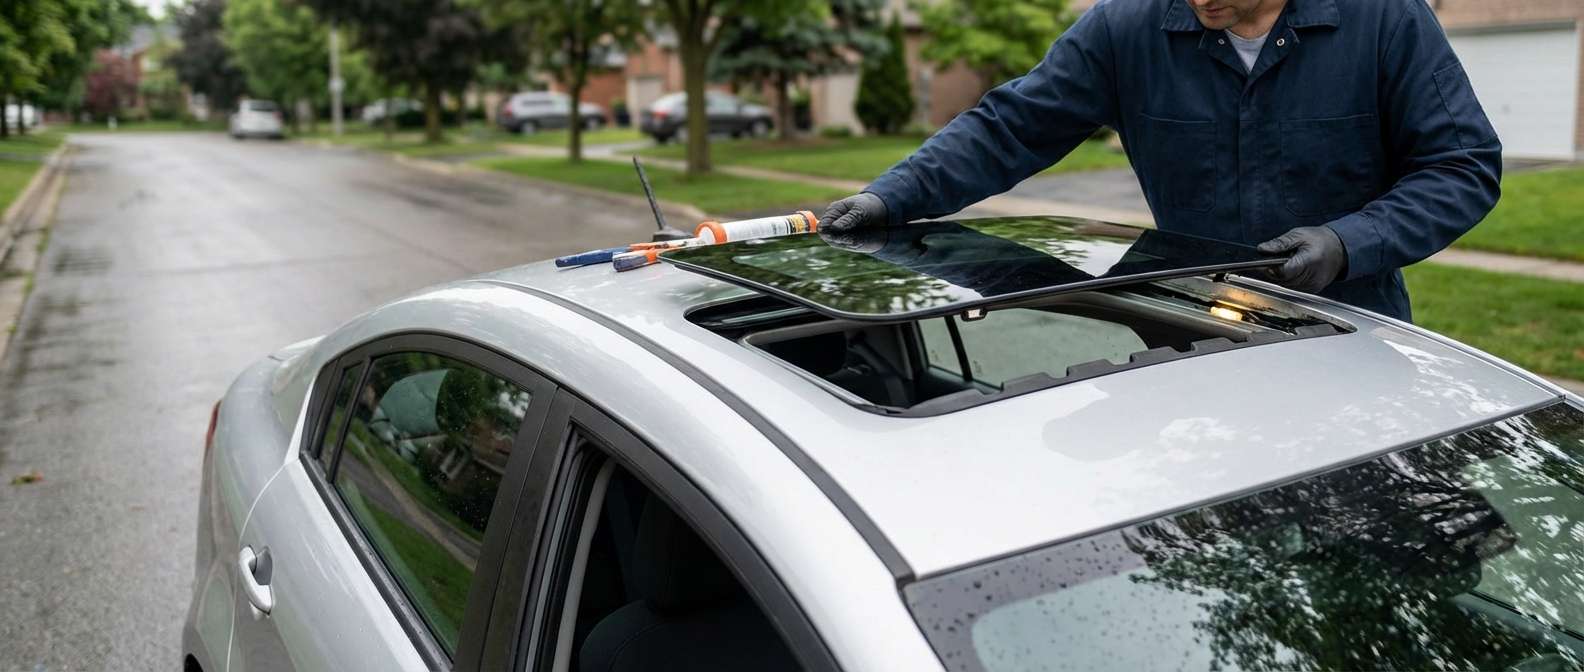
Expert Sunroof Replacement for the Kia Rio (2012-2017)
The third-generation Kia Rio (2012-2017) revolutionized the subcompact segment with its European-inspired styling, sprightly driving dynamics, and premium cabin features—most notably, its available power sunroof that floods the interior with natural light. However, when a rogue rock on the highway or a severe Canadian temperature swing causes that tempered overhead glass to shatter, your sleek commute suddenly turns into a breezy, noisy, and potentially wet nightmare. Because sunroof glass is tempered, it doesn't just crack; it explodes into thousands of pebble-like shards that rain down into your vehicle's cabin, tracks, and headliner.
When disaster strikes from above, you need a specialized solution. At AlexWindshield, we are the premier auto glass experts dedicated to restoring your vehicle's safety, comfort, and structural integrity. As a Master Technician, I have personally overseen countless sunroof replacements, and I know exactly what the 2012-2017 Kia Rio requires to get back on the road in pristine condition.
Why the 2012-2017 Kia Rio Requires Specialized Sunroof Service
The sunroof assembly on the 2012 to 2017 Kia Rio is a beautifully engineered but complex system. It relies on precise track alignments, sensitive motor calibrations, and a flawless glass seal to keep the harsh Ontario weather on the outside. Ignoring a damaged sunroof or opting for a sub-par installation can lead to severe interior water damage, electrical shorts in the overhead console, and ruined upholstery.
Common reasons for Kia Rio sunroof replacement include:
- Impact Damage: Debris kicked up by commercial trucks on busy transit routes can easily strike the roof of your subcompact car.
- Thermal Stress: Extreme temperature fluctuations—from freezing winter nights to scorching summer afternoons—can cause aging tempered glass to spontaneously shatter.
- Track and Seal Failure: Over time, the heavy vibration from driving can warp the encapsulated glass frame, requiring a full replacement and fresh adhesive application to ensure a watertight seal.
A to Z Master Technician's Process: Kia Rio Sunroof Replacement
At AlexWindshield, we do not cut corners. Replacing a sunroof is significantly more intricate than a standard windshield swap. Our step-by-step sunroof replacement process ensures your Kia Rio is treated with the utmost care, utilizing factory-approved techniques, premium primers, and superior adhesives.
Step 1: Comprehensive Interior Protection and Damage Assessment
The moment our technician arrives at your location, the first priority is protecting your Kia Rio's interior. Because tempered sunroof glass shatters into thousands of pieces, we begin by carefully draping thick, heavy-duty protective drop cloths over the front seats, rear bench, center console, and dashboard. We also protect the steering wheel and gear shifter. An initial damage assessment is performed to inspect the condition of the headliner, the sunroof motor, and the mechanical sliding tracks to ensure no hidden damage has occurred during the breakage.
Step 2: Painstaking Glass Debris Vacuuming and Cleanup
Unlike a laminated windshield that holds its shape when cracked, overhead tempered glass drops directly into the cabin. Utilizing powerful industrial HEPA vacuums, we meticulously extract every single glass shard from the interior. We vacuum the seats, floor mats, and cup holders. Crucially, we use specialized micro-attachments to vacuum inside the sunroof tracks and delicately drop the edges of the vehicle's headliner to remove any trapped glass shards that could cause annoying rattles or interfere with the sunroof mechanism later.
Step 3: Hardware Removal and Frame Extraction
Once the glass hazard is neutralized, we carefully remove the interior cosmetic trim and the accordion-style side shields that cover the sunroof brackets. Using precision Torx and metric tools, we unbolt the damaged glass frame from the sliding mechanism. If the weatherstripping or encapsulated frame is severely compromised, the entire upper glass assembly is carefully lifted out of the roof cavity. We inspect the lifting arms and cables to guarantee they are perfectly intact.
Step 4: Clearing the Sunroof Drain Tubes
A crucial step often overlooked by amateur installers is the clearing of the sunroof drainage system. The 2012-2017 Kia Rio features drain tubes at the corners of the sunroof cassette designed to channel rainwater away. We use compressed air and flexible nylon lines to flush these tubes, ensuring no microscopic glass shards or environmental debris are blocking the water flow, which would otherwise lead to a flooded headliner.
Step 5: Surface Preparation, Cleaning, and Primer Application
To ensure a permanent, watertight seal, impeccable surface preparation is mandatory. We thoroughly clean the mounting brackets and the vehicle's roof opening using a specialized, alcohol-based glass cleaner to remove old dirt, grease, and factory sealant residue. Next, we apply a high-quality automotive glass primer to the metal mounting surfaces and the bonding edge of the new sunroof frame. This active primer chemically etches into the surface, creating an optimal bonding environment that prevents rust and guarantees the adhesive will hold under extreme wind pressure.
Step 6: Installation of the New Glass Using High-Quality Adhesive
With the primer flashed and cured, we prepare the new, OEM-quality sunroof glass panel. For models requiring a bonded assembly, we lay down a precise, uniform bead of high-modulus, fast-curing urethane adhesive. The new sunroof glass is then carefully lowered into the roof cavity by two technicians to ensure absolute perfect alignment. The glass is gently pressed into the adhesive bed, and the mechanical mounting bolts are torqued exactly to Kia's factory specifications. This dual-method of bonding and bolting ensures maximum structural integrity.
Step 7: Alignment, Motor Calibration, and Final Testing
Once the adhesive has safely cured to the required drive-away time, we reconnect the vehicle's battery and begin the calibration process. We initialize the sunroof motor to "re-learn" the open, close, and tilt positions. The glass is cycled through all functions multiple times to verify smooth, quiet operation with zero track binding. Finally, we conduct a rigorous water leak test, pouring water over the closed sunroof to confirm our new seals and adhesives are 100% waterproof. The interior trim is reinstalled, and the car is given one final wipe-down and inspection.
Premium Mobile Auto Glass Services Across the Greater Toronto Area (GTA)
We understand that a shattered sunroof leaves your vehicle vulnerable to the elements and theft, which is why driving it to a shop is out of the question. AlexWindshield brings the auto glass shop directly to your driveway or workplace. Our state-of-the-art mobile service units are fully equipped to handle complex sunroof installations anywhere in the Greater Toronto Area (GTA).
Whether you are parked near the bustling shopping districts of Vaughan, commuting through the tech-heavy corridors of Markham, or residing in the quiet suburban neighborhoods of Richmond Hill, our master technicians arrive promptly with all the tools, vacuums, and high-grade adhesives required to complete the job on-site. We navigate the busy highways of the GTA so you don't have to risk driving a compromised vehicle.
Areas We Serve Include:
- Vaughan: From Woodbridge to Maple, we provide rapid response mobile sunroof replacements to keep you safe on Highway 400.
- Richmond Hill: Whether you are near Yonge Street or off Bayview Avenue, our technicians deliver pristine glass repair directly to your door.
- Markham: Covering all corners of the city, we ensure your Kia Rio is properly sealed and secure before the next Ontario rainstorm hits.
- The Wider GTA: We extend our comprehensive mobile services across the entire Greater Toronto Area, delivering unmatched convenience and expert craftsmanship.
The AlexWindshield Guarantee: Lifetime Warranty and Peace of Mind
Your 2012-2017 Kia Rio deserves the highest standard of care, and as a Senior Technician, I stand behind every piece of glass we install. At AlexWindshield, we don't just replace your glass; we restore your peace of mind. Every single sunroof replacement we perform is backed by our comprehensive Lifetime Warranty. This industry-leading guarantee covers any defects in the glass, the integrity of the urethane adhesive seal, and any issues related to workmanship or water leaks for as long as you own your vehicle.
When you choose AlexWindshield, you are choosing an elite team of dedicated auto glass professionals who prioritize your safety, comfort, and schedule. Don't let a shattered sunroof ruin your driving experience. Trust the leading mobile auto glass experts in the Greater Toronto Area to deliver flawless, factory-quality results right to your doorstep.


