Restoring the Integrity of Your Subcompact Classic: Kia Rio 2006-2011 Windshield Replacement
The second-generation Kia Rio (2006-2011) is a masterclass in subcompact resilience, highly regarded for its zippy urban maneuverability, dependable JB chassis platform, and exceptional fuel economy. However, its sleek, aerodynamic sloping front profile comes with a specific vulnerability: the front windshield often acts as a primary magnet for rogue highway debris and flying gravel. When your trusty Rio suffers a shattered or severely cracked front glass, maintaining the precise structural integrity of the vehicle is paramount. The windshield is not merely a viewing pane to keep out the wind and rain; it is a vital safety component that contributes up to 30% of the cabin's structural roof support in the event of a rollover collision. Replacing it requires absolute precision, chemical expertise, and an unwavering commitment to safety standards.
Premium Auto Glass Services Across the Greater Toronto Area (GTA)
Whether you are commuting down the busy 400-series highways or navigating local suburban roads, driving in the Greater Toronto Area (GTA) exposes your Kia Rio to constant road hazards, extreme temperature fluctuations, and construction debris. A small stone chip can rapidly expand into a dangerous, vision-impairing spiderweb crack during a freezing winter night or a scorching summer afternoon.
At AlexWindshield, we eliminate the stress of driving an unsafe vehicle to a repair shop. We proudly offer comprehensive mobile auto glass replacement services deeply rooted in the heart of the GTA, specifically highlighting our dedicated, rapid-response mobile units in Vaughan, Richmond Hill, and Markham. Whether you are parked in a commercial lot in Vaughan, your home driveway in Richmond Hill, or an office complex in Markham, our Master Technicians bring the expertise of a fully equipped auto glass facility directly to your location.
Master Technician's Guide: Step-by-Step Windshield Replacement Process
Replacing the windshield on a 2006-2011 Kia Rio requires a meticulous, multi-step procedure to guarantee absolute safety, prevent future rust, and eliminate wind noise or water leaks. As a senior technician at AlexWindshield, here is our rigorous A to Z operational protocol for your vehicle:
Step 1: Comprehensive Preparation and Interior Protection
- Vehicle Assessment: We begin with a thorough pre-inspection of the Kia Rio, noting any existing scratches on the bodywork or dashboard to ensure complete transparency.
- Interior Protection: To safeguard your vehicle, we place heavy-duty protective drop cloths over the front seats and floor mats. We then slide a specialized dashboard protector deep into the dash crevice to shield your interior plastics and defroster vents from any falling debris, dust, or adhesive.
- Exterior Taping: We apply protective automotive masking tape to the A-pillars and the leading edge of the roofline to prevent any accidental paint scratches during the extraction process.
Step 2: Cowl and Wiper Assembly Removal
- Hardware Extraction: We carefully unbolt the windshield wiper arms, typically using a 14mm socket, ensuring the wiper linkage is not stressed.
- Cowl Removal: The plastic cowling at the base of the windshield (which can become notoriously brittle on 2006-2011 models) is gently unclipped and removed using specialized non-marring trim tools. This exposes the bottom edge of the windshield glass and the lower polyurethane bead.
- Moulding Removal: We extract the top and side rubber weather mouldings framing the old windshield.
Step 3: Extracting the Damaged Windshield
- Polyurethane Cutting: To remove the old glass, we employ a sophisticated cold knife or a high-tensile wire removal system. The wire is fed through the old urethane adhesive from the inside to the outside, allowing us to seamlessly cut the bond around the entire perimeter of the glass without risking damage to the pinch weld.
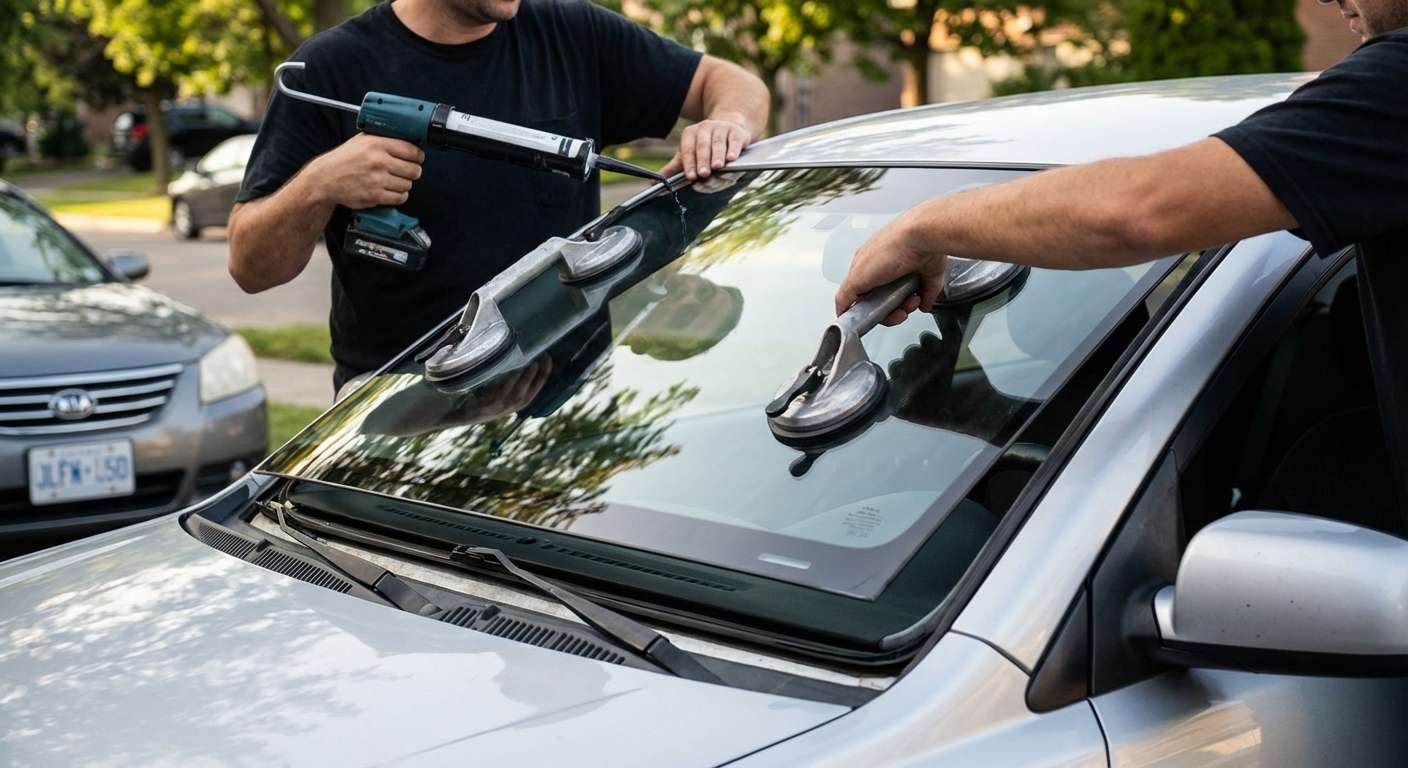
- Glass Lifting: Using heavy-duty vacuum suction cups, two technicians carefully lift the damaged windshield up and away from the Kia Rio's frame, ensuring no broken glass shards fall into the engine bay or cabin.
Step 4: Surface Cleaning and Pinch Weld Preparation
- Trimming the Bead: The remaining old adhesive on the metal frame (the pinch weld) must be trimmed down to a precise 1-2 millimeters. This thin layer of old urethane serves as the perfect bonding base for the new adhesive.
- Vacuuming and Decontamination: We vacuum any dust, dirt, or stray glass particles from the entire frame area.
- Degreasing: The trimmed pinch weld is thoroughly cleaned with a specialized, alcohol-based glass and surface prep cleaner to remove any oils, waxes, or moisture that could compromise the new chemical bond.
Step 5: Primer Application and High-Quality Adhesive Extrusion
- Rust Prevention and Priming: Older vehicles like the '06-'11 Kia Rio are prone to pinch weld rust if previously replaced poorly. We carefully inspect the bare metal. We apply an advanced, high-adhesion blackout primer to any microscopic scratches on the metal frame to prevent future oxidation and promote maximum adhesive bonding.
- Glass Preparation: The inside edge of the brand new OEM-equivalent windshield is thoroughly washed, scrubbed with an abrasive pad, and coated with a specialized glass primer.
- Adhesive Application: Using an electric caulking gun, we extrude a perfectly uniform, triangle-shaped V-bead of premium, high-viscosity, fast-curing automotive urethane directly onto the pinch weld. This high-quality adhesive is engineered to meet and exceed original factory crash-test specifications.
Step 6: Precision Installation of the New Glass
- Setting the Glass: Utilizing our suction cups, we carefully hover the new windshield over the Kia Rio. With precise coordination, we set the glass directly into the wet urethane bead, ensuring it is perfectly centered and aligned with the roofline.
- Securing the Placement: We apply firm, even pressure around the perimeter to seat the glass into the adhesive. Retention tape is then applied from the top of the glass to the roof to hold the windshield securely in place and prevent any downward slipping while the urethane begins its chemical curing process.
Step 7: Mandatory ADAS Camera Calibration Process
As a strict safety standard at our facility, we must emphasize the mandatory ADAS camera calibration process for any windshield replacement. While the core 2006-2011 Kia Rio predates many modern built-in Advanced Driver Assistance Systems (ADAS), many drivers have equipped their vehicles with aftermarket collision warning cameras, retrofitted lane-departure dash systems, or modern electronic rearview mirror clusters mounted directly to the glass. Furthermore, if your specific trim includes OEM rain sensors, they must be meticulously transferred and re-gelled.
For any windshield that houses integrated cameras or sensors, a simple physical replacement is only half the job. Our Master Technicians hook up state-of-the-art diagnostic computers and utilize precision laser targets to perform a strict dynamic or static calibration. This guarantees that your safety cameras are perfectly aligned through the new curvature of the glass, ensuring they detect lanes, pedestrians, and braking vehicles flawlessly. Skipping this step can result in safety systems malfunctioning by mere fractions of an inch, which is why ADAS calibration remains a completely non-negotiable step in our windshield replacement protocol.
Step 8: Final Reassembly, Cleanup, and Safe Drive-Away Time
- Reassembly: We carefully reinstall the plastic cowl, taking care not to crack the aging plastic, and re-bolt the wiper arms, testing them to ensure perfect alignment and sweeping motion.
- Interior Detailing: We remove our dashboard protectors and drop cloths. Although windshield replacements rarely result in interior glass shards compared to a shattered door glass, we still perform a thorough vacuuming of the front driver and passenger footwells, completely wiping down the dashboard.
- Curing Time Verification: We strictly observe the Safe Drive-Away Time (SDAT) dictated by the fast-curing urethane we use. We will instruct you exactly when the vehicle is safe to drive, ensuring the adhesive has cross-linked enough to guarantee structural support and airbag deployment safety.
The AlexWindshield Guarantee: Expertise You Can Trust
Replacing the auto glass on your 2006-2011 Kia Rio is a highly technical process that should never be left to amateurs using sub-par materials. Shoddy workmanship can lead to whistling wind noises, interior water damage, rusting frames, and catastrophic failure during an accident.
When you choose AlexWindshield, you are partnering with the most trusted auto glass professionals in the industry. As the leading experts for mobile auto glass services across the GTA, Vaughan, Richmond Hill, and Markham, we pride ourselves on our uncompromising technical standards, our use of OEE/OEM certified glass, and our premium Sika/Dow urethane adhesives.
Best of all, we stand firmly behind our master craftsmanship. Every single windshield installation we perform comes backed by our comprehensive Lifetime Warranty, covering you against any air leaks, water leaks, or manufacturer glass defects for as long as you own your Kia Rio. Don't compromise on your safety or convenience. Trust AlexWindshield to deliver seamless, professional mobile auto glass solutions directly to your door, getting you back on the road with crystal-clear vision and absolute peace of mind.


