Restoring the Sleek Profile of the Third-Generation Kia Optima: Expert Back Glass Replacement
The 2011-2015 Kia Optima, also known globally as the Kia K5, revolutionized the mid-size sedan market with its aggressive, swept-back roofline and striking design cues penned by legendary auto designer Peter Schreyer. A critical component of this aerodynamic, coupe-like silhouette is the expansive back glass. Not only does it provide crucial rearward visibility, but it also houses integrated defroster grids and structural support that keeps the cabin insulated and safe. When this tempered rear window suffers an impact, it doesn't just crack like a front windshield—it shatters into thousands of tiny, hazardous cubes. Restoring the structural integrity and aesthetic perfection of your K5 requires the precision of a Master Technician.
At AlexWindshield, we specialize in Kia Optima / K5 2011-2015 back glass replacement. We understand the specific nuances of this vehicle's third-generation (TF) platform, from the complex curvature of the rear glass to the delicate wiring of the thermal defroster system. Dealing with a blown-out rear window is stressful, but our premium mobile auto glass replacement services ensure your vehicle is returned to factory-level safety and appearance without you ever having to leave your home or office.
Why the 2011-2015 Kia Optima Back Glass Requires Specialist Attention
Replacing the rear windshield on the 2011-2015 Kia Optima is an intricate procedure that demands profound technical knowledge. Unlike laminated front windshields, the back glass is manufactured from tempered safety glass designed to break into blunt pieces upon severe impact to prevent deep lacerations. However, this safety feature means a replacement job is also a major cleanup operation.
Furthermore, the back glass of the Kia Optima / K5 contains specialized features that must be perfectly calibrated and connected during the installation process:
- Integrated Defroster Grids: The rear window contains a printed electrical circuit that heats the glass to melt ice and clear condensation. Improper installation can lead to a severed connection, rendering your rear defogger useless during harsh Canadian winters.
- Radio and GPS Antenna Integration: Depending on the specific trim level (LX, EX, or SX), the rear glass often houses vital antenna lines that communicate with your vehicle’s infotainment system.
- Acoustic and Thermal Insulation: The factory-grade glass is designed to block road noise and UV rays. We use only premium, OEM-equivalent glass to ensure your cabin remains quiet and climate-controlled.
Our Master Technician’s Step-by-Step Back Glass Replacement Process
As a Master Technician at AlexWindshield, I strictly adhere to the highest industry standards for auto glass replacement. Here is our meticulous, A-to-Z process for replacing the back glass on your 2011-2015 Kia Optima / K5.
Step 1: Vehicle Preparation and Interior Protection
Before any tools touch your vehicle, we establish a protective barrier. A shattered rear window leaves the delicate interior of your Kia Optima exposed. We lay down thick, protective drop cloths over the rear leather or cloth seats, the rear parcel shelf, and the trunk area. We also apply high-tack automotive masking tape along the exterior roofline, trunk lid, and C-pillars to ensure the vehicle's paintwork is fully protected against accidental scratches during the extraction of the old frame.
Step 2: Disconnection of Electrical Components
Once the interior is protected, we carefully remove the interior C-pillar trim panels and the rear deck lid trim. This grants us access to the vehicle's internal wiring harness. We delicately unplug the electrical connectors for the rear defroster grid and the integrated antenna. Removing these panels with non-marring trim tools ensures that no internal clips are broken, preventing future interior rattles.
Step 3: Exhaustive Vacuuming of Shattered Glass Shards
Because back glass is tempered, a break results in thousands of small glass pieces exploding into the cabin and trunk. Leaving even a few shards behind poses a severe safety risk to passengers and can cause incredibly frustrating rattling noises while driving. We use heavy-duty industrial vacuums equipped with specialized micro-crevice tools to extract every single shard of glass. We vacuum the rear seats, the floorboards, the rear parcel shelf, deep inside the speaker grilles, and down into the structural crevices of the trunk cavity. We even check the gaps between the seat cushions and the seatbelts to guarantee a perfectly clean, safe environment.
Step 4: Removal of the Old Urethane Seal and Glass Frame
With the debris cleared, we proceed to remove the remaining outer perimeter of the broken glass. Using advanced cold knife extraction tools and braided cutting wire, we carefully slice through the original factory urethane bead that bonds the glass to the vehicle’s pinch weld. This step requires a steady hand and absolute precision to avoid damaging the pinch weld—the structural metal frame of the car.
Step 5: Frame Surface Cleaning and Precision Pinch Weld Preparation
The secret to a leak-proof, factory-quality seal lies in the preparation of the metal frame. We trim the remaining old urethane down to a perfectly level 1-2 millimeter base. The channel is then rigorously cleaned using specialized, alcohol-based auto glass cleaners to remove all dirt, dust, and microscopic moisture. If any bare metal was exposed on the pinch weld, we apply a state-of-the-art, anti-corrosive black automotive primer. This primer seals the metal, absolutely preventing any future rust formation, which is the leading cause of glass leaks down the road.
Step 6: Prepping the New Premium Back Glass
We inspect the brand-new, OEM-quality Kia Optima back glass for absolute perfection, checking the curvature, defroster lines, and the blackout frit band (the black painted border around the glass). The frit band is then chemically cleaned and treated with a specialized glass prep and primer. This chemical activator allows the urethane adhesive to molecularly bond to the glass surface, ensuring the structural rigidity of the K5's roofline is fully restored.
Step 7: Extruding High-Quality Urethane Adhesive
We utilize only premium-grade, rapid-curing automotive urethane adhesive. Using an electric caulking gun, we apply a mathematically precise "V-bead" of urethane along the freshly prepped pinch weld. The V-shape is crucial; as the glass is pressed into place, the peak of the V collapses, pushing out any trapped air bubbles and creating a flawless, impenetrable seal against water and wind noise.
Step 8: Setting the Glass and Reassembly
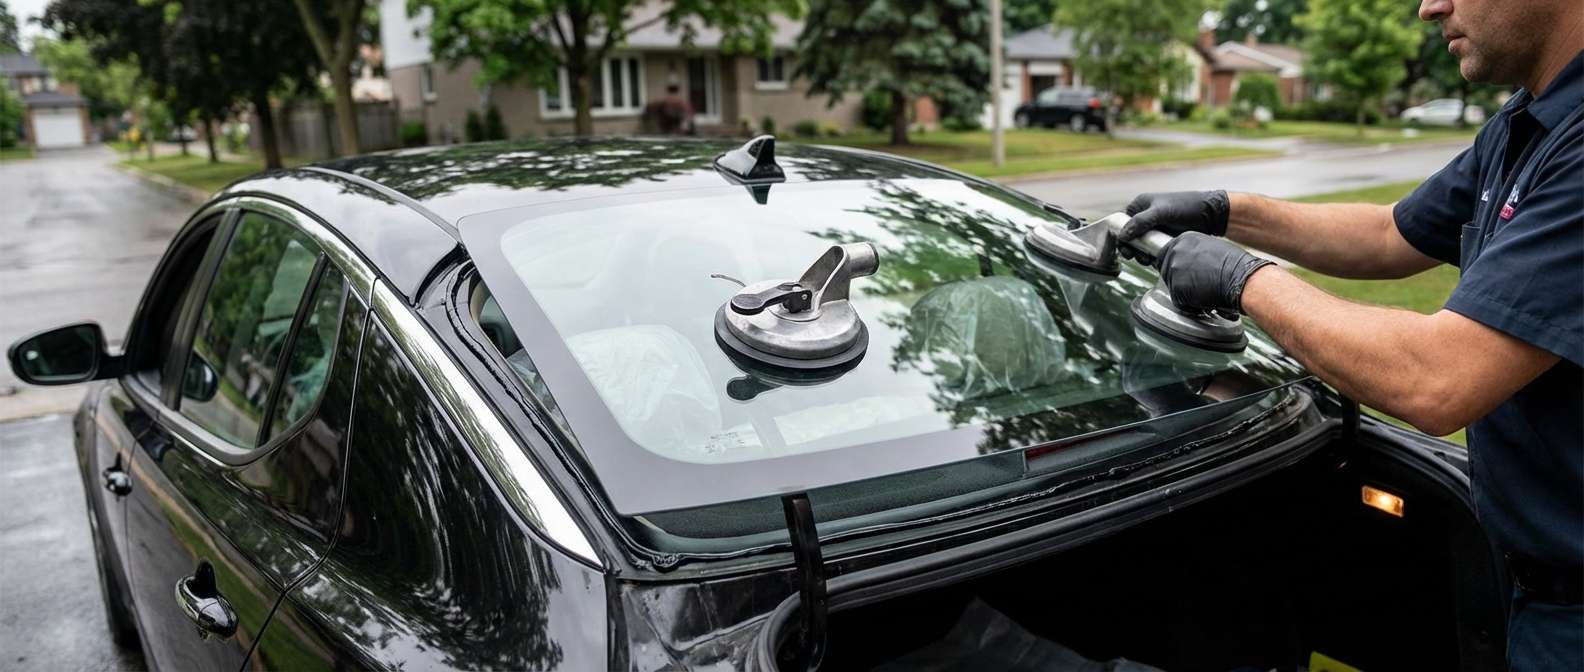
Using heavy-duty suction cups, two technicians carefully lift the new rear window and hover it over the vehicle. We perfectly align the glass with the roofline and the trunk gaps before pressing it firmly into the urethane bed. Once the glass is set, we reconnect the defroster and antenna wires, ensuring the electrical continuity is restored. Finally, we reinstall all the interior C-pillar trim panels and the rear parcel shelf, wiping down the interior to ensure the car looks as good as new.
Premium Mobile Auto Glass Service Across the Greater Toronto Area (GTA)
A shattered back glass means your vehicle is exposed to the elements and unsafe to drive. You shouldn't have to risk driving on the highway with an open cabin, battling wind, rain, or snow, just to get to a repair shop. That is why AlexWindshield brings the auto glass shop directly to you.
We are proud to offer unparalleled, fully equipped mobile auto glass services across the entire Greater Toronto Area (GTA). Whether you are parked in a residential driveway in Vaughan, at your corporate office in Richmond Hill, or shopping in Markham, our fleet of mobile service vans will arrive at your location promptly. Our vans are outfitted with climate-controlled storage for our adhesives and a full array of master technician tools, ensuring that the quality of a mobile installation is completely indistinguishable from an in-shop repair.
- Vaughan: Fast, reliable mobile back glass replacement for commuters and residents throughout Vaughan and Woodbridge.
- Richmond Hill: Precision auto glass services delivered right to your home or workplace, saving you time and hassle.
- Markham: Comprehensive rear window repair and shatter cleanup for your Kia Optima anywhere in Markham.
Trust AlexWindshield for Your Kia Optima / K5 Auto Glass Needs
Your 2011-2015 Kia Optima deserves the highest standard of care, and your safety is our ultimate priority. When you choose AlexWindshield, you are not just getting a piece of glass replaced; you are investing in peace of mind. Every single back glass installation we perform is backed by our comprehensive Lifetime Warranty. This warranty guarantees that your new rear window will be entirely free from manufacturer defects, air leaks, and water leaks for as long as you own the vehicle.
Don't let a shattered rear window disrupt your life or compromise the safety and sleek aesthetic of your vehicle. Rely on the trusted, certified experts who understand the intricate engineering of your car. For premium, reliable, and swift mobile auto glass replacement in the GTA, Vaughan, Richmond Hill, and Markham, choose AlexWindshield. Contact us today to schedule your Kia Optima back glass replacement and experience the pinnacle of automotive glass craftsmanship.


