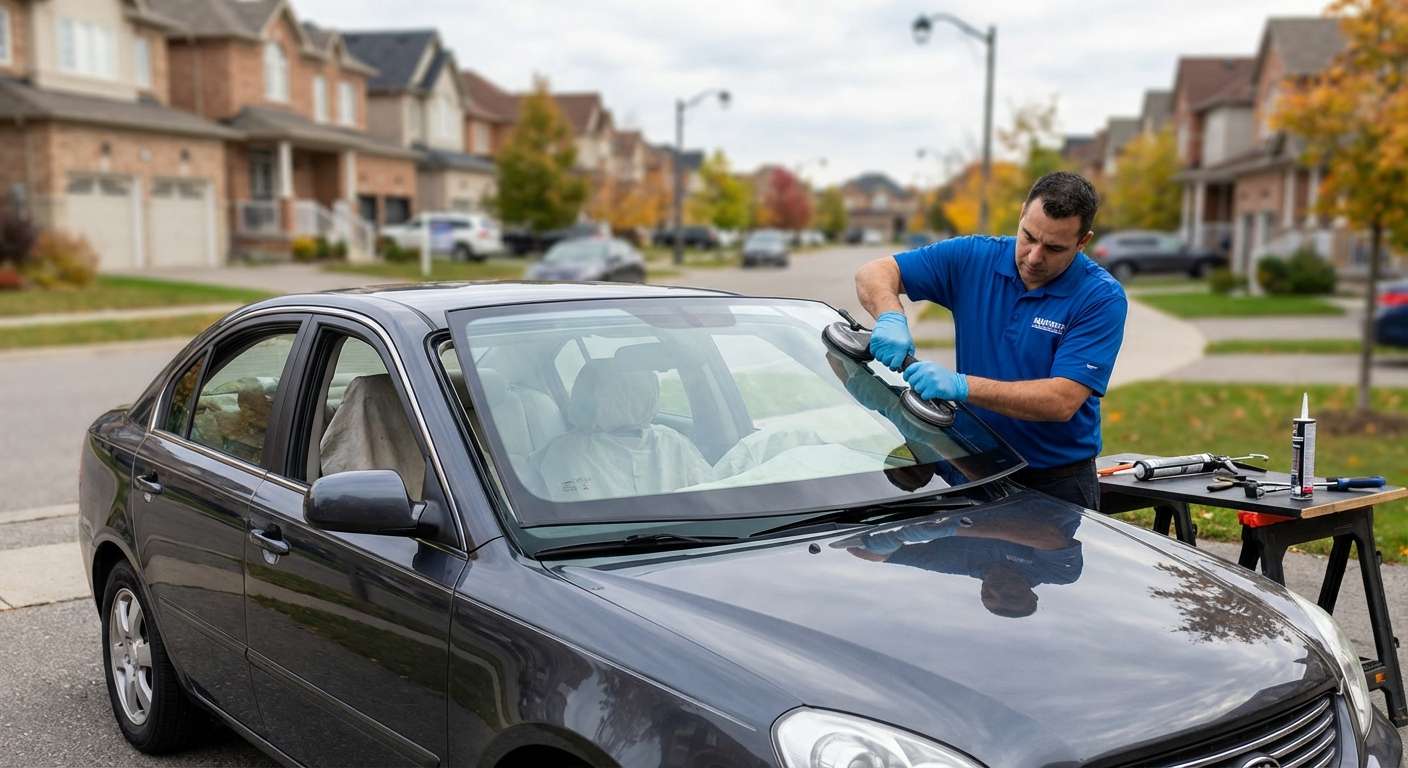
The 2006-2010 Kia Optima / K5: A Midsize Legend That Deserves Crystal Clear Vision
The second-generation Kia Optima (also recognized globally as the Kia K5 or Magentis) built between 2006 and 2010 marked a pivotal turning point for the Korean automaker. Designed on the robust MG platform, this generation shed its conservative skin for a wider, more aerodynamic stance and a highly refined, whisper-quiet cabin. A major contributor to this exceptional cabin acoustics and structural integrity is the sweeping, acoustically engineered front windshield. However, that expansive glass surface area also makes it a prime target for rogue highway debris, flying rocks, and severe temperature fluctuations. When that critical barrier is compromised, it is not just your visibility that suffers—it is the structural safety of your entire vehicle. Restoring this midsize sedan to its factory-safe condition requires the touch of a Master Technician who understands the intricate anatomy of the 2006-2010 K5.
Premium Auto Glass Service Across the Greater Toronto Area (GTA)
When you need a Kia Optima windshield replacement, you should never have to compromise your schedule or your safety by driving a compromised vehicle across town. At AlexWindshield, we bring our master-level expertise directly to your driveway, workplace, or garage. We are incredibly proud to offer unparalleled, fully mobile auto glass services throughout the Greater Toronto Area (GTA). Whether you are navigating the busy commercial districts of Vaughan, parked in a residential neighborhood in Richmond Hill, or working out of an office complex in Markham, our mobile fleet is equipped to deliver a precision installation right where you are. We understand the specific environmental challenges GTA drivers face—from blistering summer heat to freezing winter salt—and we use materials specifically engineered to withstand the harsh Canadian climate.
Why Prompt Windshield Replacement is Crucial for Your Kia Optima
Many drivers mistakenly view a cracked windshield as a mere cosmetic annoyance. In reality, the windshield of your 2006-2010 Kia Optima is a vital structural component of the vehicle's cabin. It contributes to up to 45% of the structural integrity of the cabin in a front-end collision and up to 60% in a rollover accident. Furthermore, the passenger-side airbag is designed to bounce off the interior of the windshield before cushioning the passenger. If the glass is weakened by a severe crack or improperly installed with subpar adhesive, the explosive force of the airbag can blow the windshield entirely out of the frame, rendering the safety device useless. This is exactly why AlexWindshield strictly adheres to OEM (Original Equipment Manufacturer) standards for every installation.
Step-by-Step Windshield Replacement Process for the 2006-2010 Kia Optima / K5
As a Master Technician, I believe in complete transparency. Our windshield replacement process is a meticulous, multi-step operation that guarantees factory-level safety, perfect acoustics, and a watertight seal. Here is our rigorous A to Z protocol for servicing your Kia Optima.
Step 1: Pre-Installation Inspection and Interior Protection
Before any tools are lifted, we conduct a comprehensive pre-installation inspection. We assess the damage, verify the exact glass specifications for the 2006-2010 Optima (accounting for specific tint bands or heated wiper park areas), and check the vehicle's bodywork for pre-existing rust or damage. Next, we prioritize the protection of your vehicle's interior and exterior:
- Protective Coverings: We drape high-grade protective drop cloths over the front seats, dashboard, center console, and steering wheel to shield the interior from any debris.
- Exterior Shielding: We apply protective tape and heavy-duty fender covers to protect your Kia's paint job from accidental tool contact.
- Component Removal: We carefully detach the rearview mirror, remove the windshield wiper arms using specialized pullers to avoid stripping the 14mm nuts, and extract the plastic cowl panel at the base of the windshield to expose the bottom edge of the glass.
Step 2: Precision Removal of the Damaged Windshield
Removing the old, shattered glass requires surgical precision. We never use outdated, forceful methods that can warp the vehicle's frame.
- Cutting the Seal: Using an advanced fiber-line cutting system or a specialized cold knife, we slice through the tough factory polyurethane adhesive holding the glass in place. This method ensures we do not scratch the delicate paint on the vehicle's pinch weld (the metal frame holding the glass).
- Safe Extraction: Once the old urethane is thoroughly cut, two technicians (or a specialized mechanical suction-cup lifting system) carefully lift the damaged windshield out of the frame. The old glass is immediately moved to our mobile disposal unit to be safely recycled.
Step 3: Pinch Weld Preparation and Deep Surface Cleaning
A new windshield is only as secure as the frame it is bonded to. This step is where many budget installers cut corners, but at AlexWindshield, it is where we excel.
- Urethane Trimming: We perform a "full cut," meticulously trimming the remaining old polyurethane adhesive down to a thin, even layer of 1-2 millimeters. New adhesive bonds chemically best to clean, freshly cut old adhesive.
- Debris Extraction: We use high-powered vacuums and specialized brushes to remove all dirt, leaves, and micro-shards of glass from the windshield channel and cowl area.
- Rust Treatment: If any bare metal is exposed on the pinch weld, we immediately treat it with a specialized anti-rust primer. Leaving bare metal exposed guarantees future rust, which will eventually push the glass outward, causing severe water leaks.
Step 4: Primer Application for Maximum Adhesion
Chemical bonding is the secret to a safe auto glass installation. We must prepare both the vehicle frame and the new glass to receive the adhesive.
- Glass Preparation: The new windshield is thoroughly cleaned with a specialized, residue-free glass cleaner. We focus intensely on the frit band—the black painted border around the edge of the glass.
- Glass Primer: We apply a high-tech glass primer to the frit band. This black primer acts as a UV protectant, shielding the future urethane bead from degrading under the sun's harsh ultraviolet rays, while also providing a chemical bonding agent.
- Body Primer: If required by the specific urethane system being used, a body primer is also applied to the freshly trimmed pinch weld to ensure maximum chemical cross-linking.
Step 5: Applying High-Quality Urethane Adhesive
The adhesive is the lifeblood of a windshield replacement. We exclusively utilize premium, OEM-grade, fast-curing polyurethane adhesive.
- The V-Bead Technique: Using a professional-grade, battery-operated caulking gun, we extrude a perfectly uniform "V-shaped" bead of urethane around the entire perimeter of the pinch weld. The V-shape is critical because it collapses perfectly when the glass is compressed, creating an airtight, watertight, and gap-free seal.
- Climate Consideration: Our adhesives are engineered to cure safely regardless of the humidity or temperature in the GTA, ensuring a rock-solid bond whether we are working in Vaughan in January or Markham in July.
Step 6: Setting the New Kia Optima Windshield
With the adhesive laid down, the clock is ticking. The urethane begins to "skin over" quickly, so prompt and precise placement is mandatory.
- Precision Placement: Utilizing heavy-duty vacuum suction cups, the new glass is lifted and hovered over the opening. With perfect synchronization, we gently lower the glass onto the urethane bead, ensuring the spacing on the roofline and A-pillars is absolutely symmetrical.
- Setting the Glass: We press the glass gently to collapse the V-bead, establishing the final structural bond. We then use retention tape to hold the glass firmly in place while the chemical curing process begins.
Mandatory ADAS Camera Calibration and Sensor Alignment
While the 2006-2010 Kia Optima / K5 predates some of the highly complex, modern lane-keeping systems, many models were equipped with early-generation tech such as rain-sensing wipers, automatic headlights, or electrochromic rearview mirrors. Furthermore, many GTA drivers have retrofitted their Optimas with modern aftermarket forward-collision dash cameras and sensor arrays attached to the windshield. If your windshield houses any form of sensory equipment, a mandatory ADAS (Advanced Driver Assistance Systems) camera calibration process is required.
At AlexWindshield, we never overlook this critical safety step. Even a millimeter of deviation in the angle of the new glass can throw a rain sensor or collision warning camera off by several degrees, causing systems to fail when you need them most. Our calibration process involves:
- System Diagnostics: Plugging an advanced diagnostic scanner into the Kia's OBD-II port to read current sensor data and clear any old fault codes.
- Target Board Alignment: Setting up precision optical target boards in front of the vehicle at exact, manufacturer-specified distances and heights.
- Digital Calibration: Instructing the vehicle's onboard computer to "re-learn" the exact focal points through the new, crystal-clear glass.
- Dynamic Road Testing: Taking the vehicle for a short drive on the roads of Richmond Hill or Markham to ensure all systems are communicating perfectly with the road environment.
Post-Installation Cleanup and Safe Drive-Away Time (SDAT)
Once the glass is set and the systems are calibrated, we move to the final reassembly phase. We reinstall the plastic cowl, secure the wiper arms to their exact factory torque specifications, and remount the rearview mirror. We then perform a meticulous cleanup, ensuring no smudges, fingerprints, or debris remain on the new glass or inside your vehicle. We even vacuum the interior floorboards to ensure we leave your Kia Optima cleaner than we found it.
Finally, we will brief you on the Safe Drive-Away Time (SDAT). Thanks to the high-quality, advanced-cure urethane we use, your vehicle will typically be safe to drive within 30 to 60 minutes after installation. We will provide strict instructions on when it is safe to remove the retention tape and advise you to avoid high-pressure car washes for at least 48 hours to allow the urethane to reach its maximum tensile strength.
Choose AlexWindshield for Unmatched Quality and a Lifetime Warranty
Your 2006-2010 Kia Optima has served you well, and it deserves auto glass care that extends its lifespan and protects your family. By choosing AlexWindshield, you are not just getting a piece of glass; you are securing the services of a dedicated Master Technician who treats every vehicle as if it were their own. As the premier, trusted expert for mobile auto glass services in the GTA—proudly serving Vaughan, Richmond Hill, Markham, and beyond—we guarantee a flawless installation from start to finish.
Because we stand firmly behind our rigorous technical processes and exclusively use the highest quality OEM-grade materials, every windshield replacement we perform comes backed by our comprehensive Lifetime Warranty. This warranty protects you against any leaks, whistling noises, or manufacturer defects for as long as you own the vehicle. Do not compromise your safety with amateur installations. Trust the leading experts at AlexWindshield to deliver ultimate clarity, structural integrity, and total peace of mind directly to your door.


