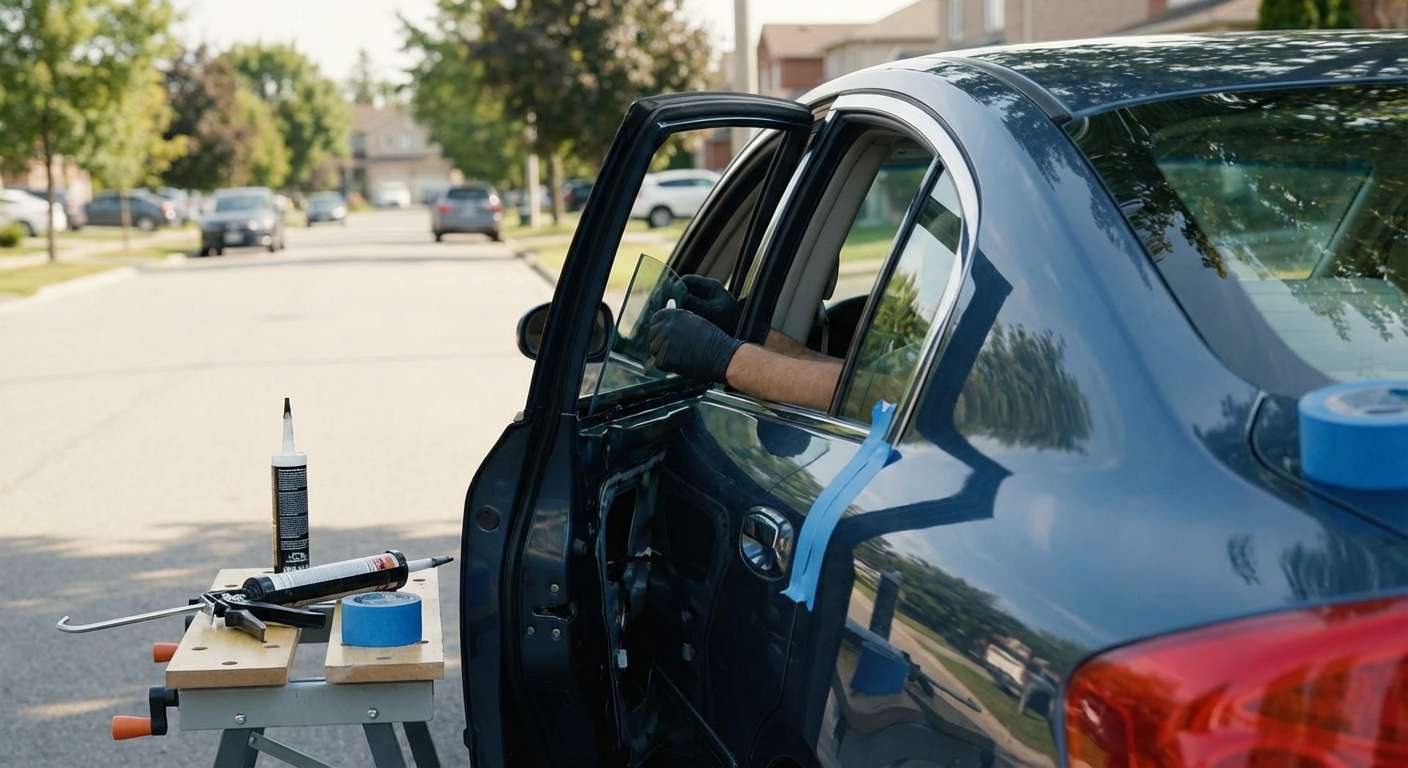
Reviving a JDM Legend: Expert Vent Glass Replacement for Your 2003-2006 Infiniti G35 Sedan
The 2003-2006 Infiniti G35 Sedan (often revered by enthusiasts by its V35 chassis code) is a celebrated icon of the early 2000s sport sedan era. By successfully merging striking rear-wheel-drive performance, courtesy of its legendary VQ35DE engine, with aggressive Japanese luxury styling, the G35 remains a beloved vehicle on modern roads. One of the distinct design elements of this vehicle's aerodynamic profile is its rear passenger door stationary vent glass. Unfortunately, whether due to an unfortunate vehicle break-in or a rogue piece of highway debris kicked up on the 401, this specific glass pane is highly vulnerable to shattering.
Because this rear door vent glass is manufactured from tempered safety glass, a direct impact doesn't just crack it—it causes the entire pane to explode into thousands of hazardous, granular glass shards. These sharp fragments instantly scatter throughout your premium leather or cloth interior and fall deep inside the inner cavity of the car door. Replacing this component isn't just a matter of slapping a new piece of glass into a rubber seal; it requires surgical precision, an intimate understanding of Nissan and Infiniti door architecture, and a meticulous, step-by-step approach to restore your cabin's safety, security, and quiet ride.
Premium Mobile Auto Glass Services Across the Greater Toronto Area (GTA)
At AlexWindshield, we do much more than simply swap out broken auto glass; we restore your vehicle to its factory-grade glory. As a master technician handling specialized luxury vehicles like the Infiniti G35, I know exactly what it takes to perform a flawless, leak-proof repair. We proudly deliver industry-leading mobile auto glass replacement services right to your driveway or workplace, making the repair process effortless and entirely stress-free.
Our expansive service area covers the entire Greater Toronto Area (GTA), and our fully equipped, state-of-the-art mobile units frequently dispatch to communities including:
- Vaughan: Providing rapid response and emergency mobile dispatch for unexpected break-ins, securing your vehicle against the unpredictable Ontario weather.
- Richmond Hill: Delivering precision installations with premium, OEM-quality materials right at your home or corporate office for ultimate convenience.
- Markham: Ensuring your classic G35 is comprehensively protected against wind noise and water leaks with expert sealing, priming, and weatherproofing techniques.
Understanding the Complexity of the G35 Sedan Vent Glass
Unlike the primary roll-down door glass, the vent glass (also referred to as the rear door quarter glass) is a stationary unit fixed rigidly into the rear door frame. On the 2003-2006 Infiniti G35 Sedan, this glass is separated from the main operational window by a solid metal division bar. When the vent glass shatters, the replacement process becomes highly technical and physically intrusive.
A proper repair demands the complete dismantling of the interior door trim, delicate manipulation of the window regulator tracks, meticulous structural cleaning, and the precise application of automotive-grade bonding agents. A subpar, rushed installation by inexperienced technicians frequently leads to severe wind whistling at highway speeds, catastrophic water leaks that can destroy your interior electronics, or the eventual structural failure of the glass pane itself. This is why specialized expertise is absolutely non-negotiable.
A to Z Step-by-Step: Our Master Technician Vent Glass Replacement Process
As a senior auto glass specialist, I adhere strictly to a rigorous, multi-point operational protocol to ensure that every single vent glass replacement meets and consistently exceeds original equipment manufacturer (OEM) safety standards. Below is the highly detailed, technical process we utilize at AlexWindshield to expertly restore the rear door vent glass of your 2003-2006 Infiniti G35 Sedan.
Step 1: Complete Vehicle Preparation and Interior Protection
Before any hand tools are ever utilized, our absolute first priority is the protection of your G35's pristine interior. We carefully lay down heavy-duty, protective canvas drop cloths over your seats, center console, and floor mats. Furthermore, we meticulously tape off the exterior painted body panels surrounding the door frame using specialized, residue-free automotive painter's tape. This vital preparatory step ensures that no metal tools, sharp glass shards, or chemical adhesives accidentally scratch or mar your Infiniti's luxury paint job during the extraction and installation procedure.
Step 2: Careful Removal of the Interior Door Panel
Because the mounting brackets and channels for the vent glass are hidden deep inside the door shell, accessing them requires the complete removal of the interior door trim panel. We begin by carefully prying off the interior door handle escutcheon and the power window switch bezel, utilizing specialized, non-marring plastic trim removal tools to prevent scuffing the plastics. Next, we locate and extract the hidden 10mm bolts securing the armrest and panel to the steel door frame. Once the bolts are safely removed, we gently pop the perimeter retaining clips, lifting the door panel upward and away from the window sill. We meticulously disconnect the power window switch electrical harnesses, speaker wiring, and mechanical door lock cables. Finally, we carefully peel back the factory plastic vapor barrier, ensuring the factory butyl adhesive remains intact so it can be perfectly resealed during reassembly.
Step 3: Comprehensive Vacuuming of Broken Glass Shards
As previously mentioned, tempered vent glass shatters into thousands of tiny, sharp cubes. Leaving even a handful of these shards behind can cause a highly irritating rattling noise when driving, or even worse, they can fall into the window regulator gear tracks and permanently jam the main roll-down window mechanism. At AlexWindshield, we utilize a high-powered industrial shop vacuum outfitted with specialized micro-crevice attachments to meticulously vacuum all broken glass shards from the vehicle’s interior cabin, deep within the seat crevices, and beneath the floor carpets. Most critically, we reach our vacuum nozzles deep inside the bottom cavity of the actual metal door shell, vacuuming out every single piece of glass debris to ensure flawless window operation and total safety for your future passengers.
Step 4: Weatherstrip and Division Bar Extraction
To safely extract the remnants of the damaged vent glass frame, we must loosen and manipulate the rear door's central window division bar. We temporarily reconnect the window switch to lower the main door glass slightly, which relieves mechanical tension inside the door. We then remove the upper and lower 10mm mounting bolts holding the metal division bar in place. By carefully pulling the rubber weatherstripping run channel aside, we are able to tilt the division bar forward. This maneuver creates exactly enough clearance to extract the broken vent glass assembly, along with its encapsulating rubber molding, safely from the rear door frame.
Step 5: Meticulous Surface Cleaning and Frame Preparation
Chemical preparation is the absolute cornerstone of a durable, leak-free auto glass installation. We thoroughly clean the pinchweld and the bare metal channels where the new vent glass unit will be seated. Using a specialized, high-grade automotive glass cleaner and lint-free microfiber towels, we aggressively scrub away all dirt, old adhesive residues, accumulated road grime, and moisture from the mounting surface. Any microscopic debris or grease left behind at this stage could severely compromise the chemical bond of the new seal.
Step 6: High-Quality Primer Application
To guarantee a completely waterproof and windproof seal around the vehicle's body, we must prep the surfaces for chemical bonding. We apply a specialized, fast-drying urethane primer to any exposed bare metal on the inner door frame, as well as to the bonding edge of the new vent glass molding. This primer application serves two absolutely critical functions: first, it prevents the formation of structural rust on your Infiniti's door frame by sealing the metal, and second, it acts as a powerful chemical bonding catalyst, ensuring the upcoming adhesive grips both the glass molding and the steel door frame with unbreakable, factory-level strength.
Step 7: Precision Installation Using High-Quality Adhesive
Once the specialized primer has flashed (dried to the precise manufacturer specification), we apply a precise, uniform bead of high-quality, advanced-cure urethane adhesive around the perimeter of the vent glass mounting surface. The brand new, OEM-quality vent glass is then carefully and precisely guided into the door frame channel. We press the glass firmly into the thick adhesive bead, applying even pressure to ensure the glass pane sits perfectly flush with the exterior vehicle body lines. While the powerful urethane sets, we realign the metal division bar, firmly seat the rubber weatherstripping run channel, and torque the upper and lower division bar mounting bolts back to the exact factory-specified tightness.
Step 8: Reassembly and Final Quality Inspection
With the new vent glass firmly installed and the high-quality adhesive curing rapidly, we seamlessly reverse the entire disassembly process. We meticulously re-adhere the plastic vapor barrier, ensuring a watertight seal to prevent future interior water leaks during heavy GTA rainstorms. We carefully reconnect all electrical wire harnesses and mechanical door lock cables, and safely remount the interior door trim panel, ensuring every single plastic retaining clip snaps securely into its designated slot. Finally, we vigorously test the main roll-down window to guarantee smooth, unobstructed operation, and apply a final streak-free cleaning to both the interior and exterior of the newly installed vent glass, leaving your Infiniti looking immaculate.
Why AlexWindshield is the Trusted Choice for Auto Glass Repairs
Driving a classic sport sedan like the Infiniti G35 should be an experience defined by luxurious comfort and responsive performance, not the frustration and anxiety of a broken vent window. When you choose AlexWindshield for your automotive glass needs, you are actively choosing unparalleled craftsmanship, high-level technical expertise, and absolute convenience. We deeply understand that your time is incredibly valuable. That is exactly why our fully equipped mobile service fleet brings the auto glass repair shop directly to your location—anywhere across the Greater Toronto Area (GTA), prominently including Vaughan, Richmond Hill, and Markham.
We stand firmly and proudly behind the exceptional quality of our work. Every single installation we perform is executed with maximum precision and care. Whether it's a massive, technologically advanced front windshield replacement that requires mandatory, highly-calibrated ADAS (Advanced Driver Assistance Systems) camera recalibration, or a physically complex rear door vent glass replacement that requires total door disassembly, we treat your vehicle with the utmost respect.
Because we refuse to cut corners—utilizing only industry-leading urethane primers, premium OEM-quality replacement glass, and the absolute strongest, fastest-curing urethane adhesives available on the global market—we are incredibly proud to offer a comprehensive Lifetime Warranty on our workmanship. You can drive away with total peace of mind, fully confident that your new glass installation is guaranteed against irritating air noises, damaging water leaks, and manufacturer defects for as long as you own the vehicle.
Don't let a shattered vent glass compromise the critical security, structural integrity, and beautiful aesthetic of your classic 2003-2006 Infiniti G35 Sedan. Trust the dedicated master technicians who will treat your prized vehicle as if it were their own. Contact AlexWindshield today to schedule your convenient mobile auto glass replacement, and experience firsthand the absolute highest standard of automotive glass service available in the GTA.


