Precision Vent Glass Replacement for Your 2008-2013 Infiniti EX35
The 2008-2013 Infiniti EX35 bridged the gap between a spirited sports sedan and a versatile luxury crossover, bringing unparalleled agility and premium Japanese craftsmanship to the market. With its signature sweeping roofline, rich leather interior, and robust 3.5-liter V6 engine, the EX35 remains a highly prized vehicle for driving enthusiasts. Unfortunately, its luxurious appeal can sometimes attract unwanted attention. The small vent glass—typically located on the rear doors or the rear quarter panel—is a frequent target for break-ins. Thieves often shatter this seemingly vulnerable pane to gain access to the interior locks. When you find yourself staring at a shattered vent window, exposing your pristine cabin to the harsh elements, you need the specialized touch of a Master Technician to restore its security, aesthetics, and whisper-quiet ride.
Replacing the vent glass on an Infiniti EX35 is not a simple "pop-in" procedure. It requires an intimate understanding of Nissan/Infiniti's intricate door assemblies, weatherstripping, and glass bonding techniques. As a senior technician at AlexWindshield, I have engineered a meticulously detailed replacement protocol to ensure your vehicle is restored to factory specifications.
Why the Infiniti EX35 Vent Glass Requires Expert Handling
The architecture of the 2008-2013 Infiniti EX35 features tight tolerances and premium sound-deadening materials. When a vent glass is shattered, it is made of tempered glass, meaning it explodes into thousands of tiny, pebble-like shards. These shards infiltrate the window run channels, the internal door cavity, and the intricate gears of the window regulator. Failing to extract every piece can result in mechanical failure of your main roll-down window or irritating rattles down the road. Furthermore, ensuring a watertight and airtight seal requires professional-grade primers and adhesives to prevent wind noise and moisture intrusion.
The AlexWindshield Master Technician Process: Step-by-Step Vent Glass Replacement
Our comprehensive A-to-Z replacement process ensures that every Infiniti EX35 vent glass replacement is executed with flawless precision. Here is exactly how we restore your luxury crossover:
Step 1: Interior Protection and Pre-Installation Inspection
Before any tools are utilized, we prioritize the protection of your EX35’s interior. We drape heavy-duty, scratch-resistant protective covers over the premium leather seating, center console, and surrounding interior trim. We conduct a thorough inspection of the window frame, checking the delicate chrome trim and rubber moldings for any secondary damage caused by the break-in or impact. Protecting your luxury vehicle is the cornerstone of our service.
Step 2: Removal of Door Panels and Vapor Barrier
To access the mounting points of the vent glass and the depths of the door cavity, the interior door panel must be completely removed. This is a highly technical step for the Infiniti EX35:
- Disconnecting Electronics: We carefully unclip the master power window switch and disconnect the wiring harness to prevent any electrical faults.
- Removing Hidden Fasteners: Using specialized non-marring trim tools, we remove the cosmetic covers behind the door latch and grab handle to expose the hidden 10mm bolts.
- Unclipping the Panel: The door panel is gently popped off its retaining clips, and the internal door latch cables are disconnected.
- Peeling the Vapor Barrier: We meticulously peel back the factory moisture/vapor barrier, taking care not to tear the material or compromise the sticky butyl rubber sealant that holds it to the metal door frame.
Step 3: Comprehensive Broken Glass Extraction
With the door's internal cavity exposed, we begin the crucial process of vacuuming all broken glass shards from the vehicle's interior and the door itself. This is a mandatory step that separates amateur work from a Master Technician's execution:
- We use a high-powered, industrial HEPA vacuum to extract the thousands of tempered glass cubes from the seats, floor mats, and hidden crevices of the cabin.
- Inside the door cavity, we vacuum out the bottom of the door shell, ensuring the factory water drain holes are completely clear of glass debris.
- We blow compressed air through the main window regulator tracks and window run channels, vacuuming simultaneously to guarantee that the primary roll-down window operates smoothly without any grinding or scratching noises.
Step 4: Removing the Division Bar and Old Glass Frame
The vent glass on the EX35 is typically separated from the main drop glass by a metal division bar. To remove the remnants of the broken vent glass, we unbolt the division bar from the top and bottom of the door shell. We carefully pull the rubber weatherstripping back to free the shattered vent frame. Any remaining bonded rubber or factory sealant is stripped away using precision cutting tools, ensuring the mounting surface is completely bare and ready for the new installation.
Step 5: Surface Cleaning and Frame Preparation
A superior bond requires a flawlessly clean surface. We treat the metal pinch weld and the surrounding seating area with a specialized, alcohol-based auto glass cleaner. This removes all dirt, old grease, and microscopic debris. If any bare metal was exposed during the removal of the old glass frame or division bar, we treat it immediately to prevent future rust or corrosion, which is vital for the longevity of the vehicle.
Step 6: Primer Application
Once the surface is chemically cleaned and dry, we move to the chemical bonding preparation. We apply a premium-grade glass primer application to both the frit band (the black painted edge) of the new high-quality vent glass and the metal pinch weld of the vehicle's frame. This black primer acts as a critical chemical bridge, promoting intense adhesion and protecting the underlying urethane adhesive from UV degradation. We allow the primer to cure for the exact flash-off time dictated by the chemical manufacturer.
Step 7: Applying High-Quality Urethane Adhesive
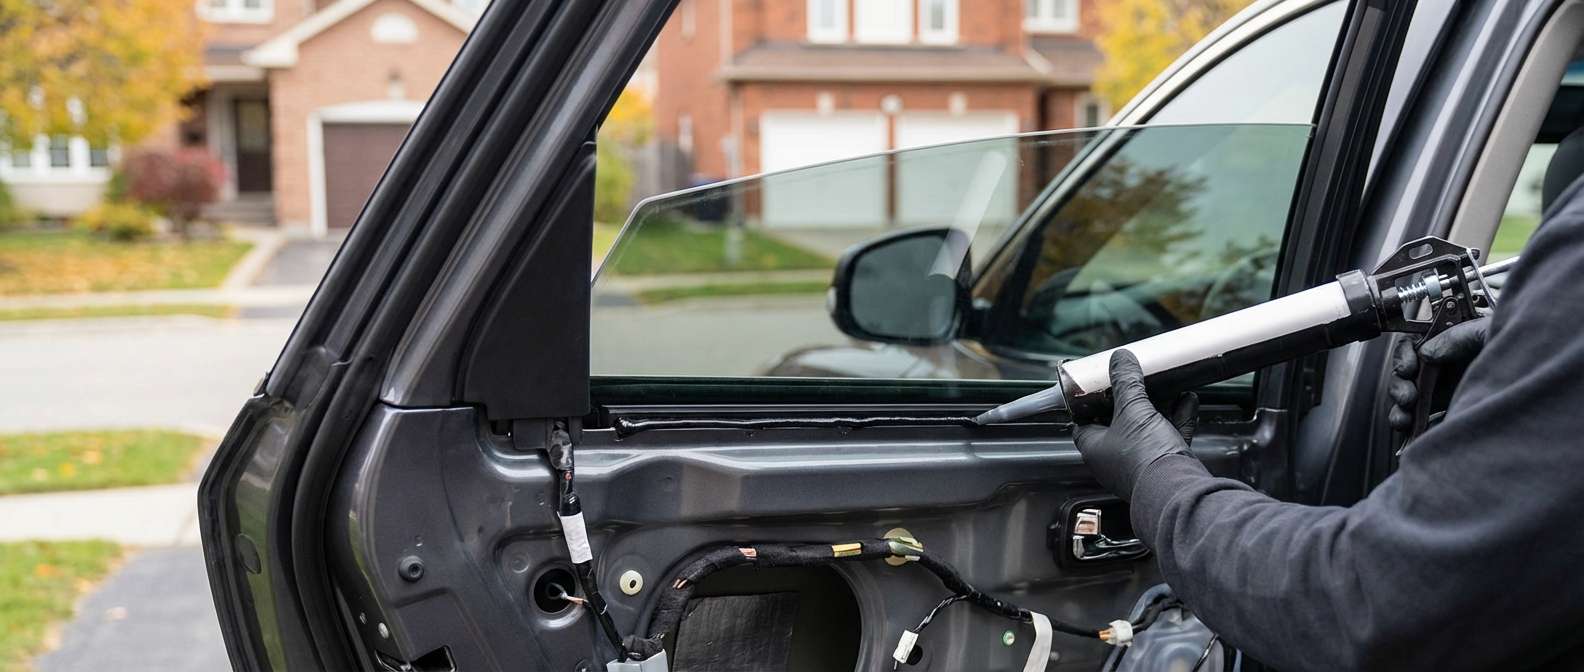
With the primer cured, we utilize an advanced, fast-curing high-quality urethane adhesive. Using a precision power caulking gun, we run a perfect, uniform bead of urethane along the mounting profile. The consistency and height of this urethane bead are calculated to exactly match the factory specifications of the 2008-2013 Infiniti EX35, ensuring there will be absolutely no wind whistles or water leaks.
Step 8: Precision Installation of the New Glass
The new, OEM-quality vent glass is carefully guided into position. We seat the glass precisely into the fresh urethane bed, applying firm, even pressure to ensure the adhesive compresses perfectly against the glass and the pinch weld. The glass is aligned perfectly with the surrounding chrome trim and rubber moldings. We then re-secure the division bar and re-seat the window run channels, locking the entire assembly tightly into the door frame.
Step 9: Reassembly and Final Quality Control
Once the glass is locked in place, we reverse the disassembly process. The vapor barrier is re-sealed, the door latch cables are reconnected, and the electrical harnesses are plugged back in. The door panel is carefully snapped back onto its retaining clips, and all bolts and cosmetic covers are restored. We then perform a rigorous quality control check, testing the main power window to ensure unhindered operation, and performing a final polish of the new vent glass to leave it sparkling clean.
Local Auto Glass Excellence: Serving the Greater Toronto Area (GTA)
At AlexWindshield, we understand that a shattered window is a stressful emergency, leaving your vehicle vulnerable to theft and the unpredictable Canadian weather. That is why we offer premium mobile auto glass services across the Greater Toronto Area (GTA).
Whether you are parked at your home in the quiet suburbs of Vaughan, at your corporate office in Richmond Hill, or shopping at a plaza in Markham, our Master Technicians bring the auto glass shop directly to you. Our state-of-the-art mobile service vans are fully equipped with the specialized tools, HEPA vacuums, and climate-controlled adhesives required to perform this complex repair safely and effectively in your driveway or parking lot. You do not need to drive your Infiniti EX35 with a plastic-taped window across town; we deliver the highest standard of auto glass repair right to your doorstep.
Choose AlexWindshield for Unmatched Expertise and Peace of Mind
When it comes to luxury crossovers like the 2008-2013 Infiniti EX35, you cannot compromise on quality. Poorly installed vent glass can lead to hidden water damage, electrical shorts in the door panel, and a compromised driving experience due to excessive cabin noise. By choosing AlexWindshield, you are opting for OEM-quality glass, advanced urethane bonding technology, and the meticulous attention to detail that only a senior auto glass specialist can provide.
Our Exclusive Lifetime Warranty Guarantee
We stand confidently behind our craftsmanship. Every vent glass replacement performed by our technicians is backed by the AlexWindshield Lifetime Warranty. This comprehensive warranty guarantees our work against any air leaks, water leaks, or manufacturer defects in the glass for as long as you own your vehicle. If you are dealing with a broken window in the GTA, do not settle for less. Contact AlexWindshield today—your trusted expert for mobile auto glass services—and let us restore the security, elegance, and integrity of your Infiniti EX35.


