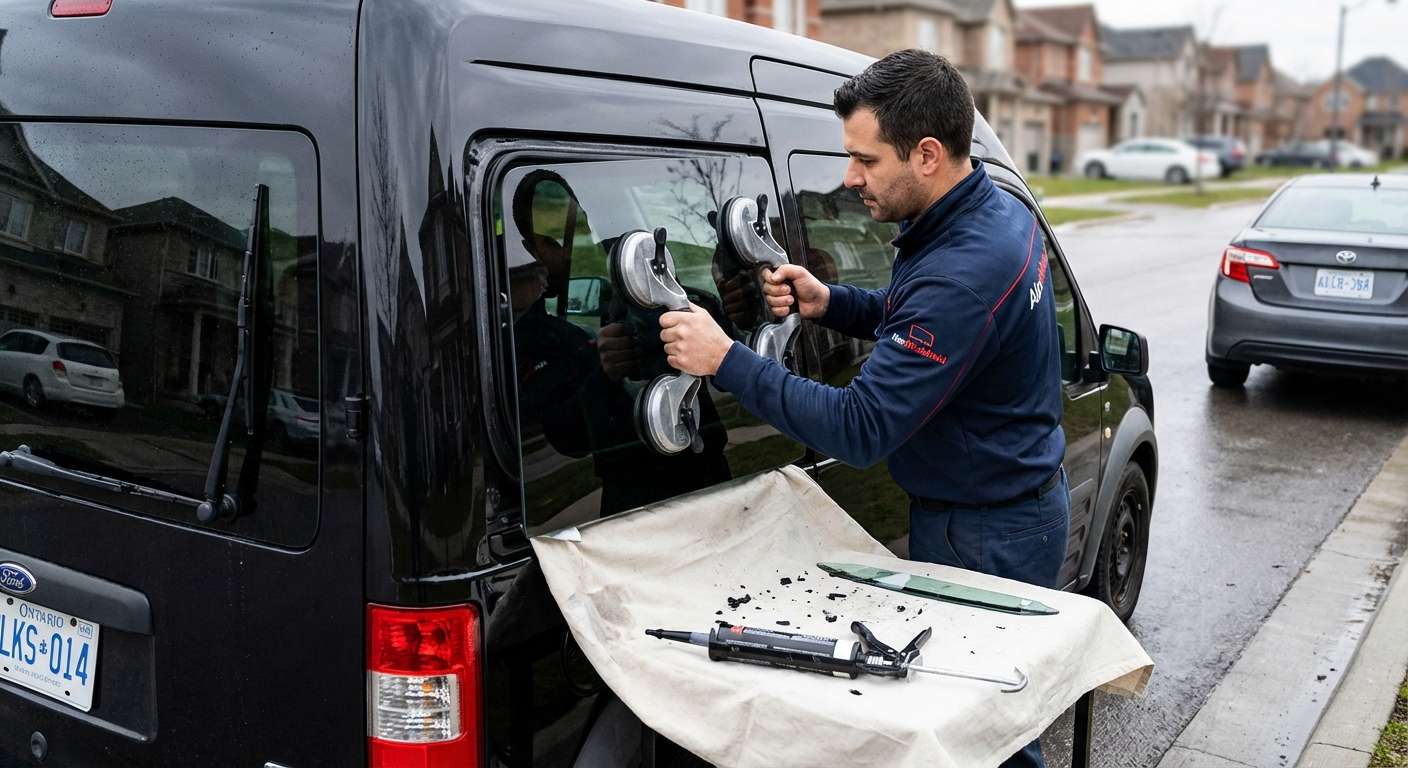
Restoring Your Workhorse: Quarter Glass Replacement for the 2010-2013 Ford Transit Connect
The 2010-2013 Ford Transit Connect pioneered the compact cargo van segment in North America, revolutionizing the way local businesses, tradespeople, and delivery services operate. Whether your Transit Connect is an XL cargo hauler packed with specialized tools or an XLT passenger wagon designed for family transport, its unique high-roof, boxy design relies heavily on structural integrity and maximum visibility. The quarter glass on these specific model years plays a crucial role in providing vital blind-spot visibility for drivers navigating tight urban environments, while also maintaining the climate-controlled security of the interior cabin.
Because these vehicles are heavily utilized for daily commercial work, a shattered or compromised quarter glass is more than just a cosmetic annoyance—it is an immediate security threat to your valuable cargo and a massive safety hazard. At AlexWindshield, we understand that a broken window means costly downtime for your business. As a Master Technician, I have replaced countless auto glass panels on the first-generation North American Ford Transit Connect, and we bring specialized, commercial-grade expertise directly to your vehicle to ensure a flawless, permanent repair.
Understanding the Quarter Glass on Your 2010-2013 Transit Connect
Depending on your specific wheelbase and trim configuration, the quarter glass on the 2010-2013 Ford Transit Connect can refer to the rear-side panel glass or the extended side cargo windows. Unlike the laminated glass used in front windshields, the factory quarter glass on these vans is manufactured from heavy-duty tempered safety glass. When struck by a flying rock on the highway, a rogue piece of construction debris, or targeted by a thief, this tempered glass is designed to shatter instantly into thousands of small, granular pebbles rather than jagged, dangerous shards.
While this is a vital safety feature that prevents severe lacerations in the event of an accident, it creates an extensive, messy cleanup job. These tiny glass pieces easily fall into the interior body cavities, cargo floorboards, and interior trim panels of your Transit Connect. A professional replacement requires much more than simply gluing a new piece of glass to the frame; it demands meticulous interior teardown, extensive vacuuming, and precision urethane application to ensure your van remains entirely watertight and secure.
Our Master Technician Process: Step-by-Step Quarter Glass Replacement
At AlexWindshield, we do not cut corners. Our A-to-Z replacement protocol guarantees that your 2010-2013 Ford Transit Connect is restored to factory specifications. Here is the detailed, highly technical procedure we follow for every quarter glass installation:
Step 1: Pre-Installation Inspection and Vehicle Protection
Before any tools are utilized, we perform a thorough inspection of the vehicle's damage. We assess the window frame (pinch weld) for any pre-existing rust or structural warping that may have occurred during the impact. To protect your vehicle's interior and exterior, we apply automotive-grade protective tape around the painted edges of the window frame. We also lay down heavy-duty drop cloths over your cargo area, shelving units, or passenger seating to ensure that debris, adhesives, and cleaning agents do not damage your Transit Connect’s interior.
Step 2: Interior Trim Removal and Complete Shattered Glass Cleanup
Because the quarter glass is tempered, thousands of glass shards will inevitably fall into the interior panels. Leaving these shards behind can cause annoying rattles while driving and can even damage the internal wiring of your van.
- Panel Removal: We carefully detach the interior plastic trim panels surrounding the quarter glass. Using specialized non-marring pry tools, we unclip the factory retainers without breaking them.
- Deep Vacuuming: We use an industrial, high-powered shop vacuum to extract every single shard of broken glass from the interior cabin, the cargo floor, the seats, and deep within the vehicle’s hollow body cavities. We meticulously clear out the window track and the surrounding metal framework.
Step 3: Extracting the Old Glass and Urethane Bead
Even when the glass is entirely shattered, the thick factory polyurethane adhesive bead remains firmly attached to the vehicle's metal frame.
- Cutting the Seal: Using specialized cold knives and automated auto-glass extraction tools, we carefully cut through the existing polyurethane bead around the perimeter of the quarter glass opening.
- Trimming the Urethane: We trim the old adhesive down to a thin, flat base of approximately 1-2 millimeters. This leaves a clean, stable foundation for the new adhesive to bond with, a process known as "bonding to the base."
Step 4: Surface Cleaning, Preparation, and Primer Application
A watertight seal is only as good as the surface preparation. If the metal pinch weld is compromised, the van will suffer from wind noise and water leaks during heavy rainstorms.
- Decontamination: We clean the entire pinch weld channel and the surrounding area using an alcohol-based, lint-free glass cleaner to remove dust, grease, and microscopic debris.
- Bare Metal Treatment: If our extraction tools exposed any bare metal on the pinch weld, we apply an industry-leading, anti-corrosive auto glass primer to those specific spots. This prevents rust from forming in the future, which is especially important for commercial vans exposed to harsh winter road salts.
- Glass Preparation: The new, OEM-equivalent quarter glass is meticulously cleaned. We then apply a specialized glass primer (frit primer) to the black ceramic band on the inside edge of the new glass to ensure optimal chemical adhesion.
Step 5: High-Quality Adhesive Application
We strictly utilize premium, high-modulus, non-conductive polyurethane adhesive. This specific type of urethane provides incredible structural strength, ensuring that the new glass contributes to the overall crash-safety rating of your Ford Transit Connect.
- The V-Bead Technique: Using an electric caulking gun for absolute consistency, we apply the polyurethane in a continuous "V" shaped bead along the prepared pinch weld. This V-shape is a master technician standard, as it ensures the adhesive collapses perfectly flat against the glass without creating air pockets or weak spots.
Step 6: Precision Installation of the New Quarter Glass
With the adhesive properly applied, time is of the essence. Depending on the size of the specific quarter glass panel, we use heavy-duty industrial suction cups to carefully maneuver the glass into place.
- Setting the Glass: We gently lay the glass onto the urethane bead, aligning it perfectly with the factory reference points. Even pressure is applied around the entire perimeter to ensure the V-bead collapses evenly, creating an impenetrable, watertight seal.
- Securing the Panel: We apply specialized retention tape to hold the quarter glass firmly in place while the urethane undergoes its initial chemical curing process.
Step 7: Reassembly and Final Quality Check
Once the glass is securely set, we begin the reassembly phase.
- Replacing the Trim: The interior plastic trim panels are carefully snapped back into their factory positions. We ensure all clips are secure and that the interior looks as pristine as it did before the damage occurred.
- Final Inspection: We perform a secondary clean of the new quarter glass, double-check the surrounding paintwork, and execute a final inspection of the interior to ensure absolutely no broken glass shards were missed.
- Safe Drive-Away Time (SDAT): We inform you of the exact curing time required for the urethane before the vehicle can be safely driven. Our premium adhesives typically boast a highly rapid safe drive-away time, getting your commercial van back on the road swiftly.
Unmatched Mobile Auto Glass Service Across the GTA
We know that as a Ford Transit Connect owner, your vehicle is likely your livelihood. Taking time out of your busy schedule to sit in a repair shop waiting room simply isn't an option. That is why AlexWindshield brings our master-level expertise directly to you.
We are incredibly proud to offer fully equipped, premium mobile auto glass repair and replacement services throughout the Greater Toronto Area (GTA). Whether your van is parked at a busy construction site in Vaughan, sitting in an office parking lot in Richmond Hill, or resting in your home driveway in Markham, our mobile technician fleet will arrive with all the specialized tools, top-tier glass, and high-quality adhesives necessary to perform a flawless installation on-site. We adapt to your schedule and location, ensuring your business experiences the absolute minimum amount of downtime.
Why Choose AlexWindshield for Your Ford Transit Connect?
Replacing the quarter glass on a unique vehicle like the 2010-2013 Ford Transit Connect requires specialized knowledge, precision tools, and a commitment to uncompromising quality. Trusting an amateur with your commercial vehicle can lead to devastating water leaks, severe interior rust, and further mechanical damage.
At AlexWindshield, we treat your vehicle with the utmost respect. From our exhaustive vacuuming of interior glass shards to our meticulous application of industry-leading urethane, every step is executed perfectly. We stand proudly behind our craftsmanship, offering a comprehensive Lifetime Warranty on our workmanship to protect you against any wind noises, water leaks, or manufacturer defects.
Don’t let a shattered quarter glass slow down your business operations or compromise the safety of your tools and cargo. Contact AlexWindshield today for your mobile auto glass replacement in the GTA, and let our Master Technicians get your Ford Transit Connect back to working perfectly.


