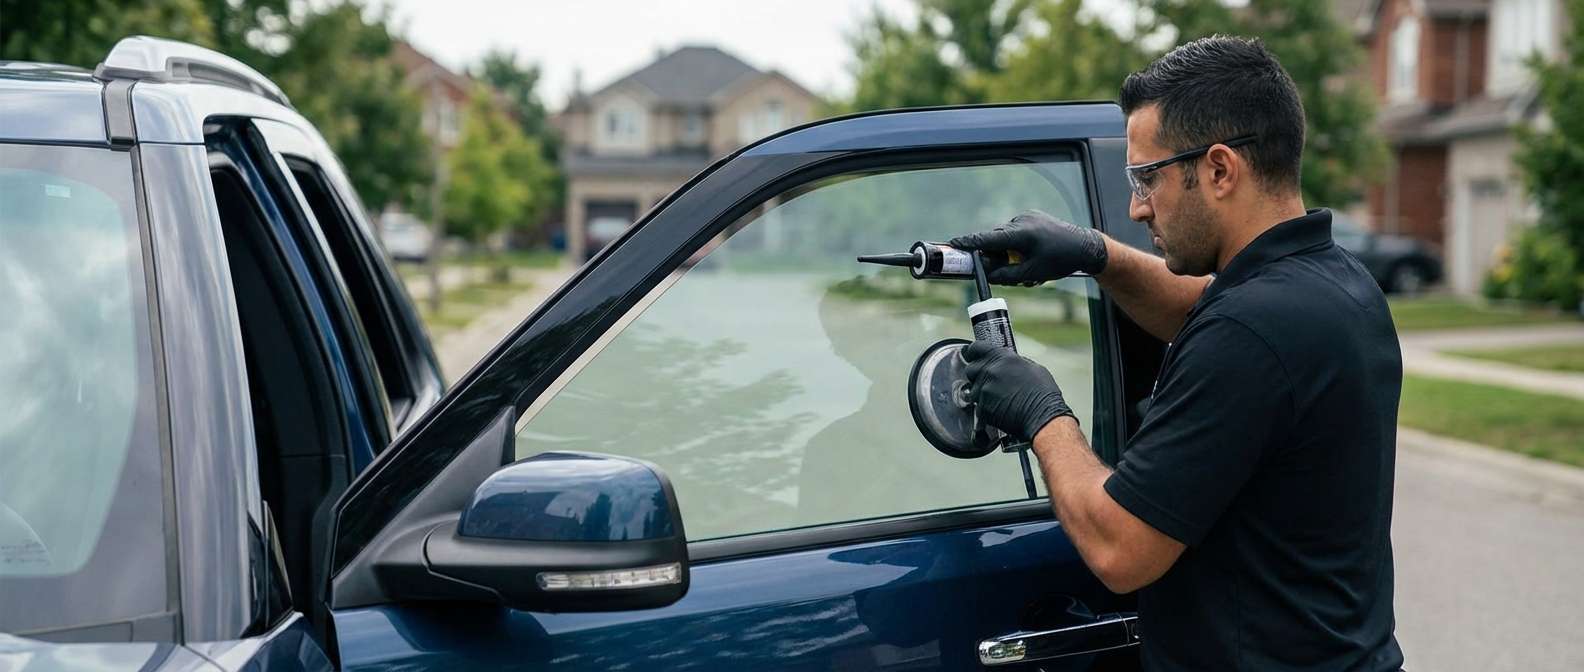
The Unmistakable Profile of the 2011-2019 Ford Explorer and Its Vulnerable Vent Glass
The fifth-generation Ford Explorer (2011-2019) completely redefined the modern family SUV, swapping the traditional body-on-frame architecture for a highly advanced, car-like unibody construction. A major part of this vehicle's iconic, muscular silhouette is its striking "floating roof" design, heavily accentuated by the dark, wrap-around window aesthetic. Embedded within this precise aerodynamic profile is the vent glass. Strategically positioned to eliminate hazardous blind spots, reduce high-speed wind turbulence, and enhance cabin acoustics, the vent glass is a marvel of automotive engineering. However, its specialized placement and tempered construction make it highly vulnerable. Whether targeted by thieves due to its proximity to door locks, or shattered by rogue debris on the highway, a broken vent glass immediately compromises your SUV’s security, climate control, and structural integrity. When disaster strikes, you need a highly specialized approach to restore your vehicle to factory specifications.
Premium Local SEO Mobile Auto Glass Services Across the Greater Toronto Area
As a Master Technician at AlexWindshield, I have witnessed firsthand the stress that a shattered vent glass causes our clients. Driving with an open void in your vehicle exposes your interior to the unpredictable Canadian weather and leaves your vehicle susceptible to theft. That is exactly why we bring our state-of-the-art auto glass shop directly to your driveway. We provide comprehensive, top-tier mobile auto glass replacement services across the Greater Toronto Area (GTA).
Our fleet of fully equipped mobile service vans is constantly dispatched to handle emergencies in key regions. Whether you are parked at a commercial complex in Vaughan, resting at your suburban home in Richmond Hill, or working out of a bustling office park in Markham, our expert technicians arrive promptly with the exact Original Equipment Equivalent (OEE) or OEM glass required for your 2011-2019 Ford Explorer.
Technical Specifications of the 2011-2019 Ford Explorer Vent Glass
Before diving into the replacement process, it is crucial to understand the anatomy of the glass we are working with. The vent glass on the 2011-2019 Ford Explorer models is not standard plate glass; it is engineered using premium tempered safety glass. Tempered glass is heat-treated to be up to four times stronger than standard glass. When its surface tension is broken by a sharp impact, it is designed to shatter instantly into thousands of small, blunt, pebble-like pieces rather than dangerous, jagged shards. While this minimizes the risk of severe lacerations to the passengers, it creates a massive, complex mess inside the vehicle's interior components.
Furthermore, depending on the specific location of the vent glass on your Explorer model, it is often secured securely to the vehicle's frame using advanced urethane adhesives and integrated into the surrounding weather stripping. This requires a highly specialized, multi-step replacement process that goes far beyond simply bolting in a new pane.
A to Z Step-by-Step Vent Glass Replacement Process: A Master Technician's Approach
At AlexWindshield, we do not cut corners. Replacing the vent glass on a 2011-2019 Ford Explorer requires precision, patience, and professional-grade materials. Below is the exact, step-by-step master methodology we employ for every vent glass replacement.
Step 1: Pre-Installation Inspection and Extensive Interior Protection
The first phase of our process is all about damage control and preparation. When tempered vent glass shatters, the fragments scatter violently. Our technicians begin by meticulously inspecting the vehicle's exterior frame for any collateral paint damage or denting caused by the impact. Once the perimeter is assessed, we focus on protecting the interior.
- Applying Protective Drop Cloths: We drape heavy-duty, scratch-resistant protective covers over the Explorer's leather or cloth seats, center console, and dashboard.
- Exterior Masking: We apply specialized automotive masking tape around the painted window frame and B/C-pillars to ensure no specialized tools scratch the vehicle’s clear coat during the extraction process.
- Safety Gear Protocol: Technicians equip themselves with cut-resistant Kevlar gloves and ANSI-rated safety glasses before handling the hazardous debris.
Step 2: Door Panel Removal and Intensive Glass Clean-Up
Because the vent glass is directly integrated into the vehicle's side profiles, a break means thousands of tempered glass shards infiltrate the deep cavities of your doors and interior panels. Leaving these shards inside will cause infuriating rattling noises every time you drive or close the door, and can even severely damage internal window regulator motors.
- Precision Panel Removal: Utilizing non-marring interior trim removal tools, we carefully unclip and unscrew the interior door panels, armrests, and weather seals to expose the inner structural cavity of the door.
- Deep Cavity Extraction: We safely disconnect the interior wiring harnesses (such as power locks and speaker connections) to gain full access to the lower door shell.
- Industrial Vacuuming: Using high-powered, industrial-grade HEPA vacuums, we meticulously vacuum all broken glass shards from the vehicle's interior. We vacuum the seats, floor mats, hidden crevices, and plunge deep into the bottom of the exposed door shell to extract every single piece of shattered tempered glass.
Step 3: Precise Removal of the Old Vent Glass Frame and Urethane Cut-Out
Once the work area is entirely cleared of hazardous debris, we must remove the remnants of the broken vent glass assembly. On the Ford Explorer, the vent glass frame is typically bonded directly to the vehicle's pinchweld.
- Breaking the Seal: We utilize specialized cold knives, automated extrusion cutters, or braided wire cutting systems to slice perfectly through the old, hardened factory urethane bead that holds the vent glass encapsulation in place.
- Frame Extraction: With the urethane bond severed, we carefully pull away the damaged vent glass frame, ensuring the surrounding rubber moldings and metal trim remain fully intact.
- Trimming the Pinchweld: Using a razor-sharp technician's chisel, we trim down the existing urethane on the metal pinchweld down to a precise 1-2 millimeter base. This level layer serves as the perfect bonding foundation for the new adhesive.
Step 4: Surface Cleaning, Preparation, and Primer Application
A new piece of auto glass is only as strong as the chemical bond holding it to the vehicle. Flawless surface preparation is mandatory to prevent future water leaks, wind noise, and structural failure.
- Decontamination: We use an alcohol-based, lint-free auto glass cleaner to thoroughly scrub the metal pinchweld, removing any dirt, grease, moisture, or microscopic debris.
- Glass Preparation: The brand new replacement vent glass for your Ford Explorer is unpacked and meticulously cleaned. We apply a specialized glass-prep activator to the bonding surface of the new glass to promote maximum chemical adhesion.
- Applying the Primer: We utilize a highly specialized, fast-drying black urethane primer. Using a dauber, the primer is applied to any bare metal scratches on the pinchweld (to prevent future rust and corrosion) and to the frit band of the new vent glass. The primer acts as a chemical bridge between the glass, the bare metal, and the urethane adhesive.
Step 5: High-Quality Urethane Adhesive Application and Precision Setting
The installation of the new vent glass requires absolute precision to match the 2011-2019 Ford Explorer's exact factory alignment and aerodynamic flushness.
- Extruding the Urethane: We load a tube of premium, industry-leading high-viscosity urethane adhesive into an electric caulking gun. A perfectly uniform, continuous V-shaped bead of urethane is extruded directly onto the primed pinchweld. There cannot be a single gap or bubble in this bead, as it would lead to catastrophic water leaks.
- Setting the Glass: Utilizing heavy-duty suction cups and expert hand-eye coordination, the technician aligns the new vent glass with the vehicle's frame. It is gently pressed into the wet urethane bead, ensuring the glass sits perfectly flush with the adjacent windows and pillars.
- Reassembly: Once the glass is perfectly seated, we carefully reassemble the interior. The wiring harnesses are reconnected, the inner vapor barrier is resealed, and the interior door panels and trim pieces are snapped securely back into their factory positions.
Step 6: Curing Time and Final Quality Assurance Check
Our commitment to excellence does not end the moment the glass is installed. We strictly adhere to the Safe Drive-Away Time (SDAT) dictated by our premium urethane manufacturer.
- Curing Process: The high-quality urethane we use requires a specific curing window to cross-link and solidify, ensuring the glass can withstand passenger airbag deployments and structural roll-overs.
- Final Inspection: We conduct a rigorous quality assurance checklist. We verify that all interior electronics (speakers, locks) function correctly after panel reassembly. We clean the newly installed vent glass to a streak-free shine and perform a pressure test to guarantee absolute protection against wind noise and water leaks.
Why Compromising on Vent Glass Replacement is Not an Option
Ignoring a broken vent glass on your 2011-2019 Ford Explorer, or taping a garbage bag over it, is a massive liability. The unique aerodynamic design of the Explorer means that driving at highway speeds with an open vent window creates a heavy internal cabin pressure that can actually strain your other windows and sunroof. More importantly, leaving the cabin exposed allows rain and snow to destroy your internal door electronics and leather upholstery. By utilizing expert replacement services, you restore your vehicle's factory seal, secure your valuables, and maintain the beautiful aesthetic of your Ford Explorer.
Trust AlexWindshield for Unmatched Expertise and a Lifetime Warranty
When you require flawless precision, extensive interior clean-up, and highly durable auto glass installations, look no further than AlexWindshield. We pride ourselves on being the absolute foremost experts in mobile auto glass services throughout the Greater Toronto Area (GTA). Whether you are situated in Markham, running errands in Richmond Hill, or working in Vaughan, our master technicians will come directly to your location, saving you time and towing expenses.
We stand confidently behind our craftsmanship. Every single vent glass replacement performed by AlexWindshield comes backed by our comprehensive Lifetime Warranty, covering you completely against any manufacturing defects, wind noises, or water leaks for as long as you own the vehicle. Do not let a shattered vent glass disrupt your life. Contact AlexWindshield today to schedule your mobile replacement and experience the pinnacle of automotive glass restoration.


