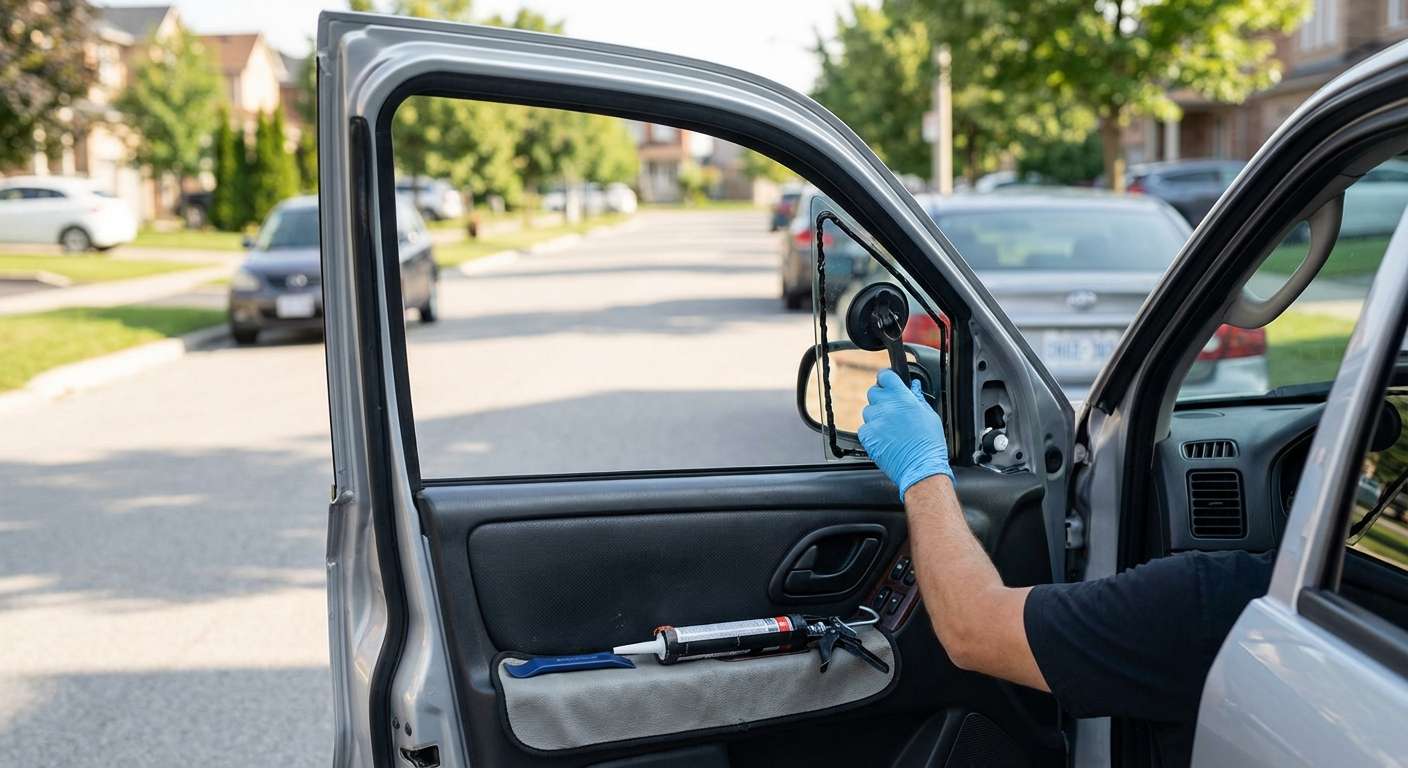
Restoring the Rugged First-Generation Classic: 2001-2007 Ford Escape Vent Glass Replacement
The 2001-2007 Ford Escape broke the mold for early compact SUVs, offering a boxy, utilitarian, and rugged design that has effortlessly stood the test of time. Whether you use your first-generation Escape for daily commuting or weekend off-roading, its signature angular vent glass plays a crucial role in the vehicle's structural aesthetics and cabin comfort. Unfortunately, because of its smaller size and relatively isolated position on the door frame, the vent glass is frequently targeted by car thieves or violently shattered by high-velocity highway debris. When you find yourself staring at a gaping hole where your Ford Escape vent glass used to be, a generic quick-fix simply will not cut it. You need a specialized, permanent solution to restore your vehicle's security, climate control, and acoustic barriers. At AlexWindshield, our Master Technicians combine decades of automotive glass expertise with precision engineering to bring your classic Ford SUV back to its original, pristine factory condition.
The Critical Importance of Immediate Vent Glass Replacement
Driving with a shattered or missing vent glass in your 2001-2007 Ford Escape is more than just an unsightly cosmetic issue; it is a severe compromise to your daily driving experience. The vent glass serves as a primary weather seal against harsh rain, snow, and freezing winds. Furthermore, an open cabin leaves your interior exposed to dust, pollen, and opportunistic theft. Many drivers make the mistake of taping over the broken vent window with plastic bags or cardboard, but this creates dangerous blind spots, generates terrible wind howling at highway speeds, and degrades the interior trim due to moisture buildup. A professional auto glass replacement ensures that the structural integrity of your door is maintained and that your cabin remains a quiet, secure, and climate-controlled environment.
Premium Mobile Auto Glass Services Across the Greater Toronto Area (GTA)
Dealing with broken car glass is stressful enough without having to navigate heavy traffic to reach a repair shop. That is why AlexWindshield brings the repair shop directly to your driveway, workplace, or emergency location. We proudly offer comprehensive mobile auto glass replacement services across the entire Greater Toronto Area (GTA). Our fleet of fully equipped mobile service vans is stationed to provide rapid response times to drivers in key regional hubs.
Whether your Ford Escape suffered a break-in while parked at a shopping center in Vaughan, sustained debris damage on the busy suburban roads of Richmond Hill, or requires a full vent glass replacement at your office complex in Markham, our technicians are ready to deploy. We understand the specific driving environments of the GTA—from the construction-heavy corridors of Markham to the fast-paced 400-series highways intersecting Vaughan and Richmond Hill. By choosing AlexWindshield, you are opting for local experts who understand how to handle the unique environmental factors and auto glass needs of Greater Toronto Area drivers.
The Master Technician's Blueprint: Step-by-Step Ford Escape Vent Glass Replacement
Replacing the vent glass on a 2001-2007 Ford Escape is a highly technical procedure. Unlike a standard roll-up door glass, the vent glass is rigidly mounted and tightly integrated into the door's weatherstripping and division bar mechanism. As a Master Technician at AlexWindshield, I strictly adhere to a meticulously crafted, step-by-step standard operating procedure to guarantee a flawless, leak-proof installation every single time.
Step 1: Vehicle Assessment and Advanced Interior Protection
Before any tools are picked up, we begin with a thorough assessment of the damage. Tempered vent glass is designed to shatter into thousands of tiny, pebble-like pieces upon impact. Because of this, our first priority is protecting the interior of your Ford Escape. We lay down heavy-duty, scratch-resistant protective moving blankets over your seats, center console, and floor mats. We also apply protective automotive masking tape to the exterior door frame to ensure that our tools do not scratch your vehicle's paint during the extraction and installation phases. Protecting your property is the hallmark of a true auto glass professional.
Step 2: Door Panel Removal and Component Dismantling
To access the mounting points of the vent glass frame and properly clean the inner mechanisms, the interior door panel must be fully removed. We utilize specialized, non-marring nylon trim removal tools to carefully pry off the plastic screw covers behind the interior door handle and armrest. After extracting the hidden retaining bolts, we gently pop the plastic retention clips free from the metal door shell. We carefully disconnect the power window switches, door lock harnesses, and speaker wires. Once the inner door panel is safely stored away, we peel back the factory vapor barrier to gain unrestricted access to the inner door cavity and the window run channel.
Step 3: Thorough Vacuuming of Shattered Glass Shards
Because this is a door glass replacement, shattered pieces inevitably fall deep into the mechanical cavity of the door. If left uncleaned, these glass shards will cause severe rattling sounds while driving, jam the power window regulator, and block the crucial water drainage weep holes at the bottom of the door shell. Using an industrial-grade, high-suction shop vacuum equipped with specialized micro-crevice attachments, we meticulously vacuum every single broken glass shard from the interior door cavity. We then transition to the cabin, vacuuming the carpet, the seat crevices, and the track sliders to ensure absolutely zero hazardous glass debris remains inside your Ford Escape.
Step 4: Division Bar Extraction and Old Glass Removal
The vent glass on the 2001-2007 Ford Escape is locked into place by a vertical metal division bar that separates it from the primary roll-up window. We lower the main door glass to the bottom of the door shell to relieve pressure. Next, we unbolt the hidden fasteners securing the division bar at the top of the door frame and the bottom of the door cavity. We carefully pull down the rubber window run weatherstripping and tilt the division bar backward. This maneuver allows us to safely extract the remaining broken vent glass frame, pulling out the shattered remnants and the old, degraded rubber seal from the vehicle's pinch weld.
Step 5: Surface Cleaning, Primer Application, and Adhesive Preparation
A flawless seal requires a surgically clean bonding surface. We begin by treating the metal pinch weld and the door frame seating area with a specialized, alcohol-based glass cleaner to strip away years of accumulated dirt, road grime, and old sealants. Once the surface is immaculate and fully dry, the critical chemical bonding process begins. We apply a high-performance, automotive-grade primer application directly to the metal frame and the encapsulating edges of the new vent glass. The black primer acts as a chemical bridge, promoting intense adhesion while preventing long-term rust formation on the bare metal of your door. We allow the primer to flash and cure according to strict manufacturer temperature guidelines.
Step 6: Precision Installation Using High-Quality Adhesive
With the primer cured, we prepare to mount the new premium vent glass. We apply a precise, uniform bead of high-quality adhesive—specifically, an advanced, fast-curing automotive polyurethane—along the mounting channel of the vent glass frame. Using suction cups and latex gloves to prevent oil cross-contamination, we carefully maneuver the new vent glass into the tight corner of the door frame. We apply firm, even pressure to seat the glass deeply into the urethane adhesive, ensuring a 100% airtight and watertight bond. We then realign the metal division bar, slide the rubber weatherstripping securely over the edges of the new glass, and bolt the internal hardware back to factory torque specifications.
Step 7: Reassembly and Final Quality Inspection
As the high-quality adhesive begins its rapid curing process, we reassemble the door. We meticulously re-seal the moisture vapor barrier, reconnect all electrical wiring harnesses for the locks and windows, and snap the interior door panel back into its factory retention clips. We secure all mounting screws and replace the cosmetic trim caps. Finally, we perform a rigorous quality assurance test. We run the primary window up and down to ensure smooth, unobstructed operation alongside the newly installed vent glass. We treat the exterior with an ammonia-free glass cleaner and inspect the seals to guarantee there will be no wind noise or water leaks during your next drive across the GTA.
Why Choose AlexWindshield for Your Auto Glass Needs?
Your 2001-2007 Ford Escape deserves the highest standard of care, and entrusting the repair to a certified expert is the only way to guarantee lasting safety and performance. At AlexWindshield, we are deeply committed to elevating the mobile auto glass industry through uncompromising technical precision, superior materials, and unparalleled customer service.
- Master Technician Expertise: Every replacement is executed by highly trained professionals who understand the intricate mechanics and structural requirements of your specific vehicle make and model.
- Premium Materials: We utilize only OEM-equivalent auto glass, advanced black primers, and high-quality urethane adhesives that exceed federal motor vehicle safety standards.
- Ultimate Convenience: Our fully equipped mobile vans bring top-tier repair capabilities to your doorstep anywhere in the GTA, including Vaughan, Richmond Hill, and Markham.
- Impeccable Cleanup: We treat your vehicle as if it were our own, guaranteeing that every last shard of shattered glass is thoroughly vacuumed and removed from your interior door panels and cabin.
- Peace of Mind: We stand confidently behind our craftsmanship, backing every single auto glass installation with an industry-leading Lifetime Warranty against leaks, wind noise, and manufacturer defects.
Do not let a broken vent glass compromise the security, comfort, and rugged aesthetic of your classic SUV. For precision, reliability, and mobile convenience, trust the auto glass authority in the Greater Toronto Area. Contact AlexWindshield today to schedule your 2001-2007 Ford Escape vent glass replacement and experience the gold standard in automotive glass repair.


