Restoring Your Classic Crossover: The 2001-2007 Ford Escape Back Glass Replacement Guide
The 2001-2007 Ford Escape revolutionized the compact SUV market with its rugged, boxy design and a highly practical dual-opening liftgate. While that independent rear glass hatch is incredibly convenient for tossing in groceries or loading lumber, it presents a very specific set of challenges when shattered. As a Master Technician at AlexWindshield, I have witnessed exactly what happens when the back glass on this first-generation Escape sustains a severe impact. Unlike a laminated front windshield that cracks and stays intact, the tempered rear glass of the Ford Escape explodes into thousands of tiny, pebble-like shards that infiltrate every crevice of your cargo area.
Whether you backed into a low-hanging branch or fell victim to a severe weather event, driving with a shattered rear window is not just uncomfortable—it is unsafe and leaves your vehicle's interior exposed to the harsh Ontario elements. Below, I will walk you through our uncompromising, professional approach to executing a flawless Back Glass Replacement for Ford Escape 2001-2007.
Why the First-Generation Ford Escape Requires Specialized Handling
Replacing the rear glass on the 2001-2007 Ford Escape is far more complex than a standard stationary window installation. This particular generation features a standalone glass hatch that opens independently of the main steel liftgate. This means the glass itself serves as a structural, moving component of the vehicle. It is equipped with hinges passing directly through the glass, gas-charged lift struts, a rear wiper motor assembly, and an integrated thermal defroster grid.
If these components are not meticulously disassembled and reinstalled with precise torque, the new glass can bind, leak, or shatter the very first time you close it. At AlexWindshield, we combine technical mastery with premium materials to ensure your Escape's liftgate functions exactly as it did when it rolled off the assembly line.
Our Master Technician’s Step-by-Step Back Glass Replacement Process
When you book a service with us, we do not cut corners. Our A-to-Z replacement protocol ensures absolute safety, structural integrity, and cosmetic perfection.
Step 1: Complete Vehicle Assessment and Interior Protection
Before any tools touch your vehicle, our technicians conduct a thorough inspection of the liftgate frame, hinges, and gas struts to ensure no secondary damage occurred during the glass breakage. Because the rear glass is tempered, shards can easily scratch your interior plastics or tear your upholstery. We drape thick, industrial-grade protective blankets over the rear bumper, folding rear seats, and cargo floor. We also apply protective tape to the painted edges of the liftgate to prevent accidental scratching during the replacement process.
Step 2: Extensive Glass Remediation and Panel Removal
When a back glass shatters, the cleanup is often the most labor-intensive part of the job. It is mandatory for our technicians to carefully remove the interior liftgate trim panels. Glass shards inevitably fall down inside the mechanical cavity of the rear door, where the latch and wiper motor live. Leaving glass in here will result in permanent, aggravating rattling noises every time you drive.
- Industrial Vacuuming: We use high-powered shop vacuums with specialized attachment nozzles to extract broken glass shards from the interior liftgate panel cavity.
- Cargo Area Cleanup: We meticulously vacuum the cargo area, the spare tire well, and the rear passenger seat tracks to ensure your family and pets are safe from hidden glass splinters.
- Weatherstrip Clearing: All remaining glass chunks lodged in the rubber weatherstripping and the bottom pinch weld are carefully extracted.
Step 3: Disassembly of the Liftgate Hardware
Because the 2001-2007 Ford Escape utilizes an opening glass hatch, the old shattered remnants are still bolted to vital hardware. We carefully unbolt the top glass hinges, detach the gas struts (temporarily supporting the liftgate safely), and meticulously disconnect the rear wiper motor assembly and wiper arm. We also disconnect the wiring harnesses for the rear defroster grid. All hardware is cleaned, inspected for wear, and set aside on a padded surface for reassembly.
Step 4: Pinch Weld Preparation and Old Urethane Removal
To ensure a watertight seal for the fixed portions of the window housing, the bonding surface (the pinch weld) must be prepared flawlessly. Using specialized auto glass cut-out knives, we carefully pare down the old layer of polyurethane adhesive. We do not remove it completely; rather, we trim it down to a thin, even layer of about 1 to 2 millimeters. This process, known as leaving a "bed" of urethane, provides the best possible bonding surface for the new adhesive. Any exposed bare metal on the vehicle frame is immediately treated to prevent future rust formation.
Step 5: Surface Cleaning, Primer Application, and High-Quality Adhesive
The longevity of your new back glass depends heavily on the chemical bonding process.
- Cleaning: Both the vehicle’s pinch weld and the black ceramic band (frit) of the new back glass are scrubbed with an alcohol-based, lint-free auto glass cleaner to remove all dust, grease, and manufacturing residues.
- Primer Application: We apply a specialized, fast-drying black glass primer to the edge of the new glass and any scratched areas of the vehicle’s pinch weld. This primer promotes maximum chemical adhesion and acts as a UV shield to protect the urethane from sun degradation.
- Urethane Bead Extrusion: Using a high-powered electric caulking gun, we extrude a thick, perfectly uniform triangular bead of premium, OEM-grade polyurethane adhesive. We only use high-quality adhesive that meets rigorous crash-test safety standards and offers a rapid Safe Drive Away Time (SDAT).
Step 6: Precision Installation of the New Glass
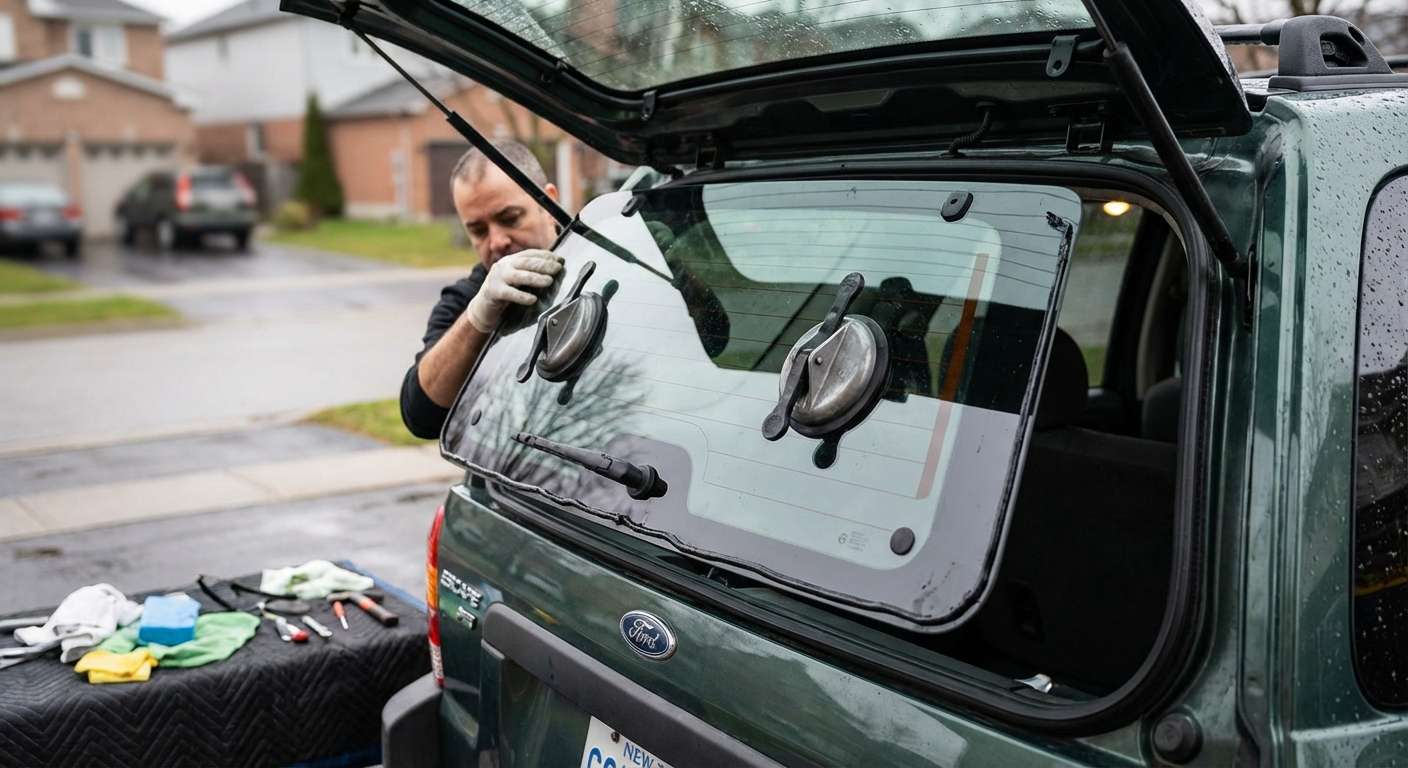
With the urethane applied, time is of the essence. Utilizing heavy-duty suction cups, our technicians carefully lift the brand-new, DOT-certified back glass. For the Ford Escape, we must simultaneously align the glass with the upper hinge mounting points while ensuring the bottom edge seats perfectly into the fresh urethane bead. Once the glass is set, we apply gentle, even pressure around the perimeter to compress the urethane, creating an impenetrable, watertight seal. Specialized retention tape is applied to hold the glass firmly in place while the adhesive begins its curing process.
Step 7: Reassembly and Defroster Connection
Once the glass is secure, we reverse the disassembly process. The upper hinges are bolted through the new glass using specialized rubber grommets to prevent stress fractures. The gas struts are reattached so the hatch can open and close under its own power. We then reinstall the rear wiper motor, align the exterior wiper arm, and plug in the electrical connectors for the rear defroster. Finally, the interior liftgate trim panels are snapped back into place. We finish with a streak-free cleaning of the new glass and perform a thorough water-leak test.
Mobile Auto Glass Services Across the Greater Toronto Area (GTA)
At AlexWindshield, we understand that a shattered back glass brings your daily routine to a grinding halt. Driving with an open rear window on Ontario highways is simply not an option. That is why we bring our master technician expertise directly to your driveway, office parking lot, or commercial garage.
Our fleet of fully equipped mobile service vans provides top-tier auto glass replacements across the entire Greater Toronto Area (GTA). We proudly offer expedited mobile dispatch to specific regions, ensuring you are never stranded with a broken vehicle:
- Vaughan: Whether you are near Vaughan Mills or working out of a commercial hub in Concord, our mobile units arrive fully stocked with your Ford Escape back glass and all necessary hardware.
- Richmond Hill: Navigating the busy stretches of Yonge Street with a broken window is stressful. Let us come to your Richmond Hill residence to clean up the shattered glass and install your new window right in your driveway.
- Markham: From Unionville to the high-tech corporate campuses of Markham, our mobile technicians deliver precision installations without interrupting your workday.
Why Choose AlexWindshield for Your Ford Escape Auto Glass Needs?
Your 2001-2007 Ford Escape is a reliable, hardworking vehicle that deserves the highest standard of care. Entrusting your back glass replacement to inexperienced hands can lead to devastating consequences, from internal water damage and electrical shorts in your liftgate, to a catastrophic blowout of the glass on the highway.
As a Master Technician at AlexWindshield, I personally guarantee that every installation follows strict manufacturer protocols. We don't just replace glass; we restore your vehicle's safety, security, and comfort. We back our meticulous workmanship, premium glass products, and advanced urethane adhesives with an industry-leading Lifetime Warranty. This warranty protects you against any wind leaks, water leaks, or manufacturer defects for as long as you own your Ford Escape.
Don't let a shattered rear window keep your classic crossover off the road. For the most reliable, precise, and convenient mobile auto glass service in the Greater Toronto Area (GTA), contact AlexWindshield today and experience the gold standard of auto glass repair.


