Restoring the American Luxury Standard: 2014-2019 Cadillac CTS Back Glass Replacement
The third-generation 2014-2019 Cadillac CTS redefined American luxury with its striking, angular profile, magnetic ride control, and meticulous cabin craftsmanship. It is a vehicle designed to isolate the driver from the harshness of the outside world. However, when your rear windshield shatters, that meticulously crafted sanctuary is instantly compromised. Unlike front windshields that are laminated and remain in one piece upon impact, the rear glass of your Cadillac CTS is constructed from tempered safety glass. When breached, it explodes into thousands of sharp, granular cubes that aggressively infiltrate every crevice of your premium leather seating and rear deck grilles. Restoring your luxury sedan requires far more than just slapping on a new piece of glass; it demands the precision, extreme care, and technical expertise of a Master Technician.
The Specialized Anatomy of the Cadillac CTS Rear Windshield
At AlexWindshield, we understand that the rear glass of the 2014-2019 Cadillac CTS is a highly sophisticated automotive component. This specific generation features integrated rear defroster grids essential for Canadian winters, and in many trims, it houses embedded radio and telematics antennas. Replacing this glass requires OEM-quality replacements, precise electrical reconnections, and a deep understanding of General Motors' structural engineering. A botched installation can lead to interior water leaks, malfunctioning defrosters, poor radio reception, or worst of all, structural failure during an accident.
Master Technician’s A-to-Z Step-by-Step Replacement Process
As senior auto glass technicians, we do not cut corners. Our Cadillac CTS back glass replacement protocol is a meticulous, step-by-step process designed to restore your vehicle to its factory-fresh condition, ensuring absolute safety and pristine aesthetics.
Step 1: Comprehensive Pre-Inspection and Interior Protection
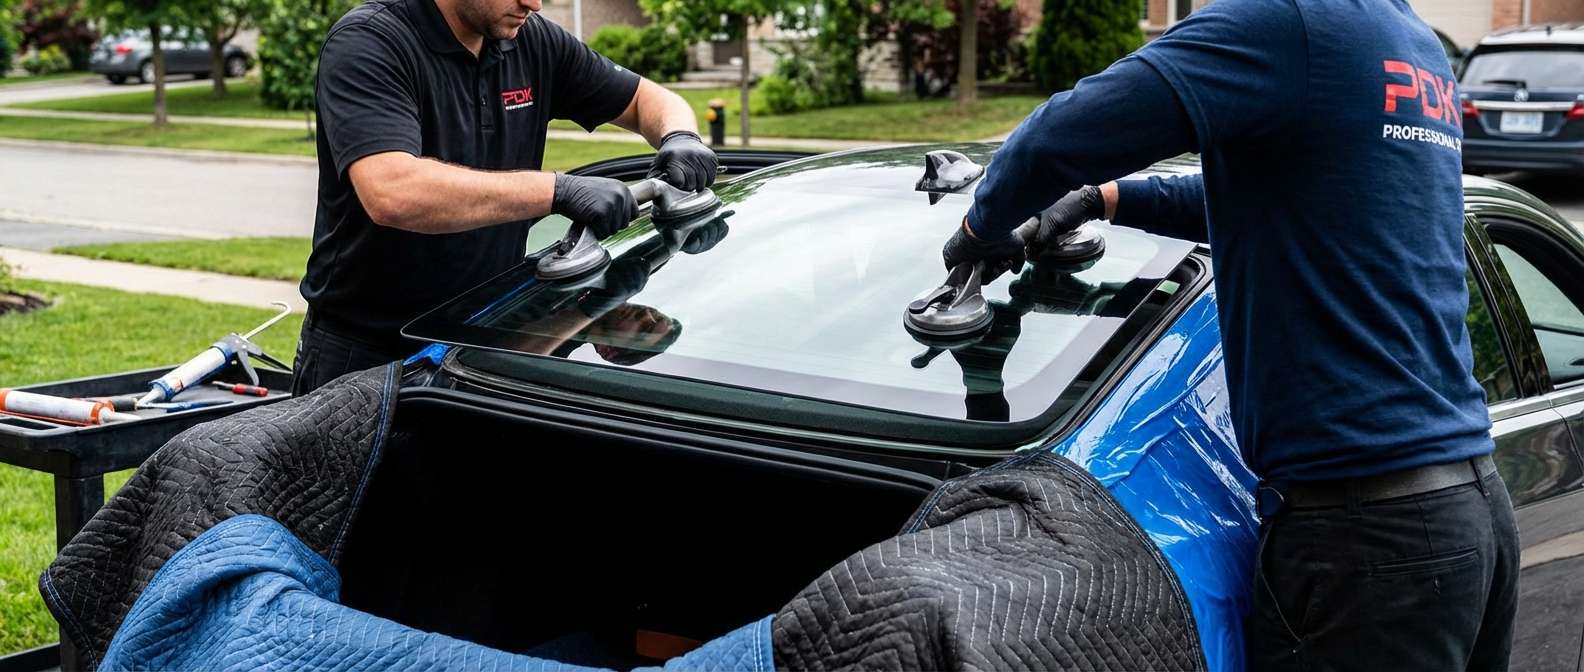
The hallmark of a premium service is respect for the vehicle's interior. Before any glass is removed, we perform a thorough inspection of the damage. We then deploy heavy-duty protective moving blankets and specialized crash wrap to cover the trunk exterior, the rear quarter panels, and the luxurious leather or suede rear seats. Tape is applied around the exterior window frame to protect the Cadillac's clear coat and paint from any accidental tool strikes during the extraction process.
Step 2: Interior Panel Removal and Intensive Shard Vacuuming
Because the rear glass is tempered, thousands of glass shards will inevitably fall into the cabin. To execute a proper back glass replacement, we must carefully detach the interior rear C-pillar trim panels and, when necessary, remove the rear parcel shelf (the deck behind the rear seats). This is a critical step. Once the panels are safely removed, we utilize high-powered, industrial shop vacuums equipped with specialized micro-crevice tools to extract every single broken glass shard from the interior. We vacuum the seats, the floorboards, the rear deck speaker housings, and deep within the structural channels of the trunk. Leaving even one piece of glass behind can cause irritating rattles or damage the interior materials over time.
Step 3: Extricating the Shattered Glass Ring and Old Urethane
Once the interior is perfectly clean, we turn our attention to the glass perimeter still bonded to the vehicle's frame. Using advanced wire-cutting systems and specialized cold knives, we slice through the factory polyurethane adhesive from the outside in. We carefully lift away the remaining ring of shattered glass. After the glass is removed, we use sharp, specialized scraping chisels to pare down the old urethane bead on the pinch weld (the metal frame of the car) to a uniform thickness of about 1 to 2 millimeters. This creates a smooth, optimal base for the new adhesive bond.
Step 4: Pinch Weld Cleaning, Preparation, and Priming
A new windshield is only as strong as the surface it bonds to. We meticulously brush away any remaining dirt, dust, and microscopic glass dust from the pinch weld. The entire perimeter is then scrubbed with an alcohol-based, lint-free cleaner. If our tools accidentally expose any bare metal during the old urethane removal, we apply a high-quality, chemically active glass primer. This anti-corrosive primer serves two critical purposes: it entirely prevents the formation of rust on your vehicle's frame, and it creates a chemical bridge that ensures maximum adhesion between the metal and the new urethane.
Step 5: Applying High-Quality Polyurethane Adhesive
With the pinch weld prepped and the new OEM-equivalent back glass thoroughly cleaned and treated with a glass-prep activator, we prepare the adhesive. At AlexWindshield, we exclusively use premium, fast-curing automotive polyurethane adhesive. Using an electric caulking gun, we apply a flawless, continuous "V-bead" of urethane around the entire perimeter of the pinch weld. The height and consistency of this bead are crucial; a Master Technician knows exactly how much pressure to apply to ensure there are no gaps, preventing future air whistling or water leaks.
Step 6: Precision Installation of the New Back Glass
Timing is everything once the urethane is applied. Utilizing heavy-duty suction cups, two technicians carefully lift the new Cadillac CTS rear glass and hover it over the vehicle frame. We align the glass perfectly with the factory reference points, gently lowering it into the urethane bed. Light, even pressure is applied around the edges to seat the glass, ensuring uniform gaps on all sides so that it sits flush with the Cadillac's sleek exterior roofline.
Step 7: Reconnecting Electronics and Final Curing
Once the glass is set, we immediately reconnect the pigtail wiring for the rear defroster grid and the integrated antenna system, testing them to ensure full electrical continuity. We then reinstall the interior parcel shelf, the C-pillar trims, and any exterior moldings. Finally, we clean the new glass inside and out using streak-free professional glass cleaner. We then advise the customer on the Safe Drive Away Time (SDAT), ensuring the urethane has adequately cured before the vehicle is driven.
Premier Mobile Auto Glass Services Across the Greater Toronto Area (GTA)
We know that a shattered rear windshield leaves your vehicle vulnerable to the elements and theft, making it incredibly difficult to drive to a repair shop. That is why AlexWindshield brings the auto glass shop directly to your driveway, office, or underground parking garage.
We proudly offer comprehensive mobile service across the entire Greater Toronto Area (GTA). Our fully equipped mobile service vans frequently operate in vital suburban hubs to ensure fast, responsive service when an emergency strikes.
- Vaughan: From Woodbridge to Maple, our technicians navigate the busy streets of Vaughan to provide rapid, on-site back glass replacements, ensuring your Cadillac is secured quickly.
- Richmond Hill: Whether you are near Yonge Street or off Bayview, we deliver pristine, Master Technician-level auto glass installations right to your luxury home or corporate office in Richmond Hill.
- Markham: From Unionville to Cornell, our mobile units serve the diverse communities of Markham, bringing industrial vacuums and OEM-quality glass directly to you, minimizing your downtime.
Why Trust AlexWindshield for Your Cadillac CTS Glass Replacement?
Choosing the right auto glass provider is about protecting your automotive investment. The 2014-2019 Cadillac CTS demands exact tolerances and meticulous care. By choosing AlexWindshield, you are opting for unparalleled technical expertise and uncompromising quality.
- Master Technicians: Our installers are rigorously trained in advanced adhesive systems, luxury vehicle interior dismantling, and complex electronic reconnections.
- OEM-Quality Materials: We use only industry-leading glass that matches exact factory specifications for tint, thickness, and defroster performance.
- Impeccable Cleanup: We guarantee an obsessive level of interior vacuuming to ensure your family is safe from hidden, dangerous glass shards.
- Unbeatable Mobile Convenience: We save you time and towing fees by performing the highest quality replacements wherever your vehicle is safely parked in the GTA.
Don't let shattered glass ruin the luxury experience of your Cadillac. For professional, seamless, and completely secure auto glass repair, trust the experts at AlexWindshield. We stand proudly behind our craftsmanship by offering a comprehensive Lifetime Warranty against water leaks, wind noise, and manufacturer defects for as long as you own your vehicle. Contact AlexWindshield today and experience the gold standard of mobile auto glass services in the Greater Toronto Area.


