The Definitive Guide to Vent Glass Replacement for the BMW X6 (E71)
The BMW X6 (E71), produced between 2008 and 2014, was not just another SUV; it was a revolutionary design that birthed the "Sports Activity Coupe" segment. With its aggressive stance, sloping roofline, and the commanding presence of the xDrive system, the E71 remains a symbol of automotive luxury and performance. However, that distinctive coupe-like silhouette relies heavily on the seamless integration of its glass components to maintain structural integrity and acoustic isolation. When a side vent glass is shattered—whether due to road debris, vandalism, or an accident—it disrupts the aerodynamic profile and exposes the sophisticated interior to the elements. At AlexWindshield, we understand that replacing the glass on a high-caliber vehicle like the X6 requires more than just generic tools; it demands the precision of a Master Technician.
Understanding the Role of Vent Glass in the BMW X6
The "vent glass" (often referred to as the quarter glass located within the rear door frame) on the BMW X6 E71 is a critical static component. Unlike the main roll-down windows, this piece is fixed, serving as a structural bridge between the C-pillar and the operational window. It provides visibility, contributes to the rigidity of the door frame, and plays a massive role in cabin soundproofing.
Because the X6 E71 utilizes tempered safety glass for its side windows, a breakage results in thousands of granular shards. While this prevents large jagged edges from causing injury, these shards have a tendency to migrate deep into the vehicle’s crevices, door mechanisms, and upholstery. A standard replacement service might just swap the glass, but a specialized service ensures the vehicle is returned to showroom condition.
AlexWindshield: The GTA's Premier Mobile Glass Specialist
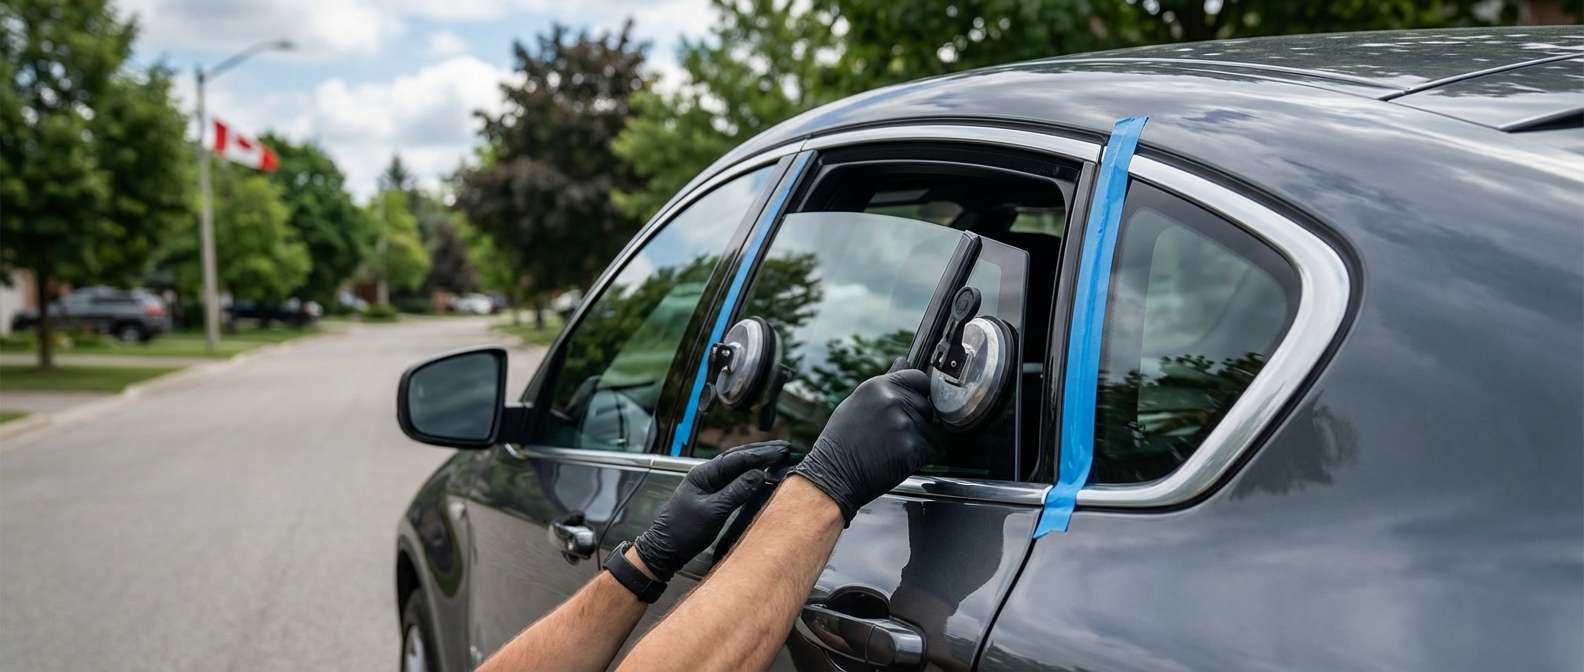
For owners residing in the Greater Toronto Area (GTA), AlexWindshield offers a level of convenience and expertise that is unmatched. We recognize that driving a BMW X6 with a broken window is a safety hazard and a security risk. That is why we bring our workshop to you. whether you are parked in a driveway in Vaughan, at an office complex in Markham, or a residential estate in Richmond Hill.
Our mobile units are fully equipped with specialized BMW tooling, industrial vacuums, and high-grade primers and adhesives to perform a factory-spec installation on-site. We do not rush; we restore.
Step-by-Step Technical Process: BMW X6 (E71) Vent Glass Replacement
Replacing the vent glass on an E71 chassis is a complex procedure that involves dismantling the rear door architecture. Below is the detailed, step-by-step protocol our Master Technicians follow to ensure a flawless installation.
Phase 1: Site Preparation and Interior Protection
Before any tools touch the vehicle, we prepare the workspace. BMW interiors, particularly the leather seats and wood trim found in the X6, are susceptible to scratches.
- Exterior Protection: We apply low-tack protective tape around the window frame and the painted door surface to prevent accidental scratches from glass shards or tools during removal.
- Interior Shielding: We place heavy-duty protective covers over the rear seats, the center console, and the floor mats. This catches falling glass and prevents leather perforation.
- Battery Safety: While not always mandatory for glass, on the sophisticated E71 electrical system, we ensure the window switches are in a neutral position before beginning disassembly.
Phase 2: Comprehensive Glass Debris Removal
Because the vent glass is tempered, it shatters explosively. The most tedious but necessary part of the job is debris management.
- Surface Vacuuming: Using industrial-grade vacuums with non-abrasive brush attachments, we remove all visible glass from the seats, carpet, and door pockets.
- Crevice Cleaning: We use compressed air to dislodge shards trapped between the seat cushions and the center console tracks.
Phase 3: Door Panel Disassembly (The E71 Protocol)
To access the vent glass mounting points, the interior door card (panel) must be removed. This requires specific knowledge of BMW fastener locations to avoid breaking brittle plastic clips.
- Trim Removal: Using soft plastic pry tools, we carefully remove the decorative trim strip running across the door panel. Behind this, and inside the door handle cup, hidden Torx screws secure the panel to the metal door skin.
- Panel Separation: We gently pop the friction clips around the perimeter of the door card. The E71 panels fit tight; excessive force can crack the fiberboard backing.
- Cable & Harness Disconnection: We disconnect the Bowden cable (door latch mechanism), the window switch connector, and the puddle light wiring harness. The door panel is then stored safely outside the work zone.
Phase 4: Vapor Barrier and Internal Vacuuming
This is a step amateurs often skip, leading to rattles and regulator failures later on.
- Vapor Barrier Peeling: We carefully peel back the foam vapor barrier sealed with butyl tape. This barrier protects the door electronics from moisture. It is crucial not to tear this material.
- Internal Cavity Cleaning: Broken glass invariably falls inside the hollow door shell. We insert a flexible vacuum hose to suck out every shard from the bottom of the door. Failure to do this results in an annoying "maraca" rattle sound every time you close the door.
- Regulator Protection: We inspect the window regulator gears and tracks to ensure no glass dust is lodged in the lubricant, which could cause the main window to grind or fail prematurely.
Phase 5: Removing the Old Vent Assembly
The vent glass in the BMW X6 rear door is separated from the main drop glass by a vertical division bar (run channel).
- Releasing the Run Channel: We locate the bolts securing the division bar at the top and bottom of the door frame. These are loosened or removed to allow the bar to shift.
- Weatherstrip Removal: The exterior belt molding and the upper window seal are carefully pulled back or removed to expose the edges of the vent glass frame.
- Extraction: Once the division bar is shifted, the old rubber gasket and any remaining glass fragments are removed. If the vent glass is encapsulated (surrounded by a frame), the entire unit is extracted.
Phase 6: Preparing the New Glass and Frame
We only use OEM-equivalent glass that matches the tint, curvature, and thickness of the original BMW factory glass. This ensures the acoustic properties of the cabin are maintained.
- Priming (If Bonded): If the specific sub-model uses a urethane-bonded vent (common in quarter panels, sometimes in doors depending on the year), we clean the bonding surface with an activator and apply a high-modulus primer to prevent rust and ensure adhesion.
- Gasket Fitting: For gasket-set glass, we inspect the rubber seal. If it is damaged by glass cuts, we replace the molding. We lubricate the new rubber seal with a silicone-based solution to ease installation without tearing.
Phase 7: Installation and Reassembly
The reassembly requires patience to ensure a water-tight seal and perfect alignment.
- Insertion: The new vent glass is maneuvered into the door frame. We carefully slide it into the rear channel and then position the vertical division bar back into place against the leading edge of the vent glass.
- Torqueing the Division Bar: We tighten the division bar bolts to BMW torque specifications. Misalignment here will cause wind noise or prevent the main window from rolling up smoothly.
- Functionality Test: Before putting the door panel back on, we reconnect the window switch temporarily to test the main drop glass. It must glide up and down the newly positioned division bar without resistance or noise.
- Water Test: We perform a localized water test to ensure the seals around the new vent glass are impermeable.
Phase 8: Final Reassembly and Cleanup
- Resealing Vapor Barrier: We re-adhere the vapor barrier, applying fresh butyl tape if necessary. A tight seal here is mandatory to prevent water from leaking onto the interior door sill.
- Door Panel Installation: The door card is snapped back into place, ensuring all clips engage. Torx screws are tightened, and the decorative trim is re-clipped.
- Final Polish: The new glass is cleaned with alcohol-based automotive glass cleaner to remove any fingerprints or handling marks. The interior is given a final vacuum to ensure absolute cleanliness.
Why Local Expertise Matters in the GTA
The climate in the Greater Toronto Area, from the humid summers in Markham to the freezing winters in Richmond Hill, puts immense stress on auto glass and adhesives. A poor installation can lead to leaks that promote mold or rust within the door frame. At AlexWindshield, we utilize adhesives and techniques specifically calibrated for the Canadian climate, ensuring that your replacement holds up against temperature fluctuations and road salt exposure.
The AlexWindshield Guarantee
We don't just fix cars; we build relationships based on trust and technical excellence. When you choose us for your BMW X6 (E71) vent glass replacement, you receive:
- Lifetime Warranty: We stand behind our workmanship for as long as you own the vehicle. If there is a leak or a noise issue related to our installation, we fix it for free.
- Mobile Convenience: We service the entire GTA, saving you the hassle of a towing service or a waiting room.
- Master Technicians: Our staff is trained specifically on luxury European makes, ensuring your BMW is treated with the respect it deserves.
Don't compromise the safety or the aesthetic of your BMW X6 with a sub-par repair. Trust the experts who know every bolt, clip, and wire in your E71.
Contact AlexWindshield today to schedule your mobile vent glass replacement in Vaughan, Richmond Hill, Markham, or anywhere across the GTA. Drive with clarity and confidence.


