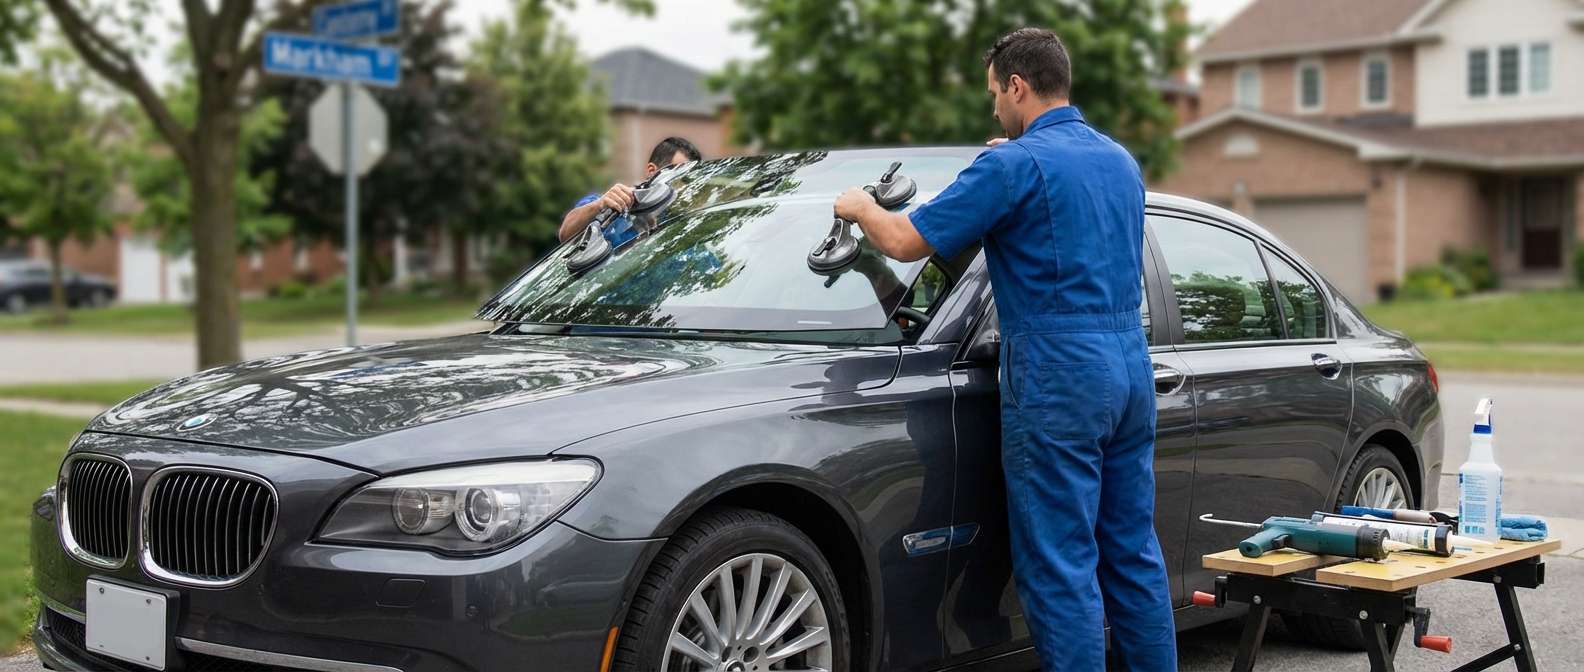
Expert Windshield Replacement for BMW 7 Series (F01) 2009-2015
The BMW 7 Series, specifically the F01 chassis (2009-2015), is not merely a vehicle; it is a masterpiece of Bavarian engineering that blends executive luxury with dynamic performance. When you drive an F01, you are cocooned in a cabin designed for silence, safety, and technological superiority. However, a cracked or chipped windshield does more than just mar the aesthetic of your 7 Series—it compromises the structural integrity of the passenger safety cell and disrupts the intricate network of sensors that define the modern driving experience. At AlexWindshield, we understand that replacing the glass on a flagship sedan requires the touch of a Master Technician, not a generalist.
Replacing the windshield on a BMW 7 Series requires a meticulous approach that respects the vehicle's complex architecture. From the Head-Up Display (HUD) clarity to the functionality of the Rain Sensor and Lane Departure Warning systems, every component must align perfectly. This guide details our specialized process for the F01 generation, ensuring your vehicle is restored to factory specifications.
Mobile Auto Glass Services Across the Greater Toronto Area
We recognize that BMW owners value their time. Whether your vehicle is parked at your executive office in Markham, your residence in Richmond Hill, or a shopping district in Vaughan, our fully equipped mobile units bring the workshop to you. AlexWindshield serves the entire Greater Toronto Area (GTA), ensuring that you receive dealership-quality glass replacement without the inconvenience of a towing service or a waiting room.
Our mobile technicians carry all necessary specialized tools, environment-control canopies, and OEM-quality adhesives to perform a safe installation in your driveway or parking lot, maintaining the same rigorous standards we uphold in our shop.
Why the BMW F01 Windshield is Unique
Before we begin the replacement process, it is vital to understand the specific glass requirements for the 2009-2015 7 Series. Utilizing generic aftermarket glass is often a mistake for this model due to specific technological integrations:
- Head-Up Display (HUD) Compatibility: Many F01 models are equipped with HUD. This requires a specially engineered windshield with a wedge-shaped laminate layer to prevent "ghosting" or double images of the projected data. Standard glass will render the HUD blurry and unusable.
- Acoustic Interlayer: To maintain the whisper-quiet cabin of the 7 Series, the windshield utilizes acoustic damping technology.
- Solar Reflective Coating: High-end BMW glass often includes infrared protection to reduce cabin heat build-up.
- Advanced Sensor Brackets: The glass comes pre-mounted with precise brackets for the rain sensor, condensation sensor, and the ADAS camera system.
Step-by-Step Replacement Process: The Master Technician Standard
At AlexWindshield, we do not cut corners. The replacement of a BMW F01 windshield is a surgical procedure. Below is the comprehensive, A-to-Z process we utilize to ensure safety and longevity.
Phase 1: Pre-Inspection and Interior Protection
Every service begins with a thorough inspection of the vehicle. We verify the functionality of your current windshield features, including the wipers, rain sensors, and HUD. Once verified, we proceed to protection:
- Interior Shielding: We place high-grade protective covers over the leather dashboard, steering wheel, and front seats. The F01 dashboard is susceptible to scratches, and our goal is to leave no trace of our work other than pristine glass.
- Exterior Taping: We apply blue painter's tape to the roofline and A-pillars to protect the paintwork during the removal of moldings.
Phase 2: Disassembly of Components
Accessing the glass edge on a BMW 7 Series requires careful disassembly of several exterior and interior components:
Exterior Removal: First, the windshield wiper arms are removed using a specialized puller to avoid damaging the splines. Next, we remove the cowl panel (scuttle panel)—the plastic trim at the base of the windshield. On the F01, this involves removing several clips and ensuring the heated washer jet lines are not strained. We also carefully detach the side moldings running up the A-pillars, which are often tightly clipped in.
Interior Disassembly: Inside the cabin, we dismantle the rearview mirror assembly. This is a delicate step as the plastic housing contains the Rain/Light Sensor and the Condensation Sensor. We disconnect the wiring harnesses for the ADAS camera system and carefully unclip the mirror from the windshield bracket.
Phase 3: Safe Removal of the Damaged Glass
This is the most critical phase for preserving the vehicle's body integrity. Unlike budget shops that use reciprocating saws (which can scratch the metal pinch weld and cause future rust), we use a precision FiberWire cutting system.
We thread a high-tensile cutting line through the existing urethane bead. Using a pulley system, we slice through the old adhesive around the perimeter of the glass. This method ensures that the pinch weld (the metal frame of the car) is never touched by a metal blade. Once the seal is broken, two technicians utilize heavy-duty suction cups to lift the heavy F01 windshield away from the vehicle body.
Phase 4: Surface Preparation and Cleaning
With the glass removed, the "full cut" method is applied. We trim the old urethane down to a thin, even layer of approximately 1mm to 2mm. This old urethane acts as the best possible base for the new adhesive to bond to.
If any minor scratches occurred on the pinch weld during previous replacements by other shops, we treat them immediately with a rust-inhibiting black primer. We then clean the bonding surface of the new windshield with a specialized glass activator to remove any silicone or production oils, ensuring a molecular bond.
Phase 5: Primer and Adhesive Application
We utilize Sika or DuPont automotive-grade urethane systems, specifically chosen for their high modulus and low conductivity properties—essential for BMW's complex electronics.
- Priming the Glass: A continuous layer of glass primer is applied to the frit band (the black ceramic edge) of the new windshield. This protects the adhesive from UV degradation and ensures adhesion.
- The V-Bead Application: Using a high-ratio electric caulking gun, we apply a high-viscosity urethane bead directly to the glass or the vehicle body (depending on the specific requirement of the F01 sub-model). We use a V-shaped nozzle which ensures that when the glass is set, the adhesive spreads outward evenly, eliminating air pockets and potential water leaks.
Phase 6: Installation and Reassembly
Using the suction cups, two technicians synchronize to lower the new windshield onto the vehicle frame. Precise alignment is crucial here; we align the VIN notch and ensure the gap between the roof and the glass is symmetrical to reduce wind noise.
Once the glass is set, we reinstall the cowl, wiper assembly, and side moldings. We verify that the cowl sits flush against the glass to prevent water from entering the engine bay and affecting the ECU box.
Mandatory ADAS Calibration: The Final Safety Step
For the 2009-2015 BMW 7 Series, windshield replacement is not complete once the glass is glued in. The F01 utilizes a KAFAS camera system mounted behind the rearview mirror. This camera is responsible for safety features such as Lane Departure Warning, Speed Limit Info, and High-Beam Assistant.
When the windshield is replaced, the angle of the camera changes slightly due to variances in the glass curvature and the thickness of the adhesive bead. Even a deviation of one degree can cause the system to miscalculate distances, rendering your safety features ineffective.
The Calibration Process at AlexWindshield
We perform a Dynamic Calibration for the BMW 7 Series F01. This involves:
- Connecting a specialized diagnostic tablet to the vehicle’s OBDII port.
- Initiating the camera "learn mode."
- Driving the vehicle on marked roads (such as Highway 407 or 400 in Vaughan and Markham) at specific speeds.
- The system reads the lane markings and recalibrates the camera focus to the new glass geometry.
Warning: Skipping this step puts you and your passengers at risk. We provide a certificate of calibration with every job involving ADAS features.
Post-Installation Care and Recommendations
To ensure the adhesive cures properly and the glass remains secure, we provide the following instructions to our BMW clients:
- Safe Drive-Away Time: Our high-modulus urethane allows for a safe drive-away time of just 60 minutes after installation.
- Car Wash Restriction: Do not use high-pressure automated car washes for at least 48 hours. The high pressure can shift the glass before the seal is fully cured. Hand washing is permitted.
- Tape Removal: Leave the retention tape on the roof for 24 hours to prevent the glass from sliding down due to gravity.
- Crack a Window: When closing the doors, keep a window slightly open for the first day. The BMW F01 has excellent cabin sealing; slamming a door creates air pressure that can push the uncured adhesive outward, causing leaks.
Why Choose AlexWindshield?
Your BMW 7 Series deserves the highest standard of care. At AlexWindshield, we combine technical expertise with premium materials to deliver results that exceed factory standards. We are not just glass installers; we are automotive safety experts dedicated to the GTA community.
We stand behind our craftsmanship with a Lifetime Warranty on leakage and workmanship for as long as you own the vehicle. Whether you are in Richmond Hill, Markham, Vaughan, or anywhere in the Greater Toronto Area, trust the Master Technicians at AlexWindshield to restore your driving view.
Ready to restore your BMW 7 Series? Contact AlexWindshield today for a quote and schedule your mobile service. Drive with clarity, drive with safety.


