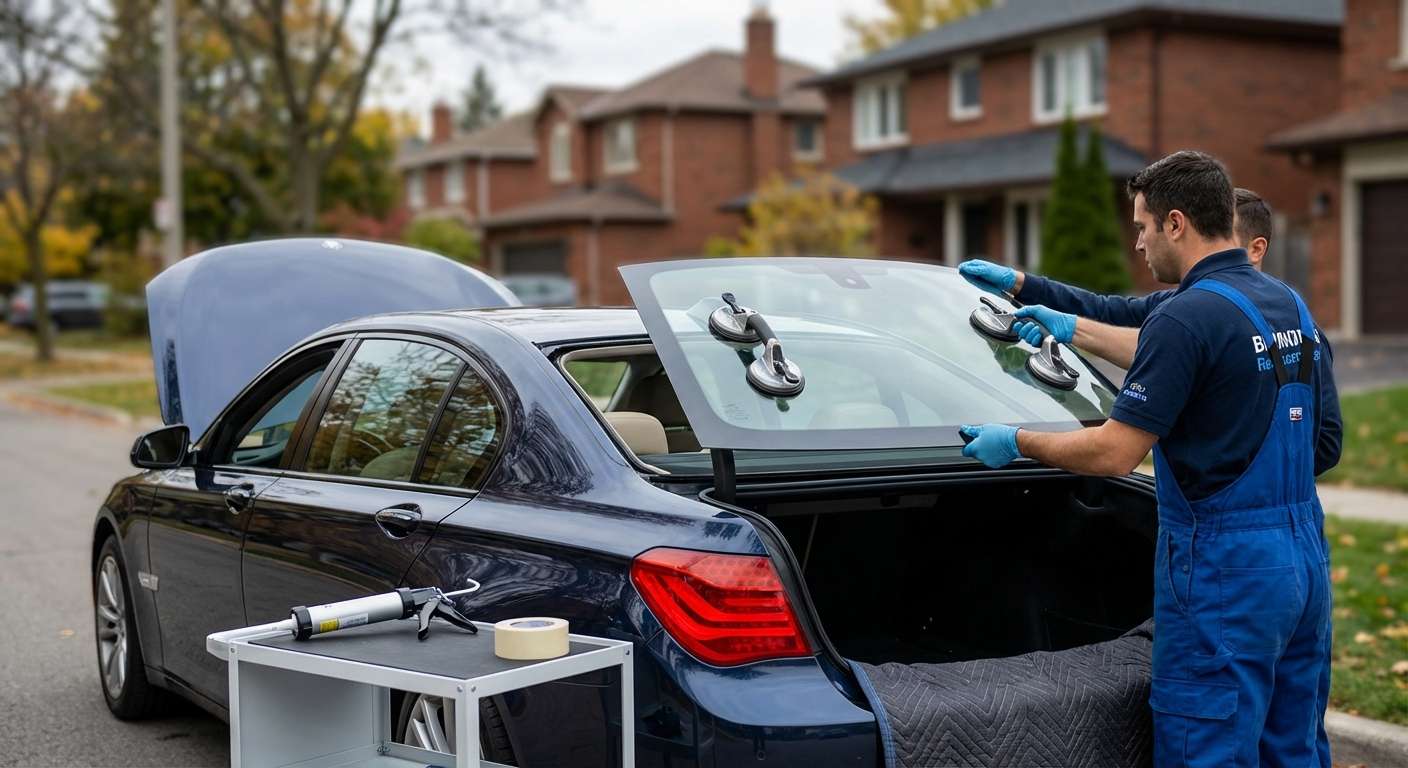
Restoring the Flagship: Back Glass Replacement for BMW 7 Series (F01) 2009-2015
The BMW 7 Series, specifically the F01 chassis produced between 2009 and 2015, stands as a paragon of Bavarian luxury and engineering dominance. It is a vehicle defined by its imposing presence, advanced technology, and whisper-quiet cabin. However, the shatter-resistant qualities of modern luxury vehicles are tested when the rear windshield is compromised. Unlike a front windshield which is laminated, the back glass of your BMW 7 Series is typically tempered safety glass. When it sustains impact, it doesn't just crack—it often shatters into thousands of granular pebbles. At AlexWindshield, we understand that for an F01 owner, this is not just a repair; it is a restoration of the vehicle's structural integrity and aesthetic perfection.
Driving a luxury sedan with a shattered or temporarily taped rear window compromises your security, exposes your bespoke interior to the harsh Canadian elements, and ruins the sophisticated silhouette of the 7 Series. As the premier auto glass specialists in the Greater Toronto Area (GTA), we provide a seamless, dealership-level replacement service brought directly to your driveway or office.
Mobile Auto Glass Mastery Across the GTA
We recognize that BMW 7 Series owners value time and convenience above all else. You should not have to spend your day in a waiting room. AlexWindshield brings the repair facility to you. Our fully equipped mobile units operate extensively throughout the Greater Toronto Area, with a high concentration of service coverage in:
- Vaughan: From Kleinburg to the chaotic 400 corridor, our technicians are ready.
- Richmond Hill: Servicing the luxury estates along Bayview and Yonge.
- Markham: Providing rapid response to tech hubs and residential sectors alike.
Whether your vehicle is parked in an underground garage in downtown Toronto or a driveway in King City, our mobile service incurs no extra travel fees and adheres to the same strict quality standards as our in-shop appointments.
The Technical Complexity of the F01 Rear Windshield
Replacing the back glass on a 2009-2015 BMW 7 Series is significantly more complex than servicing a standard economy vehicle. The F01 rear glass is an integrated component of the vehicle's electronic ecosystem. It contains:
- Heating Elements: A complex grid of defroster lines that must be electrically continuity-tested.
- Diversity Antenna Systems: The FM/AM and remote keyless entry antennas are often embedded within or connected directly to the glass glass infrastructure.
- Acoustic Properties: High-end BMW glass is designed to dampen road noise, maintaining the 7 Series' signature quiet ride.
An improper installation can lead to radio static, poor key fob range, water leaks into the trunk (damaging the amplifier and battery modules located below), and wind noise. At AlexWindshield, we use only OEM-equivalent glass (such as Pilkington, Saint-Gobain, or PGW) to ensure that every electronic feature functions exactly as it did when the car left the factory in Dingolfing.
Step-by-Step Replacement Process: The AlexWindshield Standard
As Master Technicians, we follow a rigorous protocol. Back glass replacement is messy by nature due to the shattering of tempered glass. Our process prioritizes not just the new glass, but the cleanliness and safety of your vehicle's interior. Here is our detailed A to Z workflow for the BMW F01:
Phase 1: Site Preparation and Vehicle Protection
Before a single tool touches your BMW, we prepare the environment. If we are working outdoors, we ensure the vehicle is positioned to avoid wind-blown debris.
- We apply protective fender covers to prevent accidental scratches to the paintwork while leaning over the trunk.
- The rear seats, headrests, and rear parcel shelf are covered with heavy-duty protective blankets. This catches any falling glass shards during the removal process.
- We mask the exterior body panels surrounding the rear window aperture with blue painter's tape to protect the clear coat from urethane smears or tool slips.
Phase 2: Debris Management and Interior Disassembly
This is the most critical differentiator between a budget shop and AlexWindshield. When tempered glass breaks, shards fly everywhere—into the vents, under the seats, and inside the body cavities.
- Interior Trim Removal: On the F01, we carefully remove the C-pillar interior trims and, if necessary, partially detach the rear parcel shelf to access the electrical connectors for the defroster and antenna. We use specialized nylon pry tools to ensure no leather or plastic clips are broken.
- Vacuuming Protocol: We utilize an industrial-grade HEPA vacuum to extract glass from the rear seats, the floor mats, and the trunk. We pay special attention to the gap between the rear seat back and the bottom cushion.
- Cavity Cleaning: We vacuum the "pinch weld" channel where the glass sits. It is vital to remove shards that have fallen inside the trunk lid gaps or behind the rear seats to prevent annoying rattles down the road.
Phase 3: Removal of the Damaged Glass and Adhesive
Once the electronics are disconnected and the bulk of the loose glass is removed, we address the bonded glass remains.
- Using a specialized cold knife or a wire-cutting system, we slice through the existing urethane bead that holds the glass shards to the vehicle frame.
- We carefully remove the remaining glass frame from the vehicle body.
- Using a razor scraper method, we trim the old urethane down to a thin, smooth layer (approximately 1-2mm). This "old" urethane serves as the best bonding surface for the new adhesive, provided it is clean and chemically active.
Phase 4: Surface Preparation and Priming
The longevity of the bond depends entirely on surface preparation. Rust or oil on the metal frame will cause seal failure.
- We clean the aperture with a contaminant-free glass cleaner and a lint-free cloth.
- Any areas where the paint was nicked or where bare metal is exposed during the cutting process are treated with a black primer/activator. This prevents rust formation, which is a common killer of older BMWs.
- We apply a glass activator to the ceramic band (frit) of the new rear windshield to ensure the urethane bites into the glass surface chemically.
Phase 5: Adhesive Application and Installation
We do not use generic glue. We utilize high-modulus, non-conductive urethane (such as Sika or Dow) specifically designed for luxury European automobiles. This is crucial because the adhesive acts as a structural component of the vehicle's roof strength.
- Using a high-ratio battery-powered caulking gun, we lay a consistent, pyramid-shaped "V-bead" of urethane along the perimeter of the new glass or the vehicle body (depending on the specific F01 mounting style). The V-bead ensures that when the glass is pressed down, the glue spreads outward and inward evenly, eliminating air pockets that cause leaks.
- Two technicians (or a specialized setting tool) are used to lift the large rear glass and position it precisely over the opening.
- The glass is lowered gently. We align the top edge with the roofline and ensure the gaps on the left and right sides are symmetrical, maintaining the BMW factory tolerances.
- We press the glass firmly to "deck" it into the urethane, ensuring a watertight seal.
Phase 6: Reassembly and Final Quality Check
The job isn't done until the car looks like it did in the showroom.
- We reconnect the defroster cables and antenna leads, testing them for connectivity.
- The C-pillar trims and rear parcel shelf components are reinstalled, ensuring all clips engage with a solid "click."
- We perform a secondary vacuum sweep of the interior to catch any rogue glass shards dislodged during installation.
- We clean the new glass inside and out to a streak-free shine.
- Retention tape is applied to the top of the glass to hold it in position while the urethane cures (usually safe to drive in 60 minutes).
Why the F01 Requires Expert Care
The BMW 7 Series is a heavy vehicle with a stiff chassis. The glass contributes to the torsional rigidity of the car. Using incorrect adhesive or failing to prime the metal can result in the glass popping loose during a collision or the roof crushing excessively in a rollover. Furthermore, the F01's sensitive electronics in the rear deck are susceptible to water damage. A cheap installation that leaks can destroy the logic 7 amplifier or the battery safety terminal located in the trunk, leading to thousands of dollars in electrical repairs.
At AlexWindshield, we treat the F01 with the reverence it deserves. We do not rush. We do not cut corners on materials. We understand that our work protects your investment and your passengers.
Lifetime Warranty and Trust
We are so confident in our technical precision that we offer a Lifetime Warranty on our workmanship for as long as you own your BMW. This covers you against wind noise, water leaks, and loose moldings. If there is ever an issue with the seal, we fix it—no questions asked.
Don't trust your luxury flagship to a generalist. For specialized Back Glass Replacement for your BMW 7 Series (F01), choose the experts who understand the engineering behind the badge.
Contact AlexWindshield today to schedule your mobile service in Vaughan, Richmond Hill, Markham, or anywhere across the GTA. Drive with clarity, safety, and confidence.


