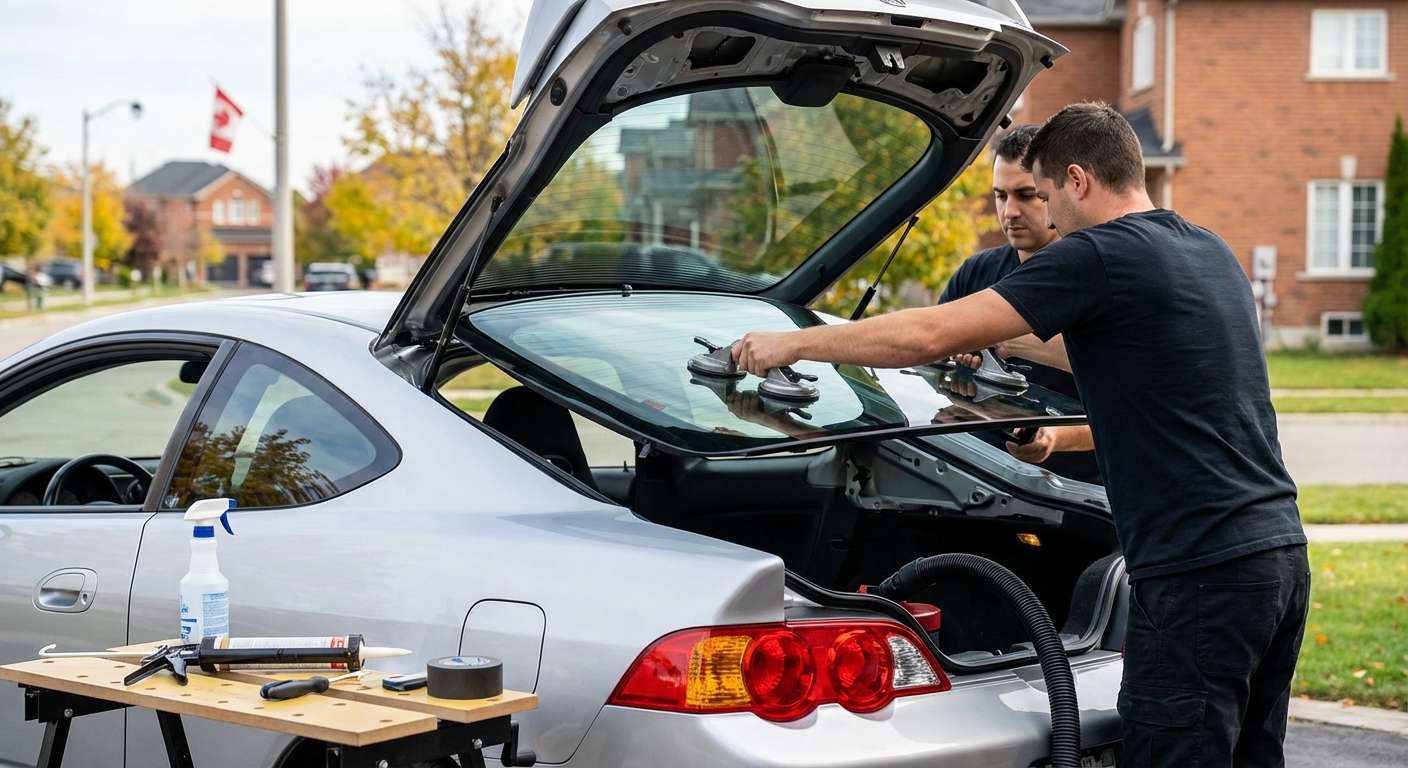
Restoring the Icon: Professional Back Glass Replacement for the Acura RSX (2002-2006)
The Acura RSX (known as the Honda Integra DC5 in Japan) is more than just a daily commuter; it is a staple of the tuner community and a modern classic. Produced between 2002 and 2006, this sport compact coupe is defined by its sharp handling, high-revving K-series engine, and its distinct, aerodynamic liftback silhouette. However, the expansive rear glass that gives the RSX its sleek profile and excellent visibility is also its most vulnerable component. Whether caused by a break-in, a stray baseball, or thermal stress, a shattered rear window on an RSX disrupts the structural integrity of the hatch and exposes your pristine interior to the elements.
At AlexWindshield, we understand that RSX owners are passionate about their vehicles. You aren't just looking for a piece of glass; you need a restoration of the vehicle's safety and aesthetics. As a Master Technician, I treat every Acura RSX back glass replacement with the precision required for a performance vehicle. This guide details our comprehensive process, our commitment to the Greater Toronto Area (GTA), and why our technical expertise makes us the premier choice for auto glass solutions.
The Critical Nature of Rear Glass in a Liftback Coupe
Unlike a standard sedan where the rear glass is stationary, the Acura RSX features a heavy rear hatch (liftgate). The back glass is bonded directly to this moving metal frame. Every time you open or close the trunk, the glass is subjected to kinetic energy and vibration. This makes the quality of the installation paramount. A poor bond can lead to leaks, wind noise, or even the glass detaching during a trunk slam.
Furthermore, the 2002-2006 Acura RSX utilizes tempered safety glass for the rear window. Unlike the laminated glass found in windshields, tempered glass is designed to shatter into thousands of small, pebble-like pieces upon impact to prevent severe injury. While safe for passengers, this "explosion" of glass creates a massive cleanup challenge, often embedding shards deep into the carpet, rear seats, and inside the hatch trim panels.
Mobile Service Across the GTA: Vaughan, Richmond Hill, and Markham
We know that driving a vehicle with a missing or shattered rear window is dangerous and illegal. The airflow can suck exhaust fumes into the cabin, and the lack of security leaves your car vulnerable. That is why AlexWindshield brings the repair shop to you. Our fully equipped mobile units operate throughout the Greater Toronto Area (GTA).
- Vaughan: From Woodbridge to Maple, we can perform the replacement in your driveway or office parking lot.
- Richmond Hill: Whether you are near Yonge Street or the Bayview extension, our technicians arrive promptly.
- Markham: We service all neighborhoods, ensuring Unionville and Cornell residents get top-tier glass care.
Our mobile service does not compromise on quality. We bring the same industrial-grade vacuums, primers, and urethanes used in our shop directly to your location in Toronto and surrounding areas.
Step-by-Step Technical Process: Acura RSX Back Glass Replacement
Replacing the rear glass on an Acura RSX is a technically demanding job that requires patience and specialized tools. As Master Technicians, we follow a rigorous protocol to ensure the new glass is water-tight, the defrosters function correctly, and every shard of broken glass is removed.
Step 1: Site Preparation and Interior Protection
Before we touch the vehicle, we ensure the work environment is safe. We inspect the extent of the damage. If the glass has shattered but is still held together by tint film, we tape it extensively to remove it in one piece. If it has crumbled, we proceed to protection.
We place heavy-duty protective covers over the Acura RSX’s sport bucket seats, the dashboard, and the rear cargo area. We also apply protective tape to the exterior paint surrounding the hatch to prevent accidental scratches from tools or glass debris during the removal process.
Step 2: Removal of Interior Trim and Spoiler (If Equipped)
This is a critical step often skipped by budget shops. The Acura RSX hatch is a hollow metal shell. When the back glass shatters, gravity pulls glass shards down inside the metal framework of the tailgate. If left inside, these shards will rattle incessantly every time you turn a corner or hit a bump.
To address this, we carefully remove the interior hatch trim panels. On the Type-S models or those equipped with the factory spoiler, we may need to access mounting points to ensure a clean work area. By exposing the bare metal of the hatch interior, we gain access to the hidden pockets where glass accumulates.
Step 3: The Detailed Vacuuming Process
Cleaning up the mess is 50% of the job when dealing with tempered glass replacement. Using industrial-grade vacuums with specialized narrow nozzle attachments, we perform a three-stage cleaning process:
- Macro Cleaning: Vacuuming the large piles of glass from the cargo cover, rear seats, and floor mats.
- Internal Hatch Cleaning: Inserting the vacuum nozzle deep into the metal cavities of the liftgate to suck out hidden shards. We manually shake the hatch gently to dislodge trapped pieces.
- Detail Cleaning: We vacuum the weather stripping and the exterior drainage channels around the trunk seal to ensure the new glass sits flush.
Step 4: Removing the Old Adhesive and Preparation
Once the debris is cleared, we remove the remains of the old glass and the original urethane bead. Using a specialized cold knife or extractor tool, we trim the old adhesive down to the pinch weld, leaving a thin, clean layer of the original bonding material. This old urethane acts as the best base for the new adhesive to bond to.
Any areas where the bare metal has been exposed or scratched by the glass breakage are treated with a high-grade anti-corrosion primer. This prevents rust from forming under the glass, which is a common killer of older vehicles like the 2002-2006 RSX.
Step 5: Priming and Electrical Preparation
The new rear glass for the Acura RSX comes equipped with a heating element (defroster grid). Before installation, we inspect the electrical connectors on the new glass to ensure continuity. We also inspect the vehicle's wiring harness on the hatch to ensure the tabs weren't damaged when the previous glass broke.
We clean the bonding surface of the new glass with a sika-activator or equivalent glass prep solution. We then apply a glass primer to the perimeter of the new window. This chemical step is non-negotiable; it ensures the urethane adhesive bonds molecularly to the glass, preventing separation.
Step 6: Urethane Application and Glass Installation
We use only high-modulus, non-conductive polyurethane adhesive. Using a high-ratio caulking gun, we lay a consistent, triangular bead of urethane along the pinch weld of the hatch or directly onto the glass, depending on the specific fitment requirement of the DC5 chassis.
Using high-suction cups, two technicians (or a specialized setting tool) carefully lift the new back glass and position it onto the Acura RSX hatch. We align the glass perfectly with the roofline and the quarter panels to ensure uniform gaps. This is vital for the aerodynamics and the aesthetic flow of the car.
Step 7: Reassembly and Final Checks
Once the glass is set, we reconnect the defroster cables and test the circuit to ensure the heating grid will function during Canadian winters. We then reinstall the interior trim panels, ensuring all clips are secure and no rattles are present.
Finally, we perform a "leak check" visual inspection and a final vacuum of the interior to catch any stray shards that may have shifted during the installation. We apply retention tape to hold the glass in position while the adhesive cures.
Why the Choice of Glass Matters for the RSX
For a vehicle aged between 2002 and 2006, sourcing quality glass is key. At AlexWindshield, we utilize OEM-equivalent (Original Equipment Equivalent) glass. This ensures:
- Perfect Fitment: The curvature of the glass matches the hatch perfectly, preventing stress cracks.
- Optical Clarity: No distortion in the rearview mirror.
- Proper Tint Match: The factory "privacy" tint (if applicable) or standard solar green tint matches the rest of the vehicle.
- Durability: The heating grid is robust and designed to last.
Safety and Drive-Away Time
Your safety is our priority. Because the Acura RSX has a large rear glass surface area, the adhesive needs adequate time to cure before the vehicle is driven. This is known as the Safe Drive-Away Time (SDAT). Our premium adhesives typically allow for a drive-away time of one hour, depending on temperature and humidity levels in the GTA.
We advise all customers to keep the retention tape on for 24 hours and to avoid high-pressure car washes for at least 48 hours. This prevents the high-pressure water from displacing the uncured urethane and causing a permanent leak.
The AlexWindshield Advantage: Lifetime Warranty
We don't just fix cars; we build relationships with our clients in Vaughan, Markham, and Richmond Hill. We stand behind our craftsmanship with an industry-leading warranty.
Our Lifetime Warranty Covers:
- Water Leaks: If your back glass ever leaks due to our installation, we fix it for free.
- Air Noises: Whistling or wind noise caused by improper sealing is covered.
- Manufacturer Defects: Distortion or stress cracks caused by glass defects are covered.
Note: The warranty does not cover damage resulting from rust on the vehicle’s pinch weld or new impact damage.
Trust the Experts at AlexWindshield
The 2002-2006 Acura RSX is a car worth preserving. Don't trust its repair to a generic shop that treats it like just another sedan. It requires specific care regarding the liftgate debris removal and precise bonding to maintain its structural rigidity.
Whether you are in Vaughan, Richmond Hill, Markham, or anywhere in the Greater Toronto Area, AlexWindshield is your trusted partner for auto glass replacement. We combine the convenience of mobile service with the technical rigor of a master workshop.
Is your Acura RSX back glass shattered? Do not wait. Contact AlexWindshield today for a free quote and get back on the road with crystal-clear vision and peace of mind.


