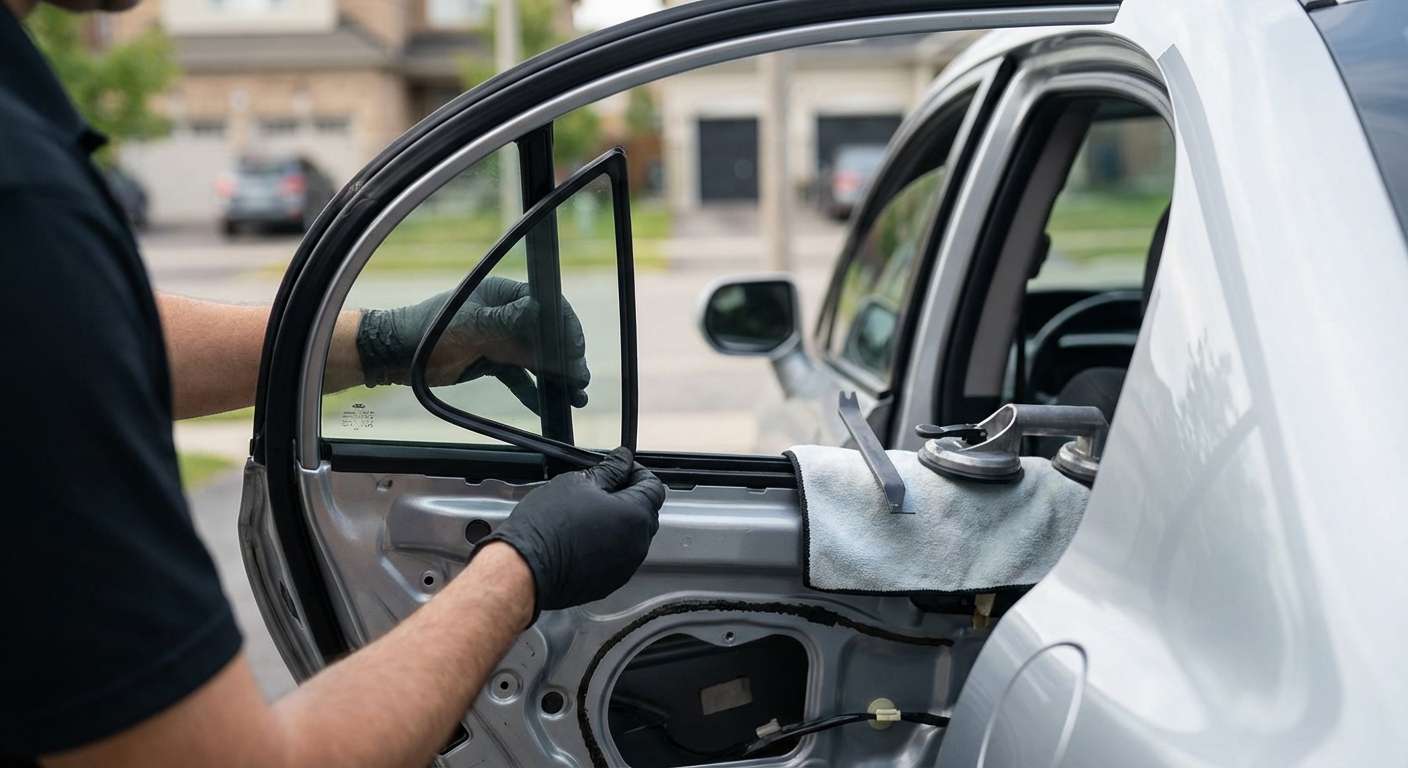
Expert Vent Glass Replacement for Acura CSX (2006-2011): Restoring a Canadian Classic
The Acura CSX is a unique chapter in automotive history—a luxury compact sedan designed exclusively for the Canadian market. As an owner of a 2006-2011 Acura CSX, you drive a vehicle that blends Honda’s legendary reliability with Acura’s premium refinement. However, even this reliable platform is not immune to the frustrations of vandalism, break-ins, or road debris damage. When the vent glass (often referred to as the quarter glass or triangular side glass) is shattered, it creates more than just an aesthetic issue; it compromises the security and weatherproofing of your vehicle.
At AlexWindshield, we understand that the vent glass on the CSX is not merely a stationary piece of glass; it is integrated into the complex mechanism of the rear door assembly. Unlike a standard windshield replacement, replacing a vent glass requires intimate knowledge of door internals, window regulators, and run channels. As your local Master Technicians serving the Greater Toronto Area (GTA), we provide a specialized, mobile solution that brings the repair shop to your driveway.
Understanding the Role of Vent Glass in Your Acura CSX
The vent glass on the 2006-2011 Acura CSX usually sits in the rear door, separated from the main roll-down window by a division bar. Because it does not roll down, many vehicle owners assume it is a simple "glue-in" fixture. This is a misconception. In the CSX (and its chassis-mate, the 8th Generation Civic), this glass is secured via the window run channel and the division bar, requiring significant disassembly to replace correctly.
Thieves often target this specific piece of glass under the false impression that it is the cheapest window to replace or that it won't trigger the alarm system. The reality is that a broken vent glass leaves your vehicle exposed to rain, snow, and theft, while the shattered remains can wreak havoc on your window regulator mechanism if not cleaned properly.
The AlexWindshield Mobile Service Advantage in the GTA
Driving with a taped-up window is dangerous and unsightly. That is why AlexWindshield offers premium mobile auto glass replacement services. We don't just serve downtown Toronto; our specialized mobile units are frequently deployed to:
- Vaughan: From Woodbridge to Maple, we handle replacements at your home or workplace.
- Richmond Hill: We provide rapid response times for residents along Yonge Street and Bayview Avenue.
- Markham: Whether you are in Unionville or near the rouge valley, our technicians come fully equipped.
Step-by-Step Technical Process: Replacing the Acura CSX Vent Glass
As a Senior SEO Specialist and Master Technician, I believe in transparency. You deserve to know exactly how we treat your vehicle. Replacing the vent glass on an Acura CSX (2006-2011) is a meticulous process involving the removal of door panels and the manipulation of the window track. Below is the A to Z procedure we follow to ensure factory-level quality.
Phase 1: Vehicle Preparation and Interior Protection
Before a single tool touches your car, we prioritize protection. Broken tempered glass has likely scattered throughout the rear seat and footwell.
- We apply protective covers to the rear seats and the exterior paint below the window to prevent scratches during the repair.
- We verify the operation of the main power window switch to ensure the regulator is still functional before disassembly.
- We tape up any remaining jagged glass edges to prevent injury and further crumbling during removal.
Phase 2: Door Panel (Door Card) Removal
To access the mounting points for the vent glass, the interior door panel must be removed. The Acura CSX utilizes hidden screws and high-tension clips.
- Fastener Removal: We carefully remove the plastic cover behind the interior door handle and the rubber mat inside the armrest pull cup to reveal the Phillips head screws securing the panel.
- Switch Disconnection: Using non-marring pry tools, we lift the power window switch assembly and disconnect the electrical harness.
- Panel Separation: Starting from the bottom edge, we use a specialized trim tool to pop the retaining clips without snapping them. The panel is then lifted upward off the window ledge.
- Cable Disconnection: We unhook the interior door handle cables (latch and lock) to fully free the door card.
Phase 3: Vapor Barrier and Debris Management
Once the panel is off, we are faced with the door's inner metal shell and the plastic vapor barrier.
- We carefully peel back the vapor barrier (the moisture shield) without tearing the adhesive butyl tape. This barrier is critical for preventing water from entering your cabin and causing mold.
- CRITICAL STEP - Vacuuming: This is where amateurs fail. When vent glass breaks, thousands of cubes of tempered glass fall inside the door shell. If left inside, they will rattle forever and can grind against the window regulator cables, causing the main window to fail. We use a high-powered industrial vacuum with a flexible crevice tool to extract 100% of the glass shards from the bottom of the door cavity.
Phase 4: Removing the Division Bar and Old Glass
The vent glass on the Acura CSX is held in place by the division bar (the vertical pillar separating the small glass from the big glass).
- lowering the Main Window: We lower the main door glass to a specific height to allow access to the run channel bolts.
- Run Channel Manipulation: We pull the rubber run channel out of the top and sides of the door frame to expose the securing screws at the top of the division bar.
- Unbolting the Division Bar: There is typically a 10mm bolt at the bottom of the division bar (inside the door shell) and a screw at the top. We remove these fasteners to allow the bar to tilt.
- Extraction: By tilting the division bar, we release the tension on the old vent glass seal. We then carefully remove the rubber gasket and any remaining glass fragments from the frame.
Phase 5: Installing the New Vent Glass
We use only OEE (Original Equipment Equivalent) or OEM-standard glass to ensure a perfect fit for your 2006-2011 CSX.
- Gasket Preparation: We inspect the rubber gasket that surrounds the vent glass. If it was damaged by the glass breaking, we replace it. If it is intact, we clean it thoroughly and seat the new glass into the rubber seal.
- Lubrication: We apply a silicone-based lubricant to the rubber edges to help them slide effortlessly into the metal door frame without binding.
- Insertion: The new glass assembly is slid into position. This requires a delicate touch—pushing the division bar aside just enough to clear the glass without bending the metal frame.
- Securing the Division Bar: Once the glass is seated perfectly, we realign the division bar. We reinstall the top screw and the bottom 10mm bolt. We ensure the bar is perfectly vertical so the main window can roll up and down without friction.
Phase 6: Reassembly and Testing
With the glass physically installed, the job is only half done. Reassembly must be precise to prevent wind noise and water leaks.
- Run Channel Re-seating: We press the rubber run channel back into the door frame, ensuring there are no kinks or waves. A poor fit here causes wind noise at highway speeds.
- Functionality Test: Before putting the door panel back on, we reconnect the window switch temporarily. We roll the main window up and down several times to ensure it does not catch on the new vent glass assembly.
- Vapor Barrier Re-sealing: We re-adhere the vapor barrier, heating the butyl glue if necessary to ensure a watertight seal.
- Panel Installation: The door panel is snapped back into place, screws are tightened, and screw covers are replaced.
- Final Clean: We perform a final vacuum of the carpets and seats, and clean the new glass with high-grade automotive glass cleaner to remove any fingerprints.
Why Cheap Replacements Cost More in the Long Run
You might find budget repair shops offering a quick fix, but cutting corners on an Acura CSX vent glass replacement often leads to disaster. If the technician does not remove the door panel and vacuum the interior door shell, the hidden glass shards will eventually jam your window regulator. Replacing a burnt-out window motor or a snapped cable assembly is significantly more expensive than paying for a proper glass installation the first time.
Furthermore, improper alignment of the division bar can lead to high-pitched wind whistling while driving on the 407 or 401. At AlexWindshield, we guarantee that your vehicle will be returned to you as quiet and weather-tight as it was when it left the factory.
Trust AlexWindshield: Your Local Auto Glass Experts
Your Acura CSX deserves expert care. Don't trust a generalist with the specific intricacies of your vehicle's door assembly. Choose the specialists who understand the importance of comprehensive debris removal and precise alignment.
The AlexWindshield Promise:
- Mobile Convenience: We come to you in Vaughan, Richmond Hill, Markham, and across the GTA.
- Master Technicians: Certified experts with years of experience on Honda and Acura platforms.
- Lifetime Warranty: We stand behind our workmanship for as long as you own the vehicle. If you experience leaks or wind noise related to our installation, we fix it for free.
Don't let a broken vent glass compromise your safety or your schedule. Contact AlexWindshield today to book your appointment and experience the highest standard of auto glass service in the Greater Toronto Area.


