Restoring a Canadian Exclusive: Back Glass Replacement for Acura CSX (2006-2011)
The Acura CSX holds a unique place in automotive history as a Canada-exclusive luxury compact vehicle. Produced between 2006 and 2011, this model served as the entry-level gateway into the Acura brand, sharing its DNA with the JDM Honda Civic but refined with upscale amenities and distinct styling cues. Because this vehicle was sold exclusively in the Canadian market, sourcing the correct high-quality glass and understanding the specific wiring configurations for its rear defroster and embedded antenna requires specialized knowledge. A shattered rear windshield on a CSX isn't just a cosmetic issue; it compromises the structural integrity of the cabin and exposes your luxury interior to the harsh elements of the Greater Toronto Area (GTA).
At AlexWindshield, we treat your Acura CSX with the precision it deserves. As Master Technicians, we understand that back glass replacement is significantly more complex than standard windshield work due to the nature of tempered glass and the electrical components involved. Whether you are located in Vaughan, Richmond Hill, or Markham, our team provides a seamless, factory-grade restoration of your vehicle’s rear glass.
The Critical Differences Between Windshields and Back Glass
Many vehicle owners assume all auto glass is the same, but the engineering behind your 2006-2011 Acura CSX rear windshield is distinct. Unlike the front windshield, which is made of laminated glass designed to hold together upon impact, the back glass is constructed from tempered glass.
When tempered glass sustains an impact, it is designed to shatter into thousands of small, pebble-like pieces rather than jagged shards. While this is a safety feature intended to prevent lacerations, it creates a massive cleanup challenge. The tiny glass pellets can migrate into:
- The rear defroster vents.
- Underneath the rear seat cushions.
- Inside the trunk lining and spare tire well.
- Deep into the crevices of the rear deck panel.
Furthermore, the back glass of the Acura CSX houses the rear defroster grid and, in many trim levels, acts as a receiver for the radio antenna. A poor installation can result in radio static or a defroster that fails to melt ice during our freezing Ontario winters. At AlexWindshield, we ensure full electrical continuity is restored during the replacement process.
Service Availability: Serving the Entire GTA
A shattered back window renders your car undriveable, especially if it is raining or snowing. You shouldn't have to tow your vehicle to a shop. AlexWindshield specializes in premium mobile auto glass services. We bring our fully equipped mobile workshop directly to your driveway, workplace, or parking garage.
We have a strong presence and rapid response times in:
- Vaughan (including Woodbridge and Maple)
- Richmond Hill (Oak Ridges to Hwy 7)
- Markham (Unionville, Thornhill, and surrounding areas)
- Across the wider Greater Toronto Area
Master Technician Protocol: Step-by-Step Replacement Process
Replacing the back glass on an Acura CSX requires a meticulous, systematic approach to ensure no glass shards remain and the new window seals perfectly against leaks. Below is our detailed A to Z replacement process.
Phase 1: Site Preparation and Safety Assessment
Before touching the vehicle, our technicians perform a safety assessment. Since the glass is likely shattered, we don full Personal Protective Equipment (PPE). We inspect the extent of the damage and check the condition of the rear body panels to ensure no paint damage occurred when the glass broke.
Phase 2: Interior and Exterior Protection
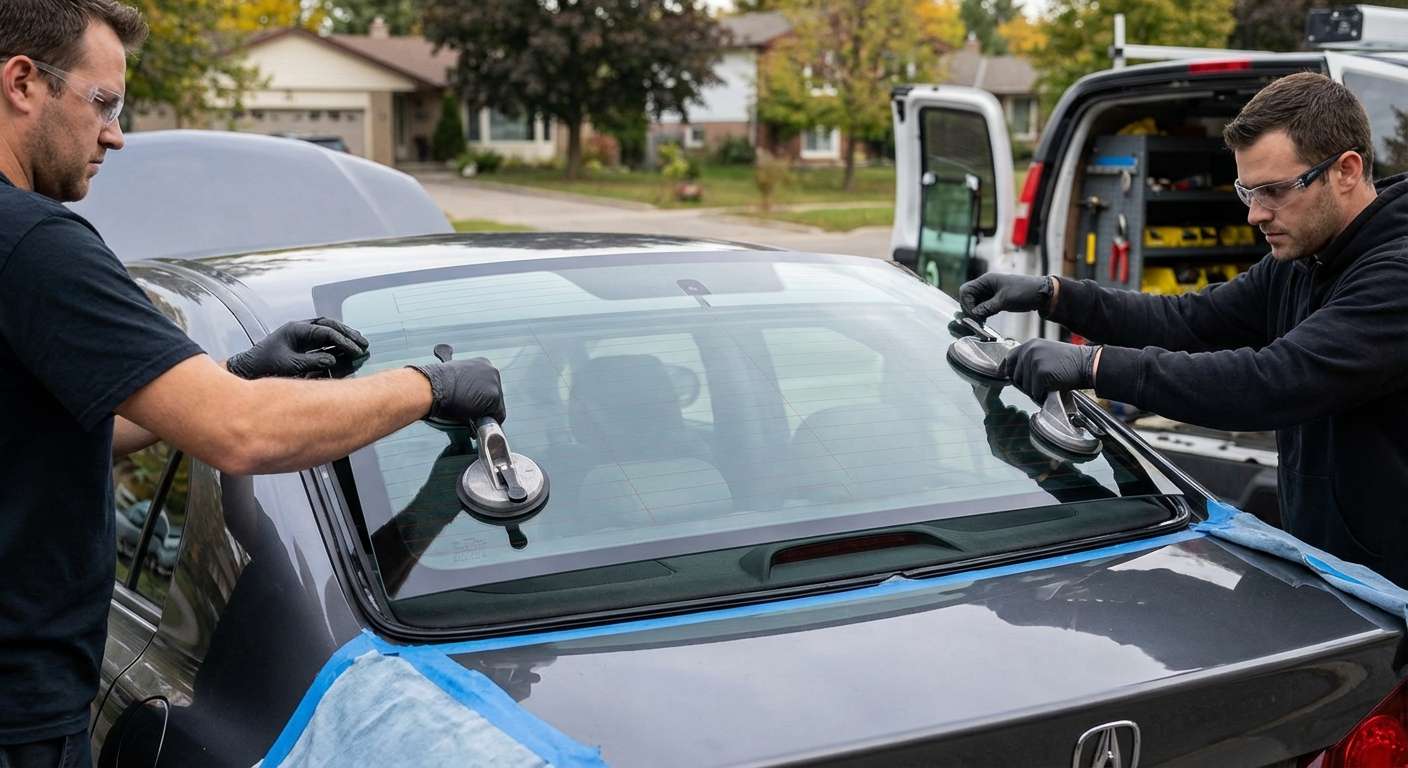
We apply protective coverings to the rear quarter panels and trunk lid to prevent scratches from tools or debris. Inside the cabin, we cover the rear seats and the rear deck (parcel shelf) with heavy-duty protective blankets. This step is vital to catch any falling glass during the removal of the frame.
Phase 3: Debris Removal and Vacuuming (Crucial Step)
This is where AlexWindshield differentiates itself from budget auto glass shops. The cleanup process for a shattered back glass is extensive.
- Bulk Removal: We carefully remove the larger chunks of glass still adhering to the frame.
- Initial Vacuum: We use industrial-grade vacuums to extract glass from the rear seats, floor mats, and headrests.
- Deep Cleaning: We remove the rear seat cushions if necessary to access glass that has fallen into the seat tracks. We also open the trunk and vacuum the spare tire well, as glass often slides through the rear deck vents into the trunk space.
- Panel Inspection: If glass has fallen inside the rear interior panels, we may partially detach them to vacuum the interior cavities, preventing annoying rattling noises while you drive.
Phase 4: Removing the Old Urethane and Moldings
The Acura CSX utilizes a specific molding system. We carefully remove any remaining trim. Using specialized cutting tools (such as the Equalizer system or cold knives), we slice through the old urethane adhesive that bonds the glass to the vehicle's pinch weld. This requires a steady hand to avoid scratching the metal pinch weld, which could lead to rust formation.
Phase 5: Pinch Weld Preparation
Once the glass residue is removed, we trim the old urethane down to a precise thickness (approximately 1-2mm). This provides a fresh base for the new bond. We then inspect the metal frame for any scratches or corrosion. If any bare metal is exposed during the removal process, we apply a high-quality black primer. This primer serves two purposes: it prevents rust and acts as a chemical bonding agent for the new adhesive.
Phase 6: Preparing the New Glass
We select a brand-new, OEM-specification rear windshield for the 2006-2011 Acura CSX. Before installation, we chemically clean the bonding surface of the new glass to remove manufacturing oils. We then apply a glass activator and primer to the edge of the glass to ensure the urethane adheres chemically, not just physically.
Phase 7: Adhesive Application
We apply a continuous, triangular bead of high-modulus, non-conductive Sika™ or Dow™ urethane adhesive. The triangular shape is industry standard as it minimizes air pockets and ensures a uniform crush when the glass is set. Using high-quality urethane is non-negotiable; it is the structural glue that keeps the roof form rigid and prevents the glass from ejecting in a collision.
Phase 8: Glass Installation and Alignment
Using suction cups (and typically a two-person team or a mechanical setting tool for precision), we carefully lower the new back glass into the opening. We align the glass with the Acura CSX’s body lines, ensuring the gaps are symmetrical on the left and right sides. We gently press the glass into the urethane to establish the bond.
Phase 9: Electrical Reconnection
Once the glass is set, we reconnect the electrical tabs for the rear defroster and the radio antenna. We inspect the connectors for corrosion and clean them if necessary to ensure a strong electrical current. We test the continuity to verify that the heating grid will function correctly.
Phase 10: Final Trim Reassembly and Cleanup
We reinstall any exterior moldings and interior trim pieces that were removed. We perform a final "white glove" vacuum of the interior to ensure we didn't miss a single shard of glass. Finally, we clean the glass inside and out with streak-free cleaner.
Why the 'Cheapest Quote' Can Cost You More
In the competitive auto glass market of the GTA, you will find fluctuating prices. However, cutting corners on a back glass replacement for a vehicle like the Acura CSX can lead to significant issues down the road.
Risks of improper installation include:
- Water Leaks: If the old urethane isn't trimmed correctly or the primer isn't used, water can seep into the trunk or cabin, causing mold and electrical damage.
- Rust: Scratches on the pinch weld that are not primed will rust quickly, eventually causing the glass to separate from the car.
- Rattling: Failure to vacuum inside the panels and under the seats results in a car that sounds like a maraca every time you hit a bump in Richmond Hill.
- Malfunctioning Electronics: Damaging the defroster tabs during installation means you won't have rear visibility in winter.
At AlexWindshield, we never compromise on materials or prep time. We use OEM-quality glass that matches the tint and curvature of your original Acura CSX parts.
Post-Installation Care for Your Acura CSX
After we complete the installation at your location in Vaughan, Markham, or elsewhere in the GTA, there are a few simple steps you must follow to ensure the adhesive cures properly:
- Wait to Drive: We will inform you of the Safe Drive-Away Time (SDAT), which is typically 60 minutes after installation, depending on humidity and temperature.
- Leave Windows Cracked: Keep your side windows cracked open by an inch for 24 hours. This prevents air pressure buildup when you close the doors, which could push the uncured back glass outward and create a leak.
- Avoid Car Washes: Do not use high-pressure automatic car washes for at least 48 hours. The high pressure can displace the molding and uncured adhesive.
- Be Gentle: Avoid slamming the doors or trunk unnecessarily hard for the first day.
Trust the Experts at AlexWindshield
Your Acura CSX is a premium vehicle that deserves premium care. Don't let a shattered back window disrupt your life or compromise your safety. AlexWindshield is the trusted name in the Greater Toronto Area for a reason: we combine technical mastery with unparalleled convenience.
We stand behind our craftsmanship with a comprehensive Lifetime Warranty on leakage and workmanship for as long as you own the vehicle. From the moment you call us to the moment we vacuum the last shard of glass from your upholstery, you are in the hands of professionals.
Ready to restore your Acura CSX? Contact AlexWindshield today for a free quote and schedule your mobile service in Vaughan, Richmond Hill, Markham, or anywhere in the GTA.


