Expert Quarter Glass Replacement for the 2007-2013 Mitsubishi Outlander
The 2007-2013 Mitsubishi Outlander revolutionized the crossover SUV market with its innovative flap-fold tailgate, rugged styling, and expansive cargo capacity. This second-generation Outlander quickly became a beloved choice for active families and outdoor adventurers. However, that generous rear cargo space is flanked by specialized, bonded quarter glass panels. Because these panels offer a clear view into the rear cargo area, they are unfortunately a common target for break-ins. Whether shattered by a thief, a stray golf ball, or an off-road mishap, a broken quarter glass leaves your Mitsubishi Outlander exposed to harsh weather and security risks. Restoring the structural integrity and aesthetic appeal of your vehicle requires precision, expertise, and the right materials.
At AlexWindshield, we specialize in precise, factory-standard auto glass restoration. As a Master Technician, I have replaced countless encapsulated glass panels on this specific generation of the Outlander. We know exactly how the interior trim clips behave, how the factory urethane is laid out, and how to properly align the encapsulated molding to ensure a wind-noise-free, watertight seal.
Why Choose AlexWindshield in the Greater Toronto Area (GTA)
When you suffer a shattered quarter glass, driving your vehicle to a shop with a compromised cabin and glass shards shifting around is the last thing you want to do. That is exactly why AlexWindshield offers premium mobile auto glass services across the Greater Toronto Area (GTA). We bring our fully equipped mobile workshop directly to your location, ensuring you do not have to disrupt your day or risk driving an unsafe vehicle.
We proudly serve motorists throughout the region, with specialized rapid-response availability in Vaughan, Richmond Hill, and Markham. Whether your Outlander is parked in a commercial lot in Vaughan, sitting in your residential driveway in Richmond Hill, or at an office complex in Markham, our technicians arrive with the exact replacement quarter glass, premium adhesives, and industrial vacuums needed to execute a flawless, on-site replacement.
Understanding the 2007-2013 Mitsubishi Outlander Quarter Glass
Before diving into the replacement process, it is important to understand the technical anatomy of the 2007-2013 Mitsubishi Outlander's quarter glass. Unlike older vehicles where quarter glass was held in by a simple rubber gasket, the second-generation Outlander utilizes an encapsulated, urethane-bonded quarter glass. This means:
- Urethane Bonding: The glass is glued directly to the vehicle's pinch weld, providing structural rigidity to the rear quarter panel of the SUV.
- Encapsulation: The rubber weatherstripping and molding are molded directly onto the edges of the replacement glass at the factory. Alignment during installation must be millimeter-perfect.
- Tempered Glass Composition: Quarter glass is manufactured as tempered safety glass. When struck with sufficient force, it does not crack like a windshield; it explodes into thousands of small, blunt cube-like shards.
Step-by-Step Quarter Glass Replacement Process: From A to Z
As a Master Technician at AlexWindshield, I adhere to a strict, methodical procedure to ensure that every quarter glass replacement meets or exceeds original equipment manufacturer (OEM) safety standards. Here is the detailed, step-by-step technical process we perform on your Mitsubishi Outlander.
Step 1: Interior Protection and Damage Assessment
Our first priority is protecting the interior of your Mitsubishi Outlander. We begin by laying down heavy-duty protective drop cloths over the rear cargo floor, the flap-fold tailgate, and the second and third-row seating areas. We meticulously inspect the exterior paint around the quarter panel, applying specialized automotive masking tape to the body lines. This tape acts as a barrier to prevent any accidental scratches to your clear coat during the glass removal process.
Step 2: Interior Trim Removal and Intensive Glass Shard Vacuuming
Because the Outlander's quarter glass is tempered, a break results in thousands of tiny glass shards flooding the cargo area. These shards hide inside the interior plastic quarter trim panels, inside the seatbelt retractor housings, and underneath the cargo floorboards. We carefully use specialized non-marring nylon pry tools to remove the interior D-pillar and C-pillar plastic trims. Once the interior framework is exposed, we deploy industrial-grade, high-suction shop vacuums to extract every single piece of broken glass. Vacuuming all broken glass shards from the vehicle's interior is a mandatory, exhaustive step. We ensure no hidden glass cubes are left behind to cause mysterious rattling noises or safety hazards for your passengers.
Step 3: Removing the Old Glass and Urethane Bead
With the interior stripped and protected, we turn our attention to the exterior. Even when shattered, the outer perimeter of the glass usually remains firmly glued to the pinch weld. Using a specialized cold knife and sometimes a power cut-out tool (such as an oscillating extractor), we carefully slice through the original factory polyurethane adhesive. We maintain strict blade control to ensure we cut only the adhesive and do not gouge the painted metal of the pinch weld underneath.
Step 4: Pinch Weld Preparation and Surface Cleaning
Once the remnants of the old glass and molding are removed, we are left with a thick bead of old urethane on the body of the Outlander. Using a razor-sharp scraper, we perform a process called "trimming the bead," cutting the old urethane down to a uniform thickness of about 1 to 2 millimeters. This remaining base serves as an excellent bonding foundation for the new adhesive. We then thoroughly clean the entire pinch weld channel with an alcohol-based, lint-free glass cleaner to remove dirt, grease, and any microscopic glass dust. Surface cleaning is paramount; any contamination can lead to a bonding failure or a water leak.
Step 5: Primer Application on the Vehicle Body and Glass
Bare metal scratches can sometimes occur during the removal process, or rust may already be present on a vehicle from the 2007-2013 era. We apply a high-quality automotive, anti-corrosive primer application to any exposed bare metal on the pinch weld. This prevents future rust formation. We also apply a specialized glass prep and primer to the black ceramic frit band on the inside edge of the new encapsulated quarter glass. This chemical primer promotes cross-linking, allowing the urethane adhesive to bite into the glass on a molecular level.
Step 6: Applying High-Quality Urethane Adhesive
At AlexWindshield, we never compromise on safety. We use only premium, fast-curing, high-quality adhesive (automotive-grade polyurethane). Using a professional electric caulking gun, we extrude a thick, uniform V-shaped bead of urethane directly onto the prepared pinch weld (or onto the glass, depending on the specific encapsulation geometry). The V-bead ensures that when the glass is pressed into place, the adhesive spreads evenly without air pockets, creating an impenetrable, watertight seal.
Step 7: Precision Installation of the New Quarter Glass
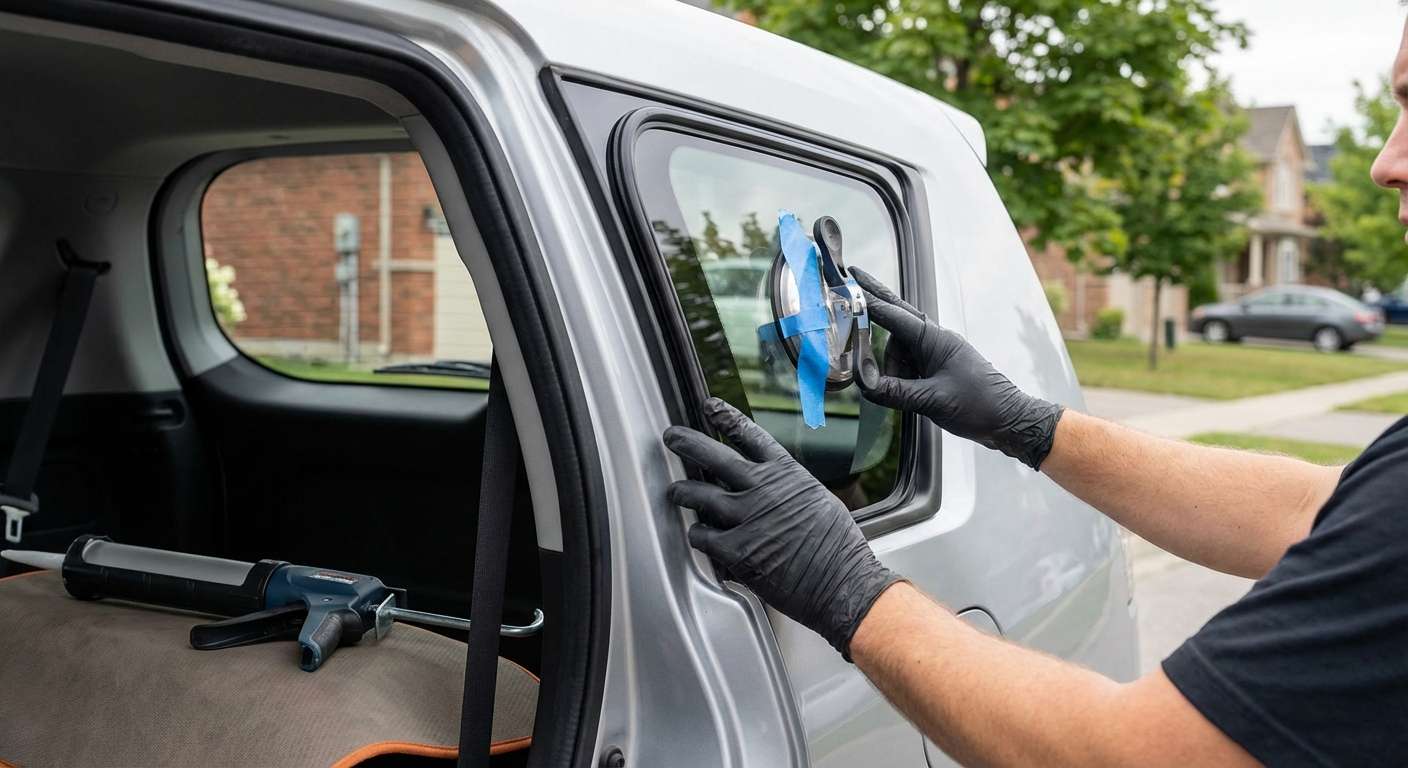
This step requires a steady hand and a keen eye. We carefully lift the new Mitsubishi Outlander quarter glass, aligning the integrated guide pins (if present) and the encapsulated rubber molding with the body lines of the vehicle. We press the glass firmly into the wet urethane bed. We then use specialized suction cup retention tape to hold the glass exactly in place, preventing it from sliding down due to gravity while the urethane begins its initial chemical cure.
Step 8: Reassembly, Final Inspection, and Cleanup
While the adhesive cures, we begin reassembling the vehicle. We reinstall the interior D-pillar and C-pillar trim pieces, ensuring all factory retaining clips snap securely back into place. We perform a secondary vacuuming sweep of the cargo area just to be absolutely certain no stray glass shards were dislodged during reassembly. Finally, we clean the new quarter glass inside and out with professional-grade, streak-free glass cleaner. A meticulous visual inspection is performed to verify the flush fitment of the exterior moldings.
Post-Installation Care for Your Mitsubishi Outlander
After your quarter glass replacement is complete, we will brief you on the Safe Drive-Away Time (SDAT) dictated by the premium urethane we used. Generally, the vehicle is safe to drive shortly after the installation, but we recommend adhering to a few simple rules for the first 24 to 48 hours:
- Avoid high-pressure car washes: The immense pressure can disrupt the curing urethane. Hand washing is safe.
- Leave the retention tape on: If we applied temporary holding tape, leave it in place for at least 24 hours.
- Keep a window slightly rolled down: When closing the doors, the cabin air pressure spikes. Keeping a window cracked allows the air to escape, preventing the newly installed quarter glass from being pushed outward.
Unmatched Auto Glass Service Across the GTA
Driving a 2007-2013 Mitsubishi Outlander means you value reliability and utility. When your quarter glass is compromised, you need a repair service that mirrors those exact values. AlexWindshield has built a reputation throughout the Greater Toronto Area (GTA) for delivering uncompromising quality directly to your doorstep.
Our mobile fleet is constantly navigating the busy corridors of Vaughan, catering to residential and commercial clients alike. We frequently service the suburban neighborhoods of Richmond Hill, ensuring families can quickly get back on the road safely. Furthermore, our rapid dispatch system extends into Markham, providing tech-savvy professionals with seamless, hassle-free booking and flawless execution. Wherever you are located within these key areas, our mobile master technicians bring the auto glass shop directly to you.
Book Your Mitsubishi Outlander Quarter Glass Replacement Today
Do not let a shattered quarter glass disrupt your life or leave your vehicle vulnerable to theft and water damage. Trust the experts who understand the intricate details of your 2007-2013 Mitsubishi Outlander. By choosing AlexWindshield, you are opting for factory-grade materials, exhaustive safety protocols, and the ultimate convenience of premium mobile auto glass service.
We stand behind our craftsmanship and the materials we use. That is why every replacement performed by AlexWindshield comes with a comprehensive Lifetime Warranty covering any wind noises, water leaks, or manufacturer defects in the glass. We are the trusted experts for mobile auto glass services in the GTA. Contact AlexWindshield today to schedule your swift, professional quarter glass replacement and experience the peace of mind that comes with hiring a true Master Technician.


