Restoring the Roar: Precision Vent Glass Replacement for Your 2008-2017 Mitsubishi Lancer
The 2008 to 2017 Mitsubishi Lancer is celebrated across the globe for its aggressive, rally-inspired "shark-nose" styling and legendary Japanese durability. Whether you drive the daily-commuter ES trim or a sportier GTS, this specific generation (CJ-CY) features distinctively angled geometric glass panels that contribute to its sleek, aerodynamic profile. However, when the vent glass on your Lancer is shattered—whether from a rogue pebble on the highway, extreme weather, or an unfortunate break-in—that iconic aesthetic and your cabin’s security are instantly compromised. Leaving a broken vent glass unattended not only exposes your interior to the harsh Canadian elements but also creates a significant security vulnerability.
As a Master Technician at AlexWindshield, I have replaced countless auto glass panels on the 2008-2017 Lancer platform. The vent glass—often a stationary piece located on the rear door or quarter panel structure—requires highly specialized attention. Unlike roll-up windows, this stationary glass is often encapsulated and bonded directly to the vehicle's frame, meaning a precise, chemically sound installation is paramount to preventing severe water leaks and disruptive wind noise.
Why Immediate Vent Glass Replacement is Crucial
Many drivers mistakenly believe that because the vent glass is one of the smallest windows on the vehicle, its replacement can be delayed. This is a critical error. The vent glass plays several vital roles in the overall integrity of your Mitsubishi Lancer:
- Cabin Security: Thieves frequently target the vent glass to gain access to interior door handles and locks. A temporary plastic patch is essentially an open invitation to criminals.
- Structural Integrity: Modern automotive glass, including the stationary vent glass, contributes to the overall rigidity of the vehicle's framework.
- Weather & Moisture Protection: The 2008-2017 Lancer is prone to cabin moisture if seals are compromised. A shattered vent glass allows rain and snow directly into the door cavity, potentially short-circuiting power window regulators and door lock actuators.
- Climate Control Efficiency: A breached cabin forces your heating and air conditioning systems to work in overdrive, decreasing fuel efficiency and comfort.
Premier Mobile Auto Glass Service Across the Greater Toronto Area (GTA)
At AlexWindshield, we understand that dealing with broken auto glass is a major inconvenience. That is why we bring our master-level technician services directly to your driveway, workplace, or emergency location. Our premium mobile auto glass replacement fleet proudly services the entirety of the Greater Toronto Area (GTA). We have dedicated rapid-response routes specifically highlighting Vaughan, Richmond Hill, and Markham.
Whether you are parked outside a busy office complex in Markham, running errands near Vaughan Mills, or relaxing at home in Richmond Hill, our fully equipped mobile service vans ensure that your 2008-2017 Mitsubishi Lancer vent glass is replaced with factory-level precision without you ever having to visit a traditional repair shop.
The AlexWindshield Master Technician Step-by-Step Replacement Process
Replacing the encapsulated vent glass on a 2008-2017 Mitsubishi Lancer is not a simple "pop-in" job. It requires a meticulous, multi-step approach involving interior disassembly, chemical bonding, and precise alignment. Here is our detailed A to Z process:
Step 1: Vehicle Preparation and Interior Protection
Before any tools touch your vehicle, preparation is our absolute priority. We begin by protecting the interior of your Mitsubishi Lancer. We place heavy-duty protective covers over your rear seats, floor mats, and interior trim panels to ensure that no debris, adhesives, or sharp edges cause secondary damage during the replacement. We also apply high-tack automotive tape around the exterior painted surfaces adjacent to the vent glass to protect the clear coat from accidental scratches.
Step 2: Removal of Door Panels and Interior Trim
Because the vent glass is integrated into the door or rear quarter structure, we must access the internal framework. Using specialized nylon, non-marring pry tools, we carefully unclip and remove the interior door panels and surrounding plastic garnishes. On the 2008-2017 Lancer, this involves locating and removing hidden Phillips screws behind the interior door handle bezel and beneath the armrest cover. Once the hardware is removed, we gently pop the retaining clips and lift the door panel away, disconnecting any electrical harnesses for the window switches and speakers.
Step 3: Complete Vacuuming of All Broken Glass Shards
When tempered vent glass shatters, it explodes into thousands of tiny, granular pieces. These shards fall deep down into the vehicle's door cavity, settling into the window tracks and the bottom of the door shell. We perform an exhaustive vacuuming of all broken glass shards from the vehicle's interior. Using a high-powered industrial shop vacuum with flexible micro-attachments, we extract every piece of glass from the seats, carpets, and the deepest crevices of the internal door cavity. Failing to do this can result in permanent rattling sounds when driving and severe damage to the internal mechanisms of your main roll-up window.
Step 4: Removal of the Old Urethane and Pinch Weld Cleaning
With the interior cleared, we focus on the damaged window frame. The factory vent glass is bonded to the metal pinch weld with industrial urethane. We use a specialized cold knife and a cut-out wire system to slice through the old, hardened adhesive without damaging the underlying metal. Once the broken frame and remaining glass chunks are removed, we use sharp scraper blades to pare down the old urethane bead to a flat, level surface of about 1-2 millimeters. We then perform a rigorous surface cleaning of the pinch weld using an alcohol-based prep solvent to remove dirt, grease, and microscopic contaminants.
Step 5: Mandatory Primer Application
This is a critical step that lesser shops often skip. Any areas where the bare metal of the pinch weld was exposed during the old adhesive removal must be treated. We apply a specialized, fast-drying black automotive primer application directly to these bare metal spots to prevent future rust and corrosion. Furthermore, we apply this same glass primer to the ceramic frit band (the black painted border) of your brand-new vent glass. The primer acts as a chemical bridge, promoting a molecular bond between the glass and the adhesive while providing essential UV protection to prevent the sun from degrading the glue over time.
Step 6: High-Quality Adhesive Application
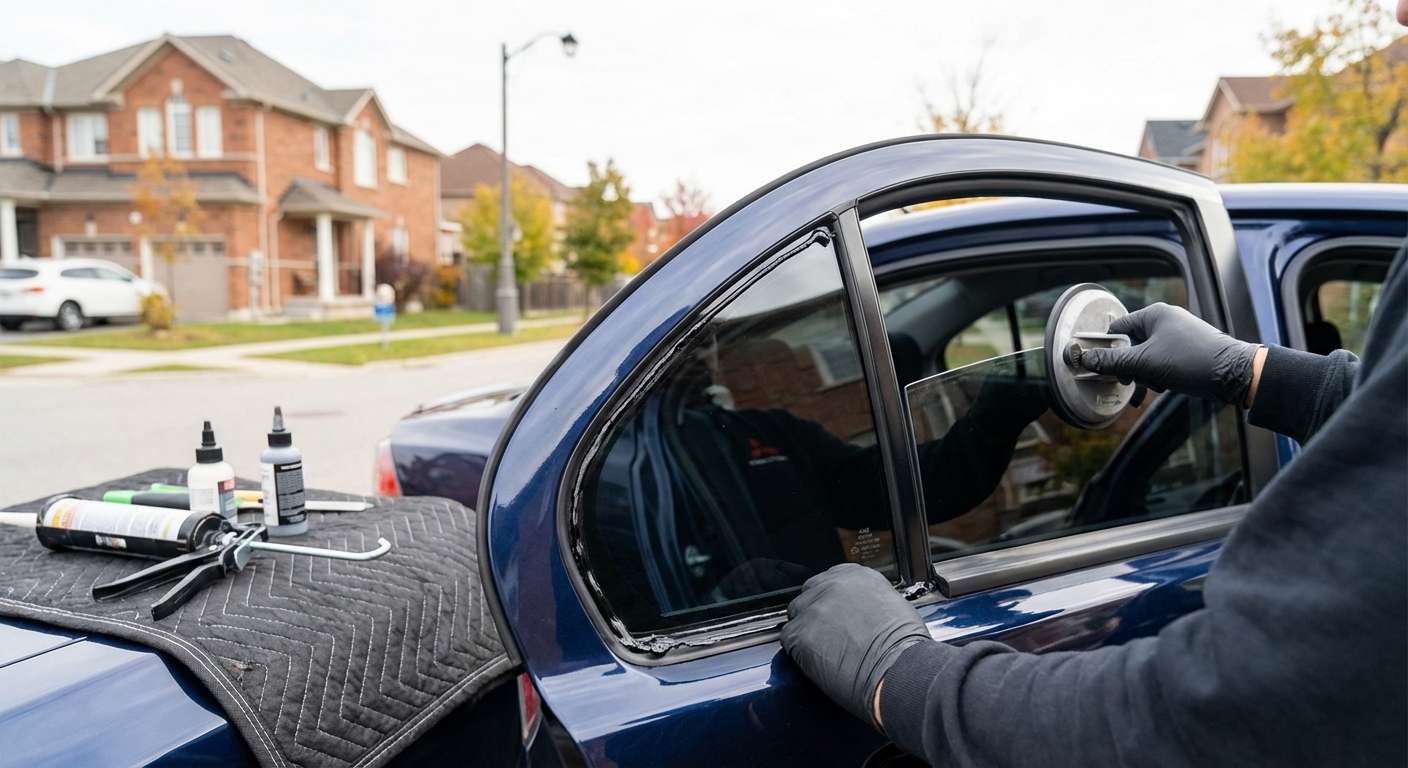
Once the primer has properly flashed off (dried), we prepare to bond the new glass. We exclusively utilize an industry-leading, OEM-grade, high-quality urethane adhesive. Using an electric caulking gun equipped with a specialized V-notch nozzle, we apply a consistent, towering bead of adhesive directly onto the prepared pinch weld. The V-notch ensures that when the glass is pressed into place, the urethane collapses perfectly to form an impenetrable, watertight, and airtight seal around the entire perimeter of the vent glass.
Step 7: Installation of the New Vent Glass
With the high-quality adhesive laid down, the new, exact-fit vent glass—manufactured specifically for the 2008-2017 Mitsubishi Lancer—is carefully lifted into position. Using high-grade suction cups for precise handling, we align the glass perfectly with the contours of the body lines. Gentle, even pressure is applied to "deck" the glass into the urethane, ensuring the depth matches the factory specifications exactly. We then use specialized retention tape to hold the glass firmly in place while the chemical curing process begins.
Step 8: Reassembly, Final Cleaning, and Curing Time
While the advanced urethane rapidly cures, we begin the reassembly process. We meticulously reinstall your interior trim, reconnect the electrical harnesses, and securely mount the door panels, ensuring every clip snaps perfectly back into place. Finally, we clean the new vent glass with a streak-free, foaming glass cleaner and do one last sweeping inspection of the interior. Our technician will then provide you with a Safe Drive-Away Time (SDAT), letting you know exactly when the adhesive has cured enough to meet Federal Motor Vehicle Safety Standards.
Trust the Experts at AlexWindshield
Your Mitsubishi Lancer deserves more than a quick, low-quality patch job; it demands the precision and expertise of certified master technicians. At AlexWindshield, we pride ourselves on delivering unparalleled craftsmanship, utilizing only the finest materials, primers, and adhesives on the market.
We are the trusted experts for premier mobile auto glass services across the Greater Toronto Area (GTA), proudly serving the communities of Vaughan, Richmond Hill, and Markham. Because we stand firmly behind the quality of our workmanship and the durability of our materials, every single vent glass replacement we perform comes backed by our comprehensive Lifetime Warranty against water leaks, air noises, and manufacturer defects.
Don't let a shattered vent glass compromise your security, your comfort, or the sleek look of your 2008-2017 Lancer. Contact AlexWindshield today to schedule your mobile replacement, and let us bring our master-level service directly to your door.


