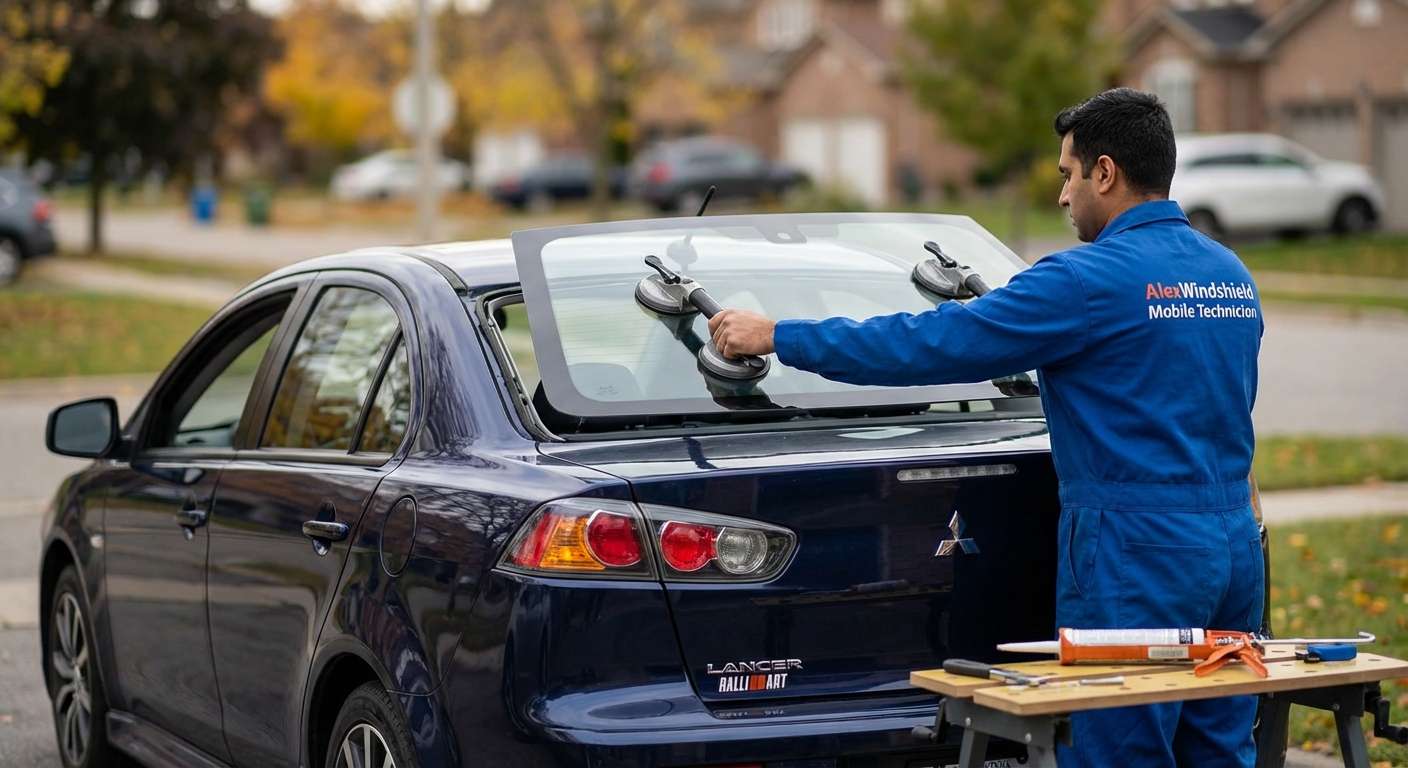
Expert Back Glass Replacement for the 2008-2017 Mitsubishi Lancer
The eighth-generation Mitsubishi Lancer (2008-2017) boasts an aggressive, shark-nosed silhouette that heavily nods to its legendary, rally-bred sibling, the Lancer Evolution. Whether you are commuting daily in a dependable Lancer ES, enjoying the sport-tuned suspension of the GTS, or carving corners in the turbocharged Ralliart, this compact sedan is a testament to Japanese engineering and aerodynamic design. However, the sleek, sloping profile of the Lancer relies heavily on the structural integrity of its auto glass. When the rear windshield suffers a catastrophic impact, it does more than just ruin the vehicle's sporty aesthetic—it instantly compromises your safety, exposes your interior cabin to unpredictable Canadian weather, and leaves your vehicle vulnerable to theft. At AlexWindshield, we specialize in restoring your vehicle to factory specifications with absolute precision.
Understanding the Mechanics of Tempered Rear Auto Glass
Unlike front windshields, which are constructed from two layers of laminated glass designed to crack but stay intact, the back glass of your 2008-2017 Mitsubishi Lancer is manufactured using specialized tempered safety glass. Through an extreme heating and rapid cooling manufacturing process, tempered glass is engineered to handle immense surface tension. However, when it breaks, it is designed to instantly shatter into thousands of tiny, pebble-like shards to prevent large, jagged pieces of glass from injuring the vehicle's occupants.
While this is an excellent safety feature, it creates a massive mess inside your Lancer. A shattered rear windshield means glass fragments will infiltrate your rear seats, trunk space, and rear parcel shelf. This demands the attention of a Master Technician who understands that replacing a back glass is not just about mounting a new window—it requires meticulous interior disassembly, extensive cleanup, and an uncompromising approach to structural bonding.
Our Master Technician A-to-Z Replacement Process
At AlexWindshield, we do not believe in taking shortcuts. As senior auto glass specialists, our meticulous step-by-step back glass replacement process ensures your Mitsubishi Lancer is restored to its original factory safety standards, leaving no trace of the damage behind.
Step 1: Vehicle Pre-Inspection and Extensive Interior Protection
Before any tools are utilized, our technicians perform a comprehensive inspection of your Lancer's rear window frame. We check for any pre-existing paint damage or rust on the vehicle's body. Because tempered glass shatters explosively, our first priority is protecting the interior of your car. We carefully apply heavy-duty protective drop cloths over your rear cloth or leather seats, floor mats, and the exterior trunk lid to prevent any accidental scratches or upholstery damage during the extraction process.
Step 2: Interior Panel Disassembly and Comprehensive Glass Shard Vacuuming
Because this is a back glass replacement, simply sweeping the visible glass is unacceptable. Thousands of sharp shards often fall deep into the vehicle's cabin. Our Master Technicians carefully remove the rear interior C-pillar trim panels and gently detach the rear parcel shelf (the deck behind the rear headrests). We also open the trunk to remove the upper trunk liner. Once the vehicle's rear architecture is exposed, we utilize an industrial-grade, high-powered shop vacuum to painstakingly extract every single broken glass shard from the seat crevices, speaker housings, child seat anchors, and the internal trunk cavity. This guarantees your safety and eliminates any irritating rattling noises while driving.
Step 3: Safe Extraction of the Remaining Bonding Ring
While the center of the glass may have shattered, the outer edge of the back glass remains firmly glued to the vehicle's frame by the original factory adhesive. Using specialized auto glass cut-out tools, such as an optimized cold knife or an advanced wire-cutting system, we slice through the hardened factory urethane. We carefully extract the remaining glass ring and the old weatherstripping without ever scratching the vehicle’s exterior paint.
Step 4: Pinch Weld Preparation and Contaminant Cleaning
The metal frame where the glass sits, known as the pinch weld, must be perfectly prepared. We use a specialized urethane scraper to meticulously trim down the old adhesive bead, leaving exactly 1 to 2 millimeters of old urethane as a stable base for the new adhesive. We then treat the pinch weld with an industrial, residue-free auto glass cleaner. This removes all microscopic dust, grease, and moisture, ensuring an uncontaminated surface for the new chemical bond.
Step 5: Advanced Black Primer Application
Bonding auto glass is a science. If our tools exposed any bare metal on the pinch weld during the removal phase, we immediately treat those specific areas with a high-quality, anti-corrosive auto glass primer to prevent future rust. Furthermore, we apply a specialized black glass primer to the frit band (the black painted edge) of your new, OEM-quality Mitsubishi Lancer back glass. This primer chemically activates the glass surface, guaranteeing an unbreakable molecular bond with the adhesive.
Step 6: Premium Adhesive Urethane Extrusion
Using a battery-operated, professional-grade caulking gun, our technicians extrude a flawless, continuous V-bead of premium, high-modulus polyurethane adhesive directly onto the prepared pinch weld. The precise height and consistency of this urethane bead are critical; it must flawlessly bridge the gap between the vehicle frame and the new auto glass to guarantee a watertight, windproof seal that structurally supports the rear roofline of your Lancer in the event of a rollover.
Step 7: Precision Installation of the New Back Glass
Handling automotive glass requires supreme accuracy. Using heavy-duty suction cups, two of our skilled technicians carefully align the new rear windshield over the Lancer's aperture. With one smooth, coordinated motion, the back glass is dropped perfectly into the wet urethane bed. We apply firm, even pressure around the perimeter of the glass to ensure the adhesive properly compresses and spreads, creating an impenetrable, factory-grade seal.
Step 8: Reconnecting Defrosters and Final Curing
The 2008-2017 Mitsubishi Lancer features an integrated thermal defroster grid on the back glass for safe winter driving. Once the glass is set, our technicians carefully reconnect the electrical wiring harnesses to the new defroster tabs, testing the circuit to ensure your rear visibility will be clear during frosty Canadian mornings. Finally, we reinstall the rear parcel shelf, C-pillar trims, and trunk liners. We inform you of the Safe Drive-Away Time (SDAT), which is the necessary curing time the premium urethane requires before the vehicle can be safely driven.
Industry-Leading Mobile Auto Glass Services in the Greater Toronto Area
At AlexWindshield, we understand that a shattered rear window disrupts your busy schedule and makes driving incredibly hazardous. You should not have to pilot a drafty, glass-filled vehicle across the highway to get to a repair shop. That is why we proudly offer premier mobile auto glass services across the Greater Toronto Area (GTA).
Our fully equipped, state-of-the-art mobile service vans bring the auto glass shop directly to your driveway, workplace, or parking garage. If you are a resident dealing with a broken window, we offer rapid response times to key regions, ensuring that top-tier service is always within reach. We prominently serve the following areas:
- Vaughan: From Woodbridge to Maple, our technicians arrive promptly to secure your vehicle, ensuring you can get back to navigating Highway 400 safely.
- Richmond Hill: Whether you are near Yonge Street or off the 404, we provide seamless, driveway back glass replacements with zero inconvenience to your day.
- Markham: We deliver expert glass removal and precision installation to residential and commercial locations throughout Markham, ensuring your Lancer is protected against the elements.
No matter where you are situated in the GTA, our mobile units are stocked with high-powered vacuums, top-tier urethane adhesives, and the exact OEM-quality back glass required for your specific Mitsubishi Lancer trim.
Why Choose AlexWindshield for Your Mitsubishi Lancer?
When it comes to automotive glass repair, trusting an amateur can lead to massive water leaks, electrical failures in your defroster grid, or rust developing silently under your window moldings. Here is why Lancer owners across the GTA trust AlexWindshield:
- OEM-Quality Glass Standards: We source only the highest-grade auto glass that matches or exceeds Mitsubishi's original factory specifications for durability, tint, and defroster grid performance.
- Master Technician Expertise: We do not cut corners. From taking apart your rear panels to vacuuming the final speck of glass dust, our attention to detail is unmatched in the industry.
- Maximum Convenience: Our mobile auto glass service comes directly to you, saving you towing fees and valuable time.
- Unbeatable Warranty: We stand proudly behind our craftsmanship.
Secure Your Lifetime Warranty Today
Do not let a shattered back glass keep your legendary Mitsubishi Lancer off the road. When you book your replacement with AlexWindshield, you are investing in peace of mind. We provide an industry-leading Lifetime Warranty on our workmanship, guaranteeing that your new rear windshield will be free from wind noise, water leaks, and manufacturer defects for as long as you own the vehicle. Contact AlexWindshield today—the trusted experts for mobile auto glass services in the GTA—and let us restore the safety, security, and sleek aesthetic of your Lancer.


