Restoring the Signature Profile of Your F60: Expert Vent Glass Replacement for the MINI Countryman
The 2017-2023 MINI Countryman (F60 chassis) perfectly balances iconic British styling with rugged, family-friendly utility. As the largest model in the MINI lineup, it boasts a sophisticated cabin and a distinct exterior silhouette. However, when that signature profile is compromised by a shattered vent glass—often the result of a break-in, road debris, or an unexpected impact—it shatters more than just the aesthetic. A broken vent glass exposes your premium interior to unpredictable weather, creates deafening wind noise at highway speeds, and poses a severe security risk. Because the vent glass is frequently targeted by thieves attempting to reach interior door handles, replacing it promptly and correctly is absolutely essential.
At AlexWindshield, we do not believe in shortcuts or temporary fixes. As a Master Technician, I have seen firsthand the damage caused by improper glass installations—from rusting door frames and water leaks to electrical failures caused by hidden glass shards. Our comprehensive vent glass replacement for the MINI Countryman 2017-2023 is engineered to restore your vehicle to its strict original factory specifications, ensuring peak security, structural integrity, and acoustic comfort.
Why F60 MINI Countryman Vent Glass Replacement Requires Specialist Expertise
The F60 MINI Countryman features a highly engineered door structure. The vent glass—the stationary, smaller pane of glass typically located on the rear doors—is not merely wedged into place. Depending on the specific build, it is integrated intricately with the vehicle's division bar, weather-stripping, and often requires precise adhesive bonding to the frame to prevent wind noise and water intrusion. Furthermore, modern MINIs are packed with advanced electronics, ambient lighting, and acoustic dampening materials inside the door panels. A standard, rushed glass replacement can easily damage these delicate components.
Choosing a specialist ensures that the specific curvature, tint, and acoustic properties of the 2017-2023 MINI Countryman glass are perfectly matched. More importantly, it ensures that the internal mechanisms of your door are completely cleared of hazardous debris and reassembled with factory-level precision.
Our Master Technician’s Step-by-Step Replacement Process: From A to Z
At AlexWindshield, our protocol for vent glass replacement is rigorous, detailed, and strictly follows industry best practices. Here is the exact technical process we execute to safely and flawlessly replace your F60's vent glass.
Step 1: Comprehensive Interior Protection and Damage Assessment
Before any tools are lifted, we secure the working environment. The F60 MINI Countryman features premium upholstery that can be easily scratched or punctured by rogue glass fragments. We begin by covering your leather or premium cloth seats, center console, and floor mats with heavy-duty protective drop cloths. We apply specialized automotive-grade masking tape to the exterior paintwork surrounding the window frame to guarantee no accidental scratches occur during the removal or installation process. A thorough inspection is then performed to assess any damage to the window regulator, division bar, or surrounding rubber gaskets.
Step 2: Interior Door Panel and Hardware Removal
Because this is a door-mounted vent glass, accessing the mounting points requires the complete removal of the interior door panel. Using specialized non-marring nylon pry tools, we carefully remove the cosmetic trim pieces to expose the hidden Torx screws. Once the screws are extracted, we systematically unclip the door card, ensuring the fragile plastic retaining clips are not broken. We then carefully disconnect the electrical harnesses for the power window switches, door locks, speaker wires, and the MINI's signature ambient lighting system. The panel is then stored safely outside the vehicle. Finally, the interior vapor barrier is gently peeled back to expose the inner door cavity.
Step 3: Deep Vacuuming of Broken Glass Shards
When a vent glass shatters, thousands of tempered glass cubes fall directly into the window run channels and the deep recesses of the inner door shell. Vacuuming all broken glass shards from the vehicle's interior and the door cavity is a mandatory and critical step. If left behind, these shards will cause a persistent, maddening rattling sound every time you drive or close the door. Worse, they can grind against the internal window regulator, causing premature failure of the main roll-down window, or block the door's water drain holes, leading to severe internal rust. We utilize high-powered, narrow-nozzle shop vacuums to extract every single piece of glass from the door shell, the window tracks, under the seats, and deep within the vehicle's carpeting.
Step 4: Division Bar and Weatherstrip Manipulation
To extract the remnants of the broken vent glass, the division bar—the metal and rubber track that separates the stationary vent glass from the movable door glass—must be unbolted and shifted. We carefully remove the weather-stripping around the window frame. By loosening the internal mounting bolts at the base of the door shell, we can tilt the division bar, allowing us to safely extract the broken glass casing and the original rubber run channel without bending the delicate metal frame.
Step 5: Surface Cleaning and Primer Application
For vent glass models that utilize a bonded installation (or to securely tack the encapsulated rubber moldings), preparation of the frame is the most critical factor for a leak-proof seal. We first perform a rigorous surface cleaning, removing all dirt, old adhesive, and environmental debris from the pinch weld and window frame using a specialized, alcohol-based automotive glass cleaner. Once the surface is completely stripped and decontaminated, we proceed to the primer application. We apply a high-grade urethane primer to any exposed bare metal on the pinch weld to prevent future oxidation and rust. We also apply a glass-specific primer to the frit band (the black painted edge) of the new, OEM-quality vent glass. This chemical primer acts as an essential bonding agent, ensuring the adhesive creates an unbreakable molecular bond between the vehicle frame and the new glass.
Step 6: Precision Installation of the New Glass Using High-Quality Adhesive
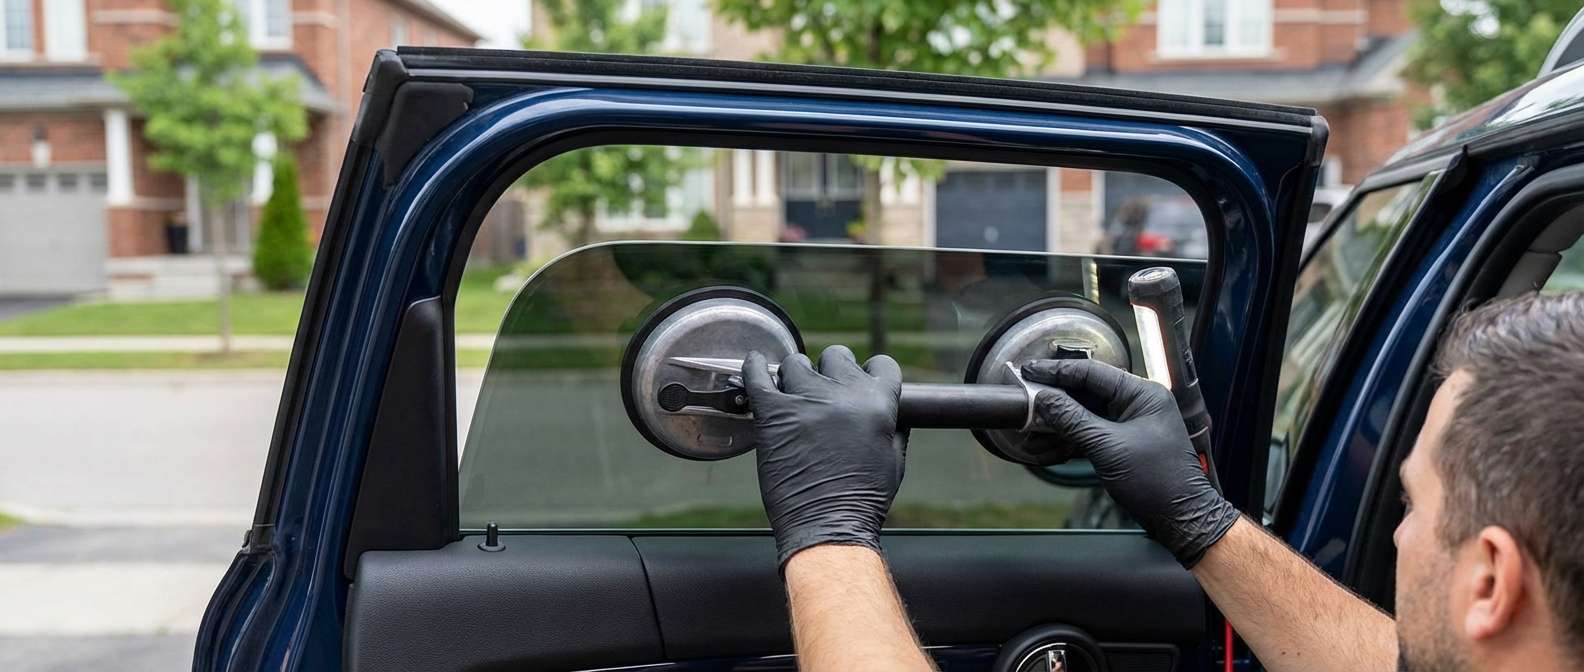
With the frame primed and ready, it is time for the installation. We apply a precise, uniform triangular bead of high-quality, fast-curing urethane adhesive along the mounting surface. The new MINI Countryman vent glass is then carefully maneuvered into the frame. As Master Technicians, we use specialized suction cups to ensure the glass is seated with absolute precision. We apply even pressure to compress the adhesive bead, guaranteeing a flawless, airtight, and watertight seal. The division bar is then shifted back into its precise factory position and bolted tightly into the door shell, locking the new vent glass securely in place.
Step 7: Reassembly and Final Quality Check
Once the glass is set and the urethane begins its rapid curing process, we meticulously reassemble the door. The vapor barrier is resealed using high-tack butyl tape to prevent moisture from entering the cabin. We reconnect all electrical harnesses for the speakers, ambient lighting, and window controls, testing each function to ensure perfect operation. The interior door panel is firmly clipped back into place, and the hidden Torx screws are reinstalled and hidden behind the cosmetic trim. Finally, we roll the main door window up and down several times to ensure there is zero binding against the newly installed vent glass division bar. The glass is cleaned to a streak-free shine, leaving your F60 looking as though the damage never occurred.
Serving the Greater Toronto Area (GTA) with Mobile Excellence
Dealing with a shattered vent glass is highly stressful, but getting it fixed shouldn't be. At AlexWindshield, we understand that your time is valuable, and driving a vehicle with an open, broken window is both uncomfortable and unsafe. That is why we offer premium, fully equipped mobile auto glass repair services across the Greater Toronto Area (GTA).
Whether you are navigating the busy industrial sectors of Vaughan, parked at your office in Richmond Hill, or at home in a residential neighborhood in Markham, our mobile fleet brings the entire auto glass shop directly to you. Our climate-controlled mobile units are stocked with the exact high-quality adhesives, OEM-equivalent glass, and advanced tools required to perform your MINI Countryman vent glass replacement flawlessly on-site, regardless of where you are located in the GTA.
Why Choose AlexWindshield for Your F60 MINI Countryman?
When you hand over the keys to your 2017-2023 MINI Countryman, you need absolute peace of mind that it is in the hands of seasoned professionals. Here is why AlexWindshield remains the top-rated choice for auto glass replacement:
- Master Technician Expertise: Your vehicle is serviced by certified professionals who understand the intricate electrical and structural nuances of the BMW/MINI F60 chassis.
- Impeccable Cleanup: We don't just replace the glass; we ensure your safety by thoroughly vacuuming out the door panels, window tracks, and interior cabin to eliminate all hazardous glass shards.
- Premium Materials: We use only OEM-quality glass and the industry's highest-grade, fastest-curing urethane adhesives to ensure maximum safety, structural integrity, and noise reduction.
- Unmatched Convenience: Our mobile service covers Vaughan, Richmond Hill, Markham, and the broader GTA, saving you the hassle of a tow truck or a long wait in a repair shop waiting room.
- Zero-Leak Guarantee: Our rigorous surface cleaning and primer application process ensures that your new vent glass will never leak water or create whistling wind noises at highway speeds.
Contact AlexWindshield Today for Your Lifetime Warranty Guarantee
Do not let a broken vent glass compromise the security, comfort, and striking appearance of your 2017-2023 MINI Countryman. Trust the Master Technicians at AlexWindshield to deliver precise, factory-standard auto glass replacement directly to your driveway or workplace. We stand firmly behind the quality of our craftsmanship and materials, which is why every installation we perform is backed by our comprehensive Lifetime Warranty against leaks, stress cracks, and workmanship defects. Contact AlexWindshield today to schedule your mobile appointment in the GTA, and experience the ultimate standard in professional auto glass care.


