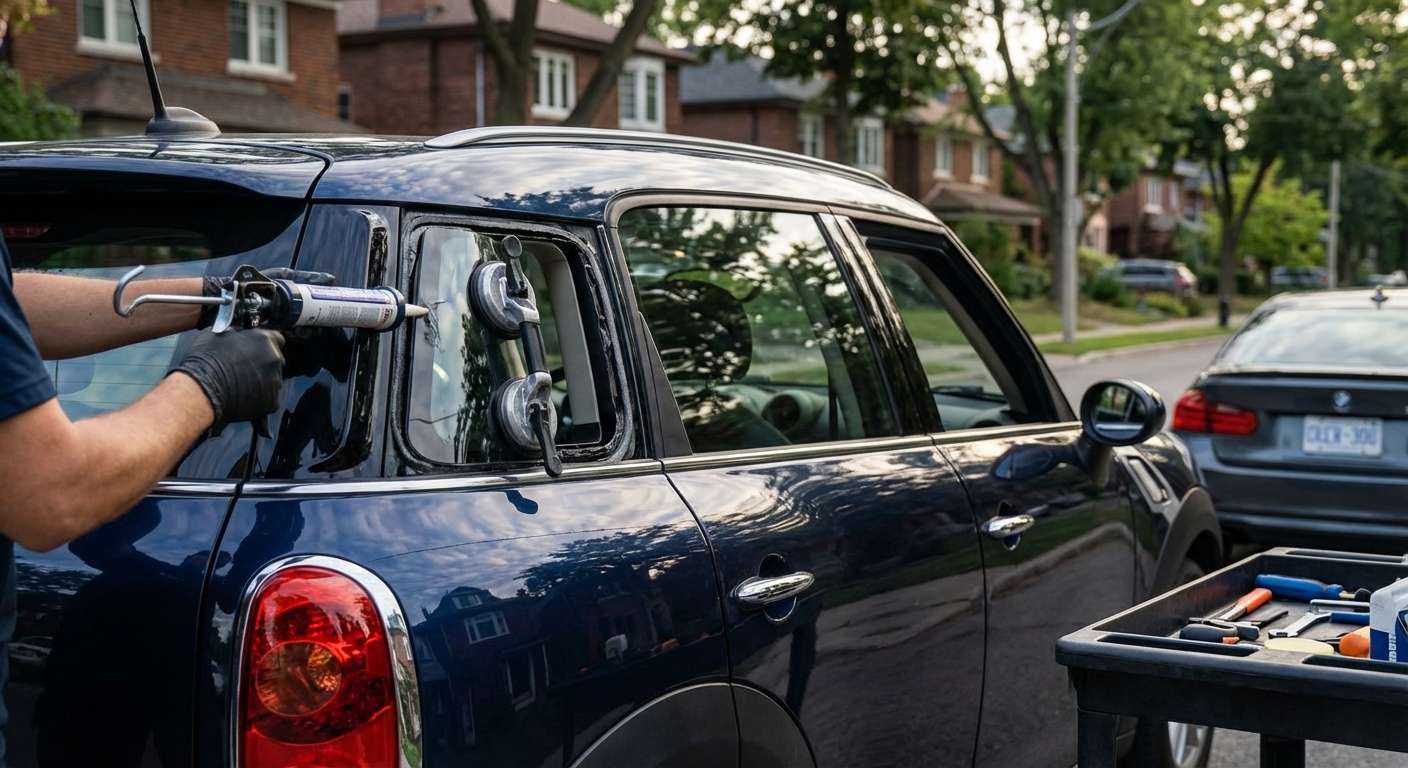
The Unique Appeal of the MINI Countryman R60 and Why Its Quarter Glass Matters
The 2011-2016 MINI Countryman, internally celebrated by enthusiasts as the R60 generation, was a revolutionary leap for the iconic British marque. It injected rugged, all-wheel-drive practicality into the classic go-kart DNA, introducing four doors and a distinct, floating roofline that set a new standard for compact crossovers. Integral to this signature aesthetic is the rear quarter glass, which seamlessly blends into the C-pillars and D-pillars to create that unmistakable wrap-around "helmet" canopy look. However, when this specific piece of automotive glazing shatters—whether from a rogue highway pebble, a break-in, or severe weather—it does not just compromise your vehicle's security and structural integrity; it entirely shatters the defining visual harmony of your R60.
Because the quarter glass on the MINI Countryman is typically constructed from tempered safety glass, a direct impact will cause it to explode into thousands of blunt, granular fragments. Replacing this specialized glass requires much more than simply sticking a new pane onto the vehicle. It demands an intricate understanding of the R60's unique body contours, encapsulated moldings, and complex interior trim panels. As a Master Technician, I have engineered a flawless, factory-grade replacement protocol specifically tailored for this beloved vehicle.
Expert Quarter Glass Replacement for Your MINI Countryman (2011-2016)
When dealing with a damaged quarter glass on an R60 Countryman, precision is paramount. The quarter panel area houses vital wiring and delicate interior plastics that can be easily scuffed or broken by inexperienced hands. Furthermore, the glass is urethane-bonded directly to the vehicle's pinch weld, meaning it plays a role in the overall structural rigidity of the cabin. A subpar installation can lead to wind noise, severe water leaks, rust formation on the vehicle's frame, and a compromised aesthetic.
Serving the Greater Toronto Area (GTA) with Unmatched Precision
You should never have to drive a compromised vehicle across town just to get it fixed. That is why our premium auto glass replacement services are fully mobile and available across the Greater Toronto Area (GTA). We bring the auto glass shop directly to your driveway or workplace, specializing in rapid, high-quality interventions in Vaughan, Richmond Hill, and Markham. Whether you are parked at a corporate office in Markham or in a residential driveway in Vaughan, our master technicians arrive fully equipped to execute a flawless, OEM-standard quarter glass replacement on site.
The Master Technician's Blueprint: Step-by-Step R60 Quarter Glass Replacement
Auto glass replacement is a precise science. To guarantee the safety, security, and silence of your MINI Countryman's cabin, we strictly adhere to a comprehensive, A-to-Z replacement methodology. Here is an exclusive look into the meticulous technical process we deploy for every 2011-2016 MINI Countryman quarter glass replacement.
Step 1: Comprehensive Interior Protection and Damage Assessment
Before a single tool touches your vehicle, we focus entirely on the protection of your R60's interior and exterior.
- Paint Protection: We apply automotive-grade protective tape around the exterior perimeter of the quarter glass opening to protect the vehicle's clear coat and paint from accidental scratches during the removal process.
- Interior Shielding: We lay down thick, protective drop cloths over the rear passenger seats, cargo area, and floor mats to catch any stray debris or adhesive during the procedure.
- Damage Assessment: We inspect the metal pinch weld (the frame where the glass sits) to ensure it was not dented or warped during the impact that shattered your original glass.
Step 2: Interior Trim Removal and Complete Glass Shard Eradication
Because the quarter glass is tempered, a break results in thousands of tiny glass shards infiltrating your vehicle's cabin. Removing the old frame is only half the battle; ensuring your interior is safe is equally critical.
- Trim Removal: Using specialized, non-marring nylon pry tools, we carefully unclip and remove the interior C-pillar and D-pillar plastic trim panels. This exposes the inner bonding area of the quarter glass and grants us access to the hidden crevices where glass shards fall.
- Deep Extraction: We execute a highly meticulous process of vacuuming all broken glass shards from the vehicle's interior. We utilize heavy-duty, industrial shop vacuums with micro-attachments to extract glass beads from deep inside the quarter panel cavities, seat tracks, and carpeting, ensuring no rattling noises or safety hazards remain.
Step 3: Extracting the Damaged Quarter Glass and Old Urethane
Removing a bonded piece of glass requires surgical precision to preserve the integrity of the vehicle's metal frame.
- Cutting the Bond: We use advanced cold knife tools and specialized braided wire cutting systems to slice through the original, factory urethane adhesive from the inside out, safely detaching the shattered glass frame or remaining encapsulation from the body.
- Trimming the Bead: Once the old glass frame is removed, we use sharp razor scrapers to pare down the old urethane bead on the pinch weld. We trim it down to a thin, 1-2 millimeter base layer. This remaining layer provides the optimal bonding surface for the fresh adhesive.
Step 4: Pinch Weld Preparation and Chemical Cleaning
The secret to a lifetime seal lies in how the vehicle's frame is prepped before the new glass is ever introduced.
- Surface Cleaning: We aggressively clean the trimmed urethane track and the surrounding metal using an ammonia-free, alcohol-based auto glass cleaner to remove dirt, grease, and moisture.
- Primer Application: Any microscopic scratches or bare metal exposed on the pinch weld during the removal process are immediately treated with a specialized black primer. This is a critical step that prevents future oxidation and rust from silently destroying your vehicle's frame from the inside out.
Step 5: Preparing the New Premium Quarter Glass
We source only premium, OEM-equivalent or genuine OEM replacement glass that flawlessly matches the original factory tint, curvature, and encapsulated molding of the R60 Countryman.
- Glass Inspection: The new quarter glass is thoroughly inspected for any optical distortion, scratches, or manufacturing defects.
- Frit Preparation: We clean the black painted band on the inside edge of the new glass (the frit). We then apply a specialized glass prep and primer to this band. This chemical activator ensures that the urethane adhesive will chemically fuse with the glass, creating an unbreakable molecular bond.
Step 6: Extruding High-Quality Urethane Adhesive
The adhesive is the literal glue holding your vehicle's safety together.
- High-Quality Adhesive: We utilize rapid-curing, high-modulus, non-conductive, high-quality urethane adhesive. This industrial-grade polymer meets and exceeds all Federal Motor Vehicle Safety Standards (FMVSS).
- V-Notch Application: Using an electric caulking gun, our technicians extrude a perfect, continuous "V-notch" bead of urethane around the perimeter of the new quarter glass (or directly onto the pinch weld, depending on the specific molding design). The V-shape guarantees that when the glass is pressed into place, the adhesive spreads perfectly without any gaps or air pockets.
Step 7: Precision Installation and Curing
With the adhesive applied, the window of opportunity is short, and the margin for error is zero.
- Setting the Glass: Utilizing suction cups and a steady hand, we precisely align the new quarter glass with the body lines of the MINI Countryman. It is gently pressed into the urethane bed, ensuring perfectly flush alignment with the adjacent doors and roofline.
- Securing the Position: We apply retention tape to hold the glass firmly in its perfect position while the urethane begins its initial cross-linking and curing process.
- Safe Drive-Away Time: We strictly observe the manufacturer's Safe Drive-Away Time (SDAT), ensuring the urethane has cured enough to guarantee structural integrity before the vehicle is operated.
Step 8: Reassembly and Final Quality Inspection
We treat your vehicle with the utmost respect, returning it to you in better condition than when we arrived.
- Reinstalling Panels: We carefully reinstall all the interior C-pillar and D-pillar trim pieces, ensuring all retaining clips are perfectly seated so there are no squeaks or rattles.
- Final Polish: We clean the newly installed quarter glass, as well as all surrounding windows, using a streak-free professional cleaner.
- Leak Testing: Before handing over the keys, we conduct a rigorous visual inspection and, when applicable, a targeted pressure test to guarantee a 100% watertight and airtight seal.
Why the R60 Quarter Glass Requires Specialized Attention
The 2011-2016 MINI Countryman features a highly specialized design. The quarter glass often incorporates an encapsulated rubber molding that sits flush against the vehicle's sheet metal to reduce wind drag and cabin noise. Generic replacement techniques often fail to properly seat this encapsulation, leading to unsightly gaps or severe wind whistling at highway speeds. Furthermore, because of the compact, curved nature of the R60's rear section, extracting the old glass requires specialized curved cutting blades to navigate tight corners without damaging the adjacent paintwork. As a seasoned expert, I ensure that the unique geometry of the MINI Countryman is respected at every single stage of the replacement process, restoring the factory-fresh look and feel of your premium crossover.
Choose AlexWindshield: Your GTA Auto Glass Authority
When the unexpected happens to your MINI Countryman, do not trust the structural integrity and aesthetic beauty of your vehicle to just anyone. You need a Master Technician who treats auto glass replacement as an exact science. At AlexWindshield, we are proud to be the trusted experts for mobile auto glass services throughout the GTA, specifically catering to drivers in Vaughan, Richmond Hill, and Markham. We bring the highest caliber tools, premium materials, and unparalleled technical expertise directly to your door.
Every quarter glass replacement we perform is backed by our comprehensive Lifetime Warranty, covering any leaks, manufacturer defects, or workmanship issues for as long as you own the vehicle. We guarantee a seamless, hassle-free experience that prioritizes your safety and your schedule. Contact AlexWindshield today to restore your 2011-2016 MINI Countryman R60 to perfection, and drive with absolute confidence.


