Mastering the R56: Expert Door Glass Replacement for the 2007-2013 MINI Cooper and Cooper S
The MINI Cooper and Cooper S (2007-2013), internally celebrated by enthusiasts as the R56 chassis, revolutionized the premium compact segment by combining modern BMW-engineered reliability with that iconic, go-kart-like driving dynamic. One of the most striking design features of the R56 is its sleek, frameless door windows. While aesthetically brilliant, these frameless windows rely on a complex "short-drop" mechanism that lowers the glass a fraction of an inch every time the door handle is pulled, ensuring a watertight seal against the roof rail when closed. When your door glass shatters, not only is your cabin completely exposed to the elements and security threats, but this delicate electro-mechanical balance is entirely disrupted.
As a Master Technician at AlexWindshield, I have seen firsthand how improperly installed frameless door glass can lead to maddening wind noise, severe water leaks, and premature failure of the window regulator. Replacing the door glass on an R56 MINI Cooper requires far more than simply bolting in a new pane; it demands structural precision, deep interior decontamination, and meticulous micro-adjustments. Below is our definitive, step-by-step guide to how we restore the safety, acoustics, and structural integrity of your vehicle.
The AlexWindshield A-to-Z Door Glass Replacement Process
Unlike standard framed windows, the MINI Cooper R56 door glass demands highly specialized techniques. From the initial interior protection to the final module recalibration, our technicians execute a rigorous protocol to ensure a factory-perfect fit.
Step 1: Thorough Preparation and Interior Protection
Tempered door glass does not crack; it spectacularly shatters into thousands of tiny, sharp cubes. Before any mechanical work begins, we meticulously prepare the vehicle. We drape heavy-duty, scratch-resistant fender covers over the exterior paintwork. Inside the cabin, we deploy thick protective blankets over the sporty bucket seats, the center console, and the footwells. Protecting the interior is our primary focus to ensure no stray shards or tools damage your MINI’s premium upholstery or dashboard components.
Step 2: Safe Removal of the Interior Door Panels
To access the inner workings of the door shell, the interior door panel (door card) must be carefully extracted. Using specialized, non-marring nylon trim tools, we gently pry away the decorative trim rings around the door handle and speakers. We locate and extract the hidden Torx screws (typically T20 and T30) securing the panel. Carefully releasing the perimeter retention clips, we pull the panel away, meticulously disconnecting the puddle lights, the power mirror switches, the speaker wiring harnesses, and the mechanical door latch cable. The delicate vapor barrier is then carefully peeled back, preserving its butyl rubber sealant for reassembly.
Step 3: Deep Extraction and Vacuuming of Broken Glass Shards
This is a critical step that lesser shops often rush. When an R56 window shatters, hundreds of glass fragments fall deep into the bottom of the steel door cavity. If left behind, these shards will cause an infuriating rattling sound every time you close the door or hit a bump. We use high-powered industrial vacuums with flexible micro-crevice attachments to aggressively clear out the door shell. We also meticulously vacuum all broken glass shards from the vehicle's interior, including beneath the seats, inside the seat tracks, and hidden within the window regulator channels.
Step 4: Removal of the Old Glass Remnants and Hardware Inspection
With the cavity clean, we manually lower the window regulator to the service position. We carefully loosen the mechanical clamping jaws that hold the glass in place and extract any remaining chunks of broken glass still bonded to the brackets. We thoroughly inspect the aluminum regulator tracks, the lifting cables, and the nylon pulleys for any stress fractures or fraying caused by the glass breakage. If the regulator is compromised, replacing it now saves the customer future labor costs.
Step 5: Surface Cleaning, Primer Application, and High-Quality Adhesive
While many standard vehicles use simple friction clamps, ensuring a permanent, vibration-free hold on a high-performance R56 requires ultimate precision at the mounting points. Depending on the specific aftermarket or OEM-equivalent glass supplied, the mounting tabs may require direct bonding. We perform rigorous surface cleaning of the lower glass edge and the mounting brackets using alcohol-based prep solvents to remove all factory greases. We then perform a specialized primer application to the bonding surfaces. Finally, we execute the installation of the new glass using high-quality adhesive (automotive-grade urethane) at the structural anchor points. This advanced adhesive technique guarantees that the glass will never slip out of its brackets during the aggressive door-slamming typical of heavy, frameless MINI doors.
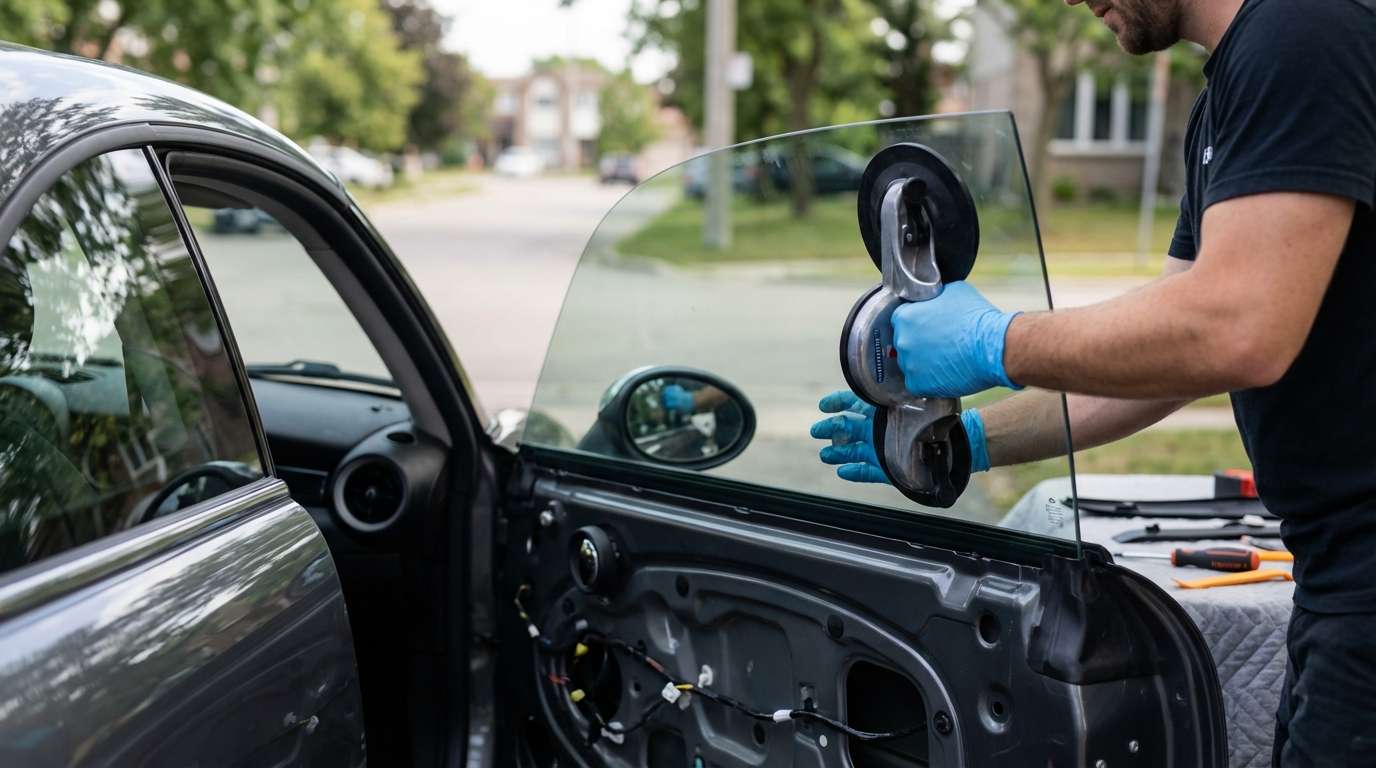
Step 6: Installing the New Door Glass
Once the adhesive and primer are correctly staged, we carefully angle the new, premium-grade tempered door glass into the outer window weatherstripping. Maneuvering the glass into the tight confines of the R56 door shell requires a delicate touch to avoid scratching the new pane against the steel door frame. The glass is seated perfectly into the regulator clamps. We softly tighten the retention bolts, leaving just enough play for the critical alignment phase.
Step 7: The Critical Frameless Window Adjustment and Alignment
Because the R56 lacks a rigid upper door frame, the glass itself dictates the cabin seal. We perform a complex geometric adjustment involving three axes:
- Rake (Inward Tilt): We adjust the regulator guide rails so the top edge of the glass presses firmly against the rubber roof seal. Too little tilt causes wind noise; too much tilt puts immense strain on the window motor.
- Height (Vertical Stop): We set the physical upper limit stops to ensure the glass tucks precisely under the roof rail lip.
- Lateral Centering: We ensure the glass sits perfectly parallel to the B-pillar seal to prevent water intrusion during high-pressure car washes.
Step 8: Reassembly, Re-sealing, and Motor Calibration
With the new glass perfectly aligned and the high-quality adhesive curing, we permanently torque the regulator bolts. The vapor barrier is meticulously resealed using fresh butyl tape to prevent rainwater from leaking into the cabin footwells. The interior door panel is carefully reinstalled, ensuring all wiring harnesses and mechanical cables are securely clipped into their retaining slots. Finally, we must recalibrate the MINI's Footwell Module (FRM). We perform a manual initialization sequence—holding the toggle switch down, then up—to teach the computer the new upper and lower limit stops. This restores the vital "short-drop" feature, ensuring the window drops its customary quarter-inch when you touch the exterior door handle.
Premium Local Mobile Auto Glass Services Across the GTA
Driving with a shattered door window is not just a nuisance; it is a severe safety hazard and leaves your prized MINI Cooper completely vulnerable to harsh Canadian weather and theft. At AlexWindshield, we understand that your time is valuable. That is why we bring our Master Technician expertise directly to your doorstep, office, or heated garage.
We proudly offer fully equipped mobile auto glass repair and replacement services across the Greater Toronto Area (GTA). Whether you are dealing with the aftermath of a break-in near the Vaughan Mills shopping district, need emergency glass clearing in the residential neighborhoods of Richmond Hill, or require a precision frameless window installation at your corporate office in Markham, our mobile fleet is ready to deploy. We carry all the specialized Torx bits, OEM-equivalent glass, and heavy-duty vacuums required to perform a dealership-quality repair right in your driveway, saving you the stress of navigating the busy 401 or DVP with a plastic bag taped over your window.
Why Choose AlexWindshield for Your MINI Cooper?
The intricate engineering of European vehicles like the MINI Cooper requires a technician who understands the subtle nuances of automotive electronics, frameless weather seals, and advanced bonding agents. We do not just replace glass; we restore your vehicle's structural integrity and acoustic comfort.
Every service we perform is backed by our unwavering commitment to quality. We strictly utilize OEM-equivalent, distortion-free tempered glass that matches your MINI's factory tint and acoustic dampening properties perfectly. Furthermore, if you ever require windshield replacement services for your R56, our technicians are fully certified to perform the mandatory ADAS camera calibration process, ensuring your rain sensors and advanced driver assistance systems function flawlessly.
Trust the experts who treat your R56 with the respect it deserves. Choose AlexWindshield for your door glass replacement and enjoy absolute peace of mind with our comprehensive Lifetime Warranty against leaks, wind noise, and workmanship defects. Contact us today to schedule your mobile appointment anywhere in Vaughan, Richmond Hill, Markham, or the wider GTA, and let us get your MINI Cooper back on the road safely and swiftly.


