Shattering the Silence: Expert Back Glass Replacement for Your Mercedes-Benz EQS
The Mercedes-Benz EQS Sedan and SUV (2022-2027) represent the absolute pinnacle of German electric vehicle engineering. Designed with a record-breaking aerodynamic "one-bow" profile and an ultra-quiet acoustic cabin, the EQS is a sanctuary on wheels. However, when your back glass shatters—whether from a highway projectile, severe weather, or an unfortunate impact—that sanctuary is compromised. On a flagship luxury EV of this caliber, a shattered rear windshield is not just a cosmetic annoyance; it is a critical structural and technological failure that exposes premium interior materials to the elements and disrupts the vehicle's advanced electronic ecosystem.
As a Master Technician and Senior SEO specialist at AlexWindshield, I have witnessed firsthand the disastrous results of improper glass replacements on high-end luxury EVs. Replacing the back glass on a 2022-2027 EQS requires much more than standard auto glass knowledge. It demands an intimate understanding of Mercedes-Benz's complex electrical connectors, specialized aerodynamic tolerances, and an obsessive attention to interior protection. Below is our definitive, master-level guide on how we flawlessly execute this service.
The Technical Complexity of the EQS Rear Glass
Before diving into the replacement process, it is essential to understand why the back glass on the Mercedes-Benz EQS is uniquely complex:
- Acoustic and Thermal Glazing: The EQS uses specialized glass designed to minimize wind noise and maximize climate control efficiency, directly impacting the vehicle's battery range.
- Integrated Defroster Grids and Antennas: The rear glass houses high-voltage defroster grids and, depending on the trim, integrated radio and telematics antennas that must be perfectly reconnected.
- Flush Aerodynamic Fit: To maintain its ultra-low drag coefficient, the rear glass sits perfectly flush with the vehicle's body lines. A misalignment of even a millimeter can cause whistling noises and reduce aerodynamic efficiency.
- Tempered Glass Dynamics: Unlike the laminated front windshield, the back glass is tempered. When broken, it instantly shatters into thousands of granular pieces that infiltrate the EQS's premium perforated Nappa leather, speaker grilles, and complex liftgate mechanics.
Step-by-Step Back Glass Replacement Process for the EQS Sedan/SUV (2022-2027)
At AlexWindshield, our replacement protocol is an uncompromising, A-to-Z technical procedure designed to restore your Mercedes-Benz to its factory-original condition. Here is exactly how our certified technicians perform the job.
Step 1: Comprehensive Pre-Inspection and Ultimate Interior Protection
The moment our technician arrives, a full diagnostic assessment is performed. Because the EQS is heavily computerized, we check the functionality of the rear defroster circuits and rear wiper assemblies (for the SUV model) prior to disassembly. Preparation is the most critical phase when dealing with shattered tempered glass. We lay down heavy-duty protective drop cloths over the exterior paint and apply a specialized crash wrap over the rear opening if the glass is completely compromised. Inside, we cover the premium rear seating, center console, and pristine floor mats with thick, puncture-resistant protective covers to ensure no stray glass scratches the luxury surfaces.
Step 2: Interior Trim Removal and Meticulous Glass Debris Vacuuming
Because shattered back glass falls inward, removing the interior door, hatch, and liftgate panels is an absolute mandatory step. Using non-marring nylon pry tools specific to Mercedes-Benz, we carefully unclip the inner tailgate trims, lateral pillar covers, and the rear parcel shelf (in the Sedan). This exposes the inner cavity of the hatch.
Next comes the most labor-intensive part of the preparation: vacuuming all broken glass shards from the vehicle's interior. We utilize high-powered, industrial-grade HEPA vacuums with specialized micro-crevice attachments to extract every single cube of tempered glass. We meticulously vacuum the perforated leather seats, the carpet fibers, the tracks of the cargo cover, and the deepest crevices inside the exposed tailgate shell. Leaving even one piece of glass inside the hatch can result in a highly irritating rattle every time the EQS is driven or the trunk is closed.
Step 3: Disconnecting Electrical Components and Hardware
With the trim removed, our technicians carefully unplug the electrical wiring harnesses connected to the shattered rear glass. This includes the high-capacity rear defroster connections, integrated antenna leads, and the third brake light assembly if integrated into the glass zone. On the EQS SUV, we also expertly remove the rear wiper arm, the wiper motor housing cover, and the exterior spoiler trim to ensure unobstructed access to the glass perimeter.
Step 4: Extracting the Old Glass and Residual Polyurethane
Using an advanced fiber-line cutting system, we slice through the factory urethane bonding the remaining glass perimeter to the vehicle's frame. We never use traditional metal cold knives on an EQS, as they run the risk of scratching the aluminum body panels or damaging the underlying paint, which could lead to galvanic corrosion. Once the remnants of the broken glass are safely lifted away, we are left with the vehicle's bare pinch weld.
Step 5: Pinch Weld Preparation and Surface Cleaning
The existing urethane bead on the pinch weld must be trimmed down to a precise thickness of 1-2 millimeters. This "close-cut" method provides the ideal chemical base for the new adhesive to bond to. We then thoroughly clean the entire mounting surface with a specialized, alcohol-based auto glass cleaner to remove any dirt, fine glass dust, or greasy residues. A perfectly sterile surface is paramount to preventing future water leaks or wind noise.
Step 6: Primer Application and Flashing
If there are any microscopic scratches on the pinch weld from the factory installation or the extraction process, they are treated immediately. We apply a premium, anti-corrosive black body primer to the bare metal spots and the trimmed urethane track. We also apply a specialized glass primer to the bonding edge of the new, OEM-equivalent acoustic back glass. The primer is allowed to "flash" (dry and chemically activate) for the exact time specified by the manufacturer, ensuring a permanent, cross-linked chemical bond.
Step 7: Applying the High-Quality Urethane Adhesive
For a luxury EV like the Mercedes-Benz EQS, standard adhesives are insufficient. We utilize an advanced, high-modulus, non-conductive, and fast-curing polyurethane adhesive. This specific urethane is designed to support the structural rigidity of the EV frame and will not interfere with the vehicle's electrical frequencies. Using an electric caulking gun, we lay down a continuous, perfectly uniform "V-bead" of urethane along the perimeter of the glass. The V-shape ensures that when the glass is compressed, the adhesive spreads evenly without squeezing out into the interior cabin.
Step 8: Precision Installation of the New EQS Back Glass
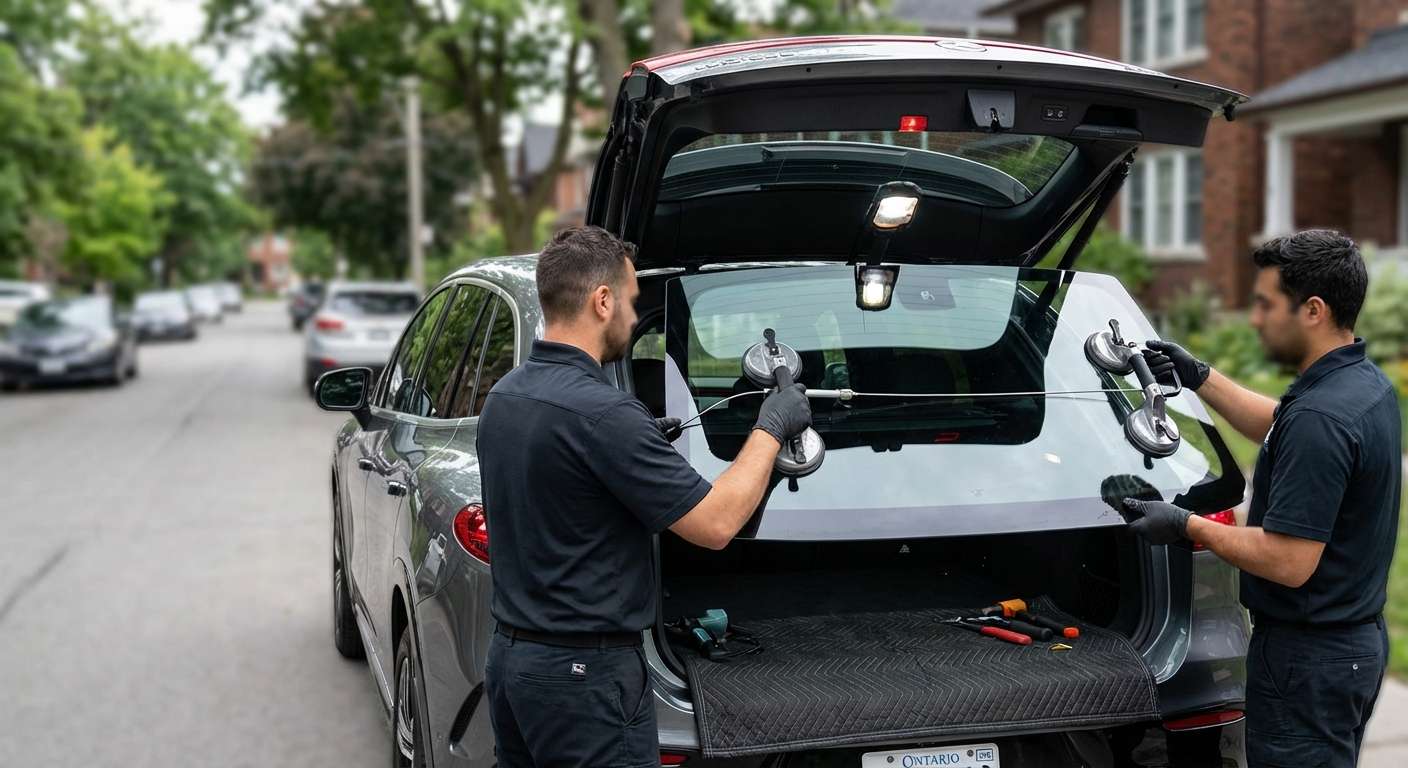
Due to the sheer size and weight of the EQS rear glass, this step requires absolute precision. Using heavy-duty suction cups and an alignment system, two master technicians carefully lower the new back glass onto the fresh urethane bead. We use the factory alignment pins and specific measuring tools to ensure the glass sits perfectly flush with the aerodynamic curves of the body. Once set, we apply light, even pressure to ensure a watertight and airtight seal.
Step 9: Reassembly, Reconnection, and Final Quality Check
With the glass firmly in place, the reassembly process begins. We reconnect all electrical harnesses for the defrosters and antennas, reinstall the rear wiper assembly (for the SUV), and carefully snap the interior liftgate and pillar trim panels back into their exact factory positions. A final, comprehensive vacuuming is performed to guarantee the cabin is immaculate. Finally, we run a diagnostic test to ensure the defroster grid is receiving the correct voltage and that all rear electronics are functioning flawlessly.
Crucial Post-Installation Care Guidelines
To ensure the longevity and safety of your newly installed Mercedes-Benz EQS back glass, we advise our clients to adhere to the following post-installation rules:
- Observe the Safe Drive-Away Time (SDAT): Allow the vehicle to sit for at least 1 to 2 hours before driving. This allows the high-grade urethane to cure sufficiently to meet federal safety standards.
- Ventilate the Cabin: Keep a window rolled down about an inch for the first 24 hours. This prevents air pressure buildup when closing the heavy EQS doors from pushing against the freshly curing rear glass seal.
- Avoid Commercial Car Washes: Do not take your EQS through a high-pressure automatic car wash for at least 72 hours. Hand washing is acceptable, but avoid directing high-pressure water at the rear glass edges.
- Leave the Tape: If retention tape was used to hold the glass flush during the initial cure, leave it on for 24 hours before gently peeling it off.
Proudly Serving the Greater Toronto Area (GTA)
At AlexWindshield, we know that driving in the Greater Toronto Area (GTA) presents its own unique hazards. Whether you are navigating the heavy construction zones on Highway 400 in Vaughan, dealing with kicked-up road debris on the 404 in Richmond Hill, or commuting through the busy tech corridors of Markham, back glass damage is an unfortunate reality.
We bring our specialized EV auto glass shop directly to you. Our premium mobile service covers the entire GTA, meaning you do not have to drive your EQS with a shattered, drafty rear window to a traditional shop. We dispatch our fully equipped mobile service vans directly to your home driveway in Vaughan, your corporate parking lot in Markham, or your garage in Richmond Hill, providing ultimate convenience without sacrificing technical excellence.
Contact AlexWindshield Today for Unmatched EV Glass Expertise
Do not trust your $100,000+ luxury electric vehicle to just any high-volume glass shop. The Mercedes-Benz EQS Sedan and SUV demand the touch of a Master Technician. As the leading experts in mobile auto glass services across the GTA, AlexWindshield guarantees a flawless, factory-standard back glass replacement. We stand proudly behind our craftsmanship by offering an industry-leading Lifetime Warranty against leaks, wind noise, and manufacturer defects.
If your 2022-2027 Mercedes-Benz EQS has suffered rear glass damage, demand the best. Contact AlexWindshield today to schedule your premium mobile glass replacement and experience the ultimate in luxury auto glass service.


