Restoring the Sanctuary: Lexus LS 460 (2007-2017) Back Glass Replacement
The Lexus LS 460, produced between the model years of 2007 and 2017, is the undisputed pinnacle of Japanese luxury engineering. Designed to provide a whisper-quiet, sanctuary-like cabin, this flagship sedan relies heavily on its structurally robust, acoustically treated auto glass. However, when the rear windshield suffers a catastrophic impact and shatters, that meticulously crafted silence is instantly destroyed. As a Master Technician, I have seen firsthand how compromised back glass not only exposes your premium leather interior to the harsh elements but also compromises the structural integrity of the vehicle's cabin. Restoring your LS 460 requires much more than just slapping on a new piece of glass; it demands a high-level, master-crafted approach tailored specifically to the intricate architecture of Lexus vehicles.
Premium Mobile Auto Glass Services Across the Greater Toronto Area
At AlexWindshield, we understand that your time is a luxury. Driving a vehicle with a shattered rear window to a traditional repair shop is not only stressful but dangerous. That is why we bring our master-level technician expertise directly to your home or workplace. We proudly offer comprehensive mobile auto glass services across the Greater Toronto Area (GTA). Whether you are parked at a corporate office in Markham, residing in a quiet neighborhood in Richmond Hill, or running errands in Vaughan, our fully equipped mobile service fleet arrives on-site with the exact premium replacement glass and industrial-grade tools required to execute a flawless installation. We restore your vehicle to factory standards without you ever having to leave your driveway.
Understanding the Complexity of the Lexus LS 460 Rear Glass
Before diving into the replacement process, it is vital to understand what makes the Lexus LS 460 back glass unique. Unlike standard economy vehicles, the LS 460 features an intricate rear glass assembly. It contains embedded thermal heating grids for rapid defrosting, integrated radio diversity antennas for seamless navigation and audio reception, and a specialized blackout frit band designed to protect the urethane adhesive from UV degradation. Furthermore, the interior of the LS 460 often houses motorized rear sunshades, climate control vents, and premium Mark Levinson audio speakers located on the rear parcel shelf. Replacing this glass requires surgical precision to ensure none of these luxury components are damaged during the extraction and installation process.
Step-by-Step Master Technician Process for Back Glass Replacement
At AlexWindshield, we adhere strictly to the Auto Glass Safety Council (AGSC) standards. Because the back glass of the 2007-2017 Lexus LS 460 is made of tempered glass—which shatters into thousands of tiny, blunt pieces upon impact—the replacement process is highly specialized. Here is our detailed, A to Z master technician procedure:
Step 1: Extensive Interior Protection and Glass Extraction
When a back glass breaks, it explodes inwards. Thousands of tiny tempered glass shards blanket the rear seats, the carpet, the rear parcel shelf, and often fall deep into the trunk compartment. The very first step is comprehensive containment and protection. We lay down heavy-duty protective drop cloths over the exterior trunk lid and the rear quarter panels to prevent any accidental scratches. Inside, we use a specialized, high-powered industrial vacuum to meticulously extract all broken glass shards from the vehicle’s interior. We vacuum the premium leather seats, the floor mats, inside the speaker grilles, and deep within the trunk cavity. Vacuuming all broken glass shards is a critical safety measure to ensure no hidden glass cuts the passengers or damages the intricate leatherwork of your Lexus.
Step 2: Precision Removal of Interior Trim and Panels
To access the lower pinch weld and the electrical connectors for the rear window, we must partially disassemble the rear interior. Using specialized non-marring nylon pry tools, we carefully remove the interior C-pillar trim panels and the rear deck lid panels. This step must be executed with absolute precision to avoid triggering the side curtain airbags or damaging the clips that hold the luxurious Alcantara headliner in place. Once the panels are removed, we carefully disconnect the wiring harnesses attached to the defroster lines and the integrated AM/FM diversity antenna.
Step 3: Severing the Old Urethane Bond
With the interior protected and the trim safely removed, we focus on extracting the remaining glass and the original factory adhesive. Using a cold knife, an extended reach power cut-out tool, or a specialized wire-cutting system (such as the Spider wire system), we carefully slice through the thick bead of factory urethane holding the outer perimeter of the glass in place. We maneuver our cutting tools with immense care to ensure we do not scratch the exterior paint or gouge the metal pinch weld, which could lead to severe rust issues down the road.
Step 4: Pinch Weld Preparation and Cleaning
The secret to a factory-quality seal lies entirely in the preparation. After the old glass is removed, the vehicle's metal frame—known as the pinch weld—is exposed. We use a sharpened scraper to trim the old urethane down to a thin, even layer of about 1-2 millimeters. This acts as a base for the new adhesive to bond to. Next, we rigorously clean the entire perimeter using a specialized automotive glass cleaner and lint-free wipes to remove dirt, grease, and microscopic debris. If there are any bare metal scratches present on the pinch weld, we apply an anti-corrosion metal primer to seal the area and prevent future rust.
Step 5: Applying Advanced Primer and High-Quality Adhesive
Once the surface is completely sterile, we apply a specially formulated glass primer to the blackout frit band of the new back glass. This primer promotes maximum adhesion and protects the urethane from UV light deterioration. After the primer has flashed (dried), we load our electric caulking gun with premium, OEM-grade high-quality urethane adhesive. We apply the adhesive using a precise "V-bead" technique. This triangular bead ensures that when the glass is compressed into the frame, the adhesive spreads evenly without overflowing into the interior or leaving gaps that could cause air whistles or water leaks.
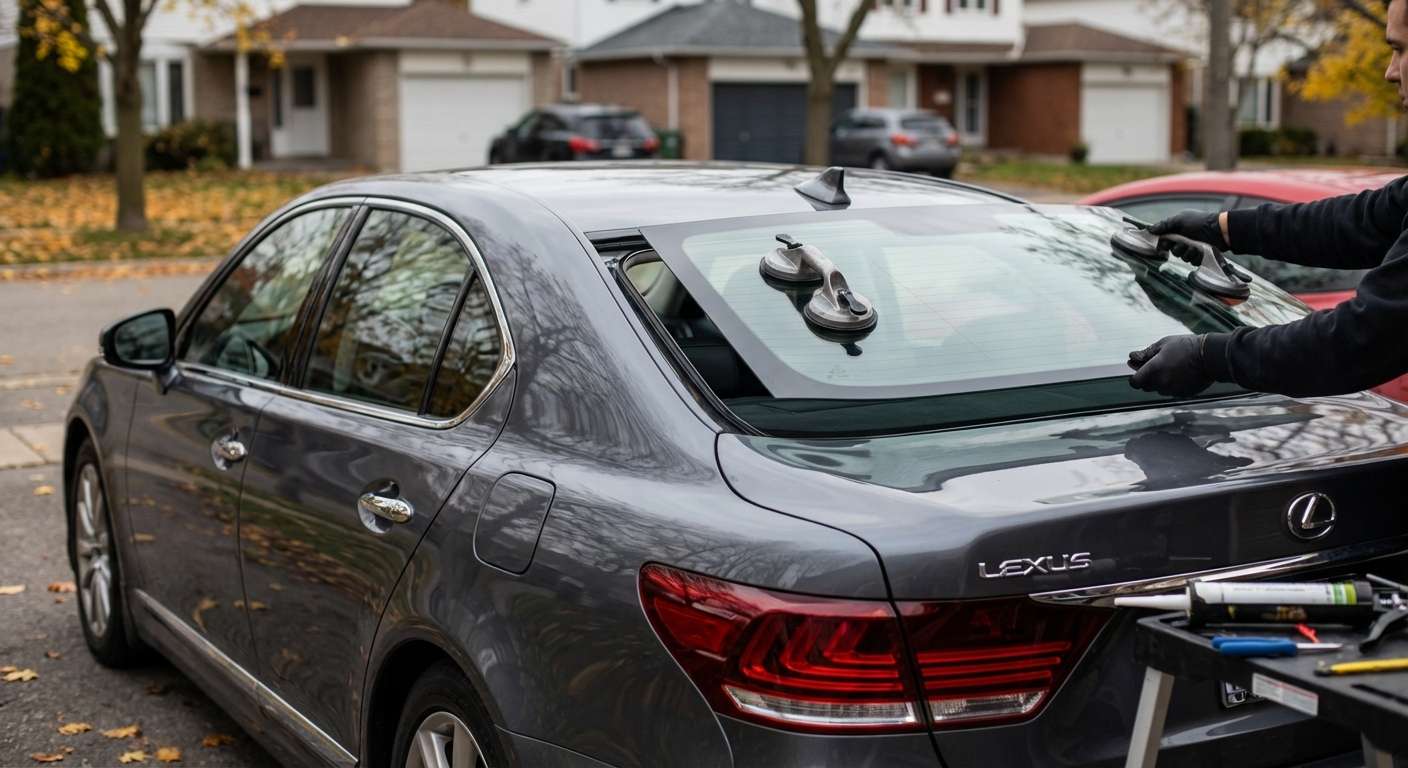
Step 6: Precision Installation of the New Premium Back Glass
Handling the large, curved back glass of the Lexus LS 460 requires steady hands and suction-cup gripping tools. Our technicians carefully lift the glass and align it perfectly with the vehicle's body lines, ensuring equal gaps on the roof line and trunk lid. Once perfectly positioned, the glass is gently pressed into the fresh urethane bead. We then apply specialized retention tape to hold the glass firmly in place and prevent it from sliding down while the adhesive begins its initial curing phase. Immediately after setting the glass, we reconnect the defroster wiring and the antenna cables, testing them to ensure full functionality.
Step 7: Reassembly and Final Cleanup
With the new glass securely bonded, we begin the meticulous reassembly of your Lexus. We reinstall the rear parcel shelf, carefully snap the C-pillar trims back into their exact factory positions, and ensure the rear power sunshade (if equipped) operates flawlessly without obstruction. We perform a secondary, deep vacuuming of the interior to catch any microscopic glass dust that may have shifted during the installation. Finally, we use a premium foaming glass cleaner to polish both the inside and outside of the new rear windshield, leaving it completely streak-free and crystal clear.
Post-Installation Care for Your Lexus LS 460
To ensure the high-quality adhesive cures perfectly and guarantees a watertight seal, we recommend following these post-installation guidelines for the first 24 to 48 hours:
- Observe the Safe Drive-Away Time (SDAT): Do not drive the vehicle until the technician confirms the urethane has cured to a safe, structurally sound level.
- Keep Windows Slightly Open: Leave your side windows rolled down about an inch to prevent cabin air pressure from pushing against the newly installed back glass when you close the doors.
- Avoid High-Pressure Car Washes: Do not take your Lexus through an automatic or high-pressure car wash for at least 48 hours. Rain or gentle hand washing is perfectly safe.
- Leave the Retention Tape: Keep the blue retention tape on the exterior of the glass for at least 24 hours to support the weight of the glass as the urethane fully solidifies.
Trust AlexWindshield for Your Auto Glass Needs in the GTA
When you drive a masterpiece like the 2007-2017 Lexus LS 460, you cannot afford to compromise on the quality of your auto glass repair. At AlexWindshield, we blend technical mastery with unparalleled customer convenience. As your dedicated mobile auto glass experts serving Vaughan, Richmond Hill, Markham, and the greater GTA, we guarantee a flawless replacement process from the initial vacuuming of glass shards to the final polish of your new windshield.
We stand behind our craftsmanship, which is why every back glass replacement comes backed by our comprehensive Lifetime Warranty against leaks, air whistles, and manufacturer defects. Do not let a shattered rear window ruin your driving experience. Contact AlexWindshield today to schedule your mobile Lexus back glass replacement, and let our Master Technicians restore the safety, security, and silent luxury of your vehicle directly at your doorstep.


