Preserving a Modern Classic: Expert Windshield Replacement for the Lexus IS 250/350 2001-2005
The 2001-2005 era of the Lexus IS platform represents the dawn of a new age in the compact executive sport sedan market. Blending aggressive, timeless styling with relentless Japanese engineering and reliability, the early Lexus IS 250/350 models set a benchmark that driving enthusiasts still revere today. From its distinct chronograph-style instrument cluster to its perfectly balanced rear-wheel-drive chassis, every inch of this vehicle was designed with the driver in mind. However, even the most legendary sport sedans are not immune to the unpredictable hazards of the open road. Whether it is a stray rock kicked up by a commercial truck or stress cracks formed by extreme temperature fluctuations, driving with compromised auto glass completely undermines the structural integrity and safety of your prized vehicle.
As a Master Technician and auto glass specialist, I have seen firsthand how ignoring a minor chip can lead to a massive spiderweb crack, requiring immediate intervention. Your windshield is not merely a window to the road; it is a critical safety component that supports the roof in the event of a rollover and ensures the proper deployment of passenger-side airbags. When the time comes for a Lexus IS 250/350 windshield replacement, you need a technician who respects the engineering of the vehicle and executes the replacement with microscopic precision.
Premium Mobile Auto Glass Services Across the Greater Toronto Area (GTA)
Navigating the busy highways of the Greater Toronto Area (GTA)—including the 401, 404, and the DVP—exposes your Lexus to a barrage of road debris daily. We understand that your time is incredibly valuable, which is why we have engineered our replacement process to be completely mobile. You do not need to interrupt your busy schedule or risk driving a vehicle with an obstructed view to a physical shop.
We are proud to offer our top-tier mobile windshield replacement services throughout the GTA, with dedicated dispatch units specifically serving Vaughan, Richmond Hill, and Markham. Whether your Lexus is parked securely in your residential driveway in Vaughan, at a corporate office complex in Richmond Hill, or at a bustling retail center in Markham, our fully equipped mobile workstations come directly to you. We bring the expertise, the premium materials, and the precision tools directly to your location, guaranteeing a factory-quality installation no matter where you are.
The Master Technician's Blueprint: A-Z Step-by-Step Windshield Replacement
Replacing the windshield on a 2001-2005 Lexus IS requires an intricate understanding of the vehicle's unique trim moldings, cowl design, and pinchweld structure. As a senior technician, I adhere to a strict, uncompromising protocol to ensure that your new glass is installed flawlessly.
Step 1: Thorough Preparation and Interior Protection
The very first step in our professional replacement process is safeguarding your vehicle. The luxurious interior of a Lexus demands respect. We begin by applying heavy-duty protective covers over your driver’s seat, steering wheel, and floor mats. A protective drape is carefully laid across the entire dashboard to catch any potential debris, dust, or urethane shavings. On the exterior, we apply protective tape around the A-pillars and the roofline to prevent any accidental scratches to your clear coat during the extraction process.
Step 2: Removal of Exterior Components and Cowl Panel
To access the bottom edge of the windshield, we must meticulously remove the windshield wiper arms and the plastic cowl panel that sits at the base of the glass. On the 2001-2005 Lexus IS, these clips can become brittle over time due to age and UV exposure. We use specialized non-marring trim removal tools to carefully unclip the cowl and remove the weather stripping without causing any damage. All hardware is safely stored and organized for reassembly.
Step 3: Precision Removal of the Old Windshield
Removing the damaged glass requires slicing through the original factory polyurethane adhesive holding the windshield to the vehicle's frame. We utilize advanced auto glass extraction tools—such as a specialized cold knife and a braided wire cutting system. The wire is fed through the adhesive layer and carefully pulled around the perimeter of the glass. This method ensures that we cut cleanly through the urethane bead without applying unnecessary stress to the glass, which could cause it to shatter, and most importantly, it prevents any scratching of the metal pinchweld underneath.
Step 4: Pinchweld Cleaning and Surface Preparation
Once the old windshield is safely lifted away using heavy-duty suction cups, the most critical phase of the replacement begins: surface preparation. The exposed metal frame, known as the pinchweld, still retains a thick layer of old adhesive. We use a razor-sharp scraper to carefully trim this old urethane down to a thin, uniform layer of approximately 1 to 2 millimeters. This acts as a bonding base for the new adhesive. Next, we rigorously clean the entire pinchweld channel using a specialized, alcohol-based auto glass cleaner to remove all dirt, grease, and microscopic contaminants.
Step 5: Primer Application
If any bare metal is exposed during the trimming process, it must be treated immediately to prevent future oxidation. We apply a high-grade, fast-drying, anti-corrosive black body primer to these areas. Furthermore, we apply a specialized glass primer to the ceramic frit band (the black painted border) of your new OEM-equivalent windshield. This primer ensures a maximum-strength molecular bond between the glass and the polyurethane adhesive.
Step 6: High-Quality Adhesive Application
With the surfaces flawlessly prepped, we apply a continuous, precise bead of premium, fast-curing polyurethane adhesive around the entire perimeter of the pinchweld. Using a specialized power caulking gun, we extrude the adhesive in a distinct "V-bead" shape. This specific geometric shape is crucial; as the glass is pressed into place, the V-bead collapses evenly, preventing air pockets, water leaks, and wind noise while providing the maximum structural rigidity required by Lexus safety standards.
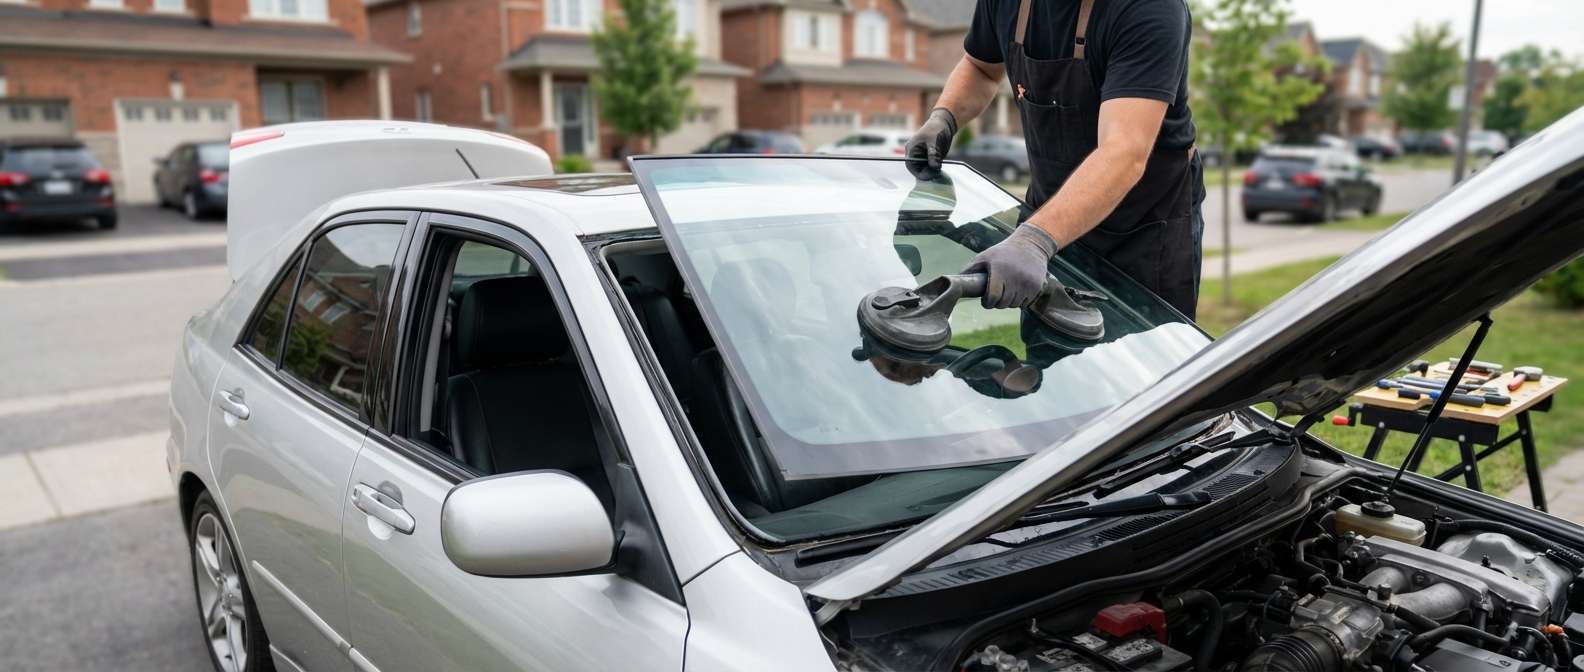
Step 7: Setting the New Glass
Timing is everything once the adhesive is applied. Using our specialized lifting equipment and a two-technician approach, we carefully align the new windshield over the frame and gently lower it into the exact factory position. We press firmly around the edges to ensure the glass seats perfectly into the urethane. We then use specialized retention tape to hold the glass firmly in place while the chemical curing process begins.
The Critical Safety Protocol: Mandatory ADAS Camera Calibration
As a strict company standard, any time a windshield is replaced, we must emphasize the mandatory ADAS camera calibration process. While the 2001-2005 Lexus IS 250/350 models predate the highly complex lane-departure and autonomous braking systems found in modern vehicles, many of these classic models feature early iterations of integrated optical rain sensors, auto-dimming mirror modules, and retrofitted heads-up display sensors attached directly to the windshield glass.
Furthermore, auto glass technology is universal, and our commitment to safety is unwavering. If your specific vehicle configuration or any aftermarket safety modules utilize forward-facing optical equipment, the exact angle and clarity of the new glass can skew the sensor's perspective. Even a millimeter of deviation can cause rain sensors to malfunction or retrofitted safety cameras to miscalculate distances. Following the installation of the new glass, we connect cutting-edge diagnostic equipment to the vehicle's OBD-II port to perform a comprehensive system check. We ensure that any optical sensors mounted to the new windshield are perfectly realigned and calibrated to factory specifications. This ADAS camera calibration guarantees that your safety features are not just functional, but flawlessly accurate, protecting you and your passengers long after we leave your driveway.
Final Assembly, Cleaning, and Quality Assurance
After the glass is set and calibrated, we reinstall the cowl panel, meticulously realign the windshield wiper blades to their correct resting positions, and reattach all exterior trim moldings. We then perform a comprehensive post-installation inspection.
- Interior Clean-Up: We meticulously vacuum the front interior of your Lexus, ensuring no dust or debris from the installation remains.
- Glass Polishing: Both the inside and outside of the new windshield are treated with a streak-free, professional-grade glass cleaner.
- Cure Time Verification: We calculate and inform you of the exact Safe Drive-Away Time (SDAT) based on the current temperature and humidity, ensuring the high-quality adhesive has properly cross-linked and cured before the vehicle is driven.
Trust AlexWindshield: The GTA's Premier Auto Glass Authority
Your 2001-2005 Lexus IS is a masterclass in automotive engineering, and it deserves nothing less than master-level care. By choosing AlexWindshield, you are not just getting a piece of glass replaced; you are investing in unparalleled craftsmanship, uncompromised safety, and absolute peace of mind.
We are the trusted experts for mobile auto glass services across the Greater Toronto Area. Whether you reside in the quiet neighborhoods of Vaughan, work in the business districts of Richmond Hill, or commute through Markham, we bring our elite services to your doorstep. To stand behind our promise of absolute perfection, every single windshield replacement performed by AlexWindshield is backed by our comprehensive Lifetime Warranty, covering you completely against any wind noise, water leaks, or manufacturer defects for as long as you own the vehicle.
Do not compromise the safety and beauty of your classic Lexus with sub-par auto glass installations. Trust the master technicians at AlexWindshield to restore your vehicle’s structural integrity and optical clarity today.


