Expert Quarter Glass Replacement for Lexus ES 350 & ES 300h (2013-2018)
The 2013-2018 Lexus ES 350 and its hybrid counterpart, the ES 300h (part of the acclaimed XV60 generation), represent the pinnacle of mid-size luxury, renowned for their whisper-quiet cabins, refined ride quality, and sleek, aerodynamic silhouettes. A defining structural and aesthetic feature of this elegant profile is the rear quarter glass—the small, stationary window meticulously integrated into the C-pillar just behind the rear passenger doors. While this glass enhances the vehicle’s striking exterior lines and provides natural interior lighting, it is also highly vulnerable. Frequently targeted by thieves attempting to access the interior lock releases, or damaged by side-impact road debris, a shattered quarter glass instantly compromises vehicle security and ruins the meticulously engineered acoustic insulation of your Lexus. Restoring this component requires far more than just "gluing in a new window."
Why Your Lexus ES Quarter Glass Requires Specialized Technical Care
Unlike standard roll-down door windows, the quarter glass on the 2013-2018 Lexus ES series is an "encapsulated" unit. This means the tempered safety glass is permanently bonded into a specialized polyurethane frame at the factory, often integrating seamlessly with the vehicle's exterior chrome window trim and rubber weather stripping. Because it is glued directly to the vehicle's structural body (the pinch weld), replacing it demands precision auto glass expertise. A subpar replacement utilizing incorrect adhesives or aggressive removal techniques can lead to severe rust, persistent wind noise, water leaks, and permanent damage to your luxury vehicle's paint and trim. As a Master Technician at AlexWindshield, I utilize factory-approved techniques and OEM-quality materials to ensure your Lexus is restored to its original factory specifications.
Our Master Technician Step-by-Step Replacement Process
At AlexWindshield, we do not cut corners. Our comprehensive, A-to-Z replacement protocol ensures the highest standards of safety, durability, and aesthetics. Here is exactly how we perform a quarter glass replacement for the Lexus ES 350/300h:
Step 1: Pre-Installation Inspection and Interior Protection
Before any tools touch your vehicle, we perform a thorough assessment of the damage and prepare the workspace. Luxury vehicles require delicate handling to preserve their premium materials.
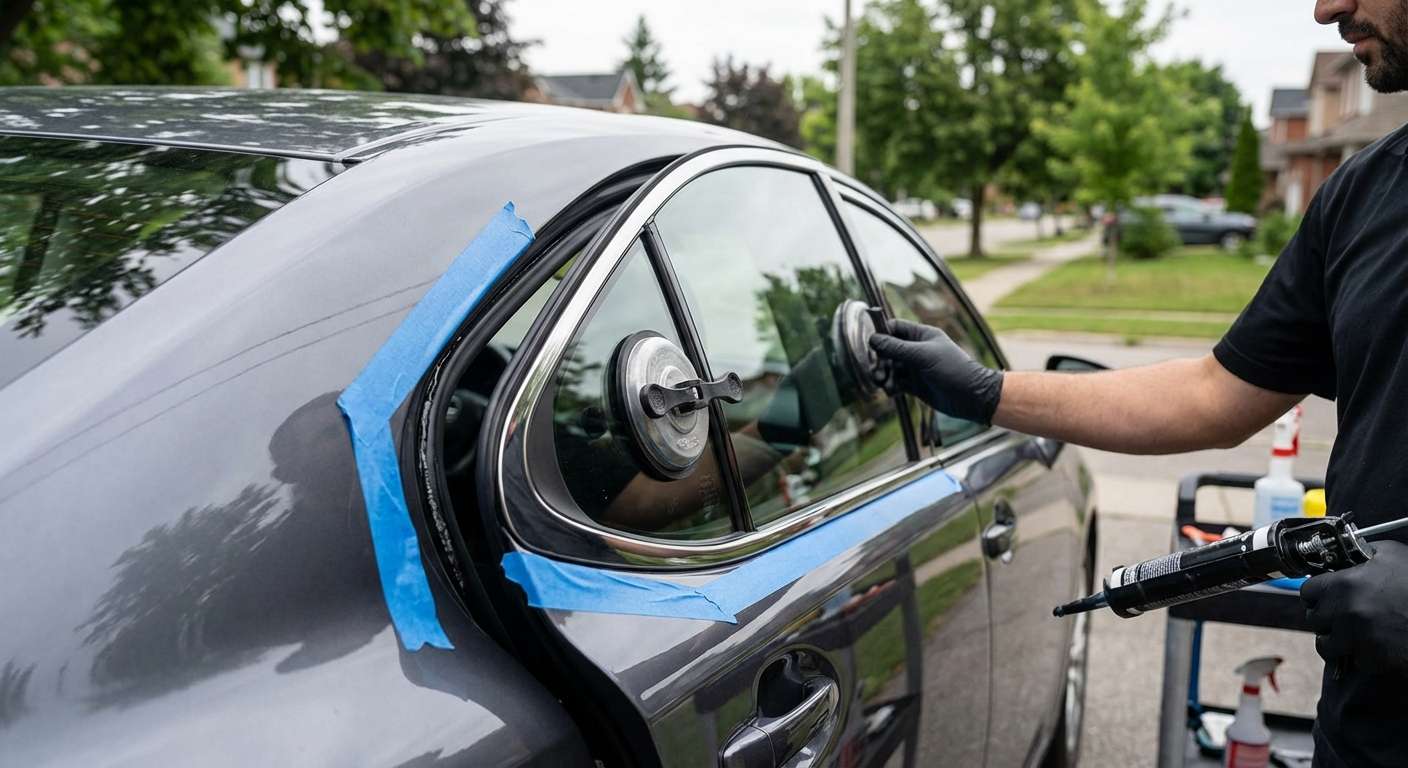
- Paint Protection: We apply automotive-grade protective masking tape around the exterior C-pillar, rear door frame, and quarter panel to ensure the Lexus paint is completely safeguarded against tool scratches during the removal process.
- Interior Shielding: We lay down heavy-duty protective drop cloths over the NuLuxe or semi-aniline leather rear seats, floor mats, and door panels to catch any stray debris or urethane during the procedure.
- Damage Assessment: We inspect the surrounding chrome moldings and interior trim panels to ensure no secondary damage occurred when the glass was broken.
Step 2: Comprehensive Vacuuming and Shattered Glass Removal
Because the quarter glass is made of tempered safety glass, it is designed to explode into thousands of tiny, pebble-like shards upon impact. These shards instantly infiltrate the deepest crevices of your vehicle's interior.
- Panel Removal: We carefully unclip and remove the interior C-pillar trim panels and gently pull back the weather seals to access hidden glass fragments.
- Deep Extraction: Utilizing high-powered, industrial shop vacuums fitted with specialized micro-crevice tools, we extract every single shard of broken glass from the interior cabin.
- Seat and Trunk Vacuuming: We thoroughly vacuum the rear seats, the floorboards, the gaps between the seat cushions, and the rear parcel shelf. We also check the trunk compartment, as glass pebbles often migrate through the rear partition. Leaving even a single piece of glass can cause annoying rattles while driving and poses a safety hazard to passengers.
Step 3: Precision Removal of the Damaged Quarter Glass Assembly
Removing the remnants of the old encapsulated glass requires finesse to avoid damaging the vehicle's high-strength steel frame.
- Cutting the Urethane Bond: We utilize advanced wire-cutting systems (such as WRD Glass Tools) or specially designed cold knives to slice through the original, rock-hard polyurethane adhesive holding the glass frame to the pinch weld.
- Protecting the Pinch Weld: Using a wire system ensures a controlled cut from the inside out, drastically reducing the risk of scratching the protective e-coat on the pinch weld, which is the primary cause of hidden automotive rust.
- Extracting the Frame: Once the adhesive bead is fully separated, we carefully extract the remaining damaged encapsulated frame and dispose of it safely.
Step 4: Pinch Weld Preparation and Surface Cleaning
A new window is only as secure as the surface it is bonded to. Proper preparation is the most critical step in preventing future leaks and structural failures.
- Skiving the Old Adhesive: Using sharpened specialty scraping blades, we perform a "close cut" or "skive," trimming the old factory urethane down to a thin, even layer of about 1-2 millimeters. This provides the optimal base for the new adhesive to bond chemically.
- Surface Decontamination: We clean the bare pinch weld area using specialized, alcohol-based auto glass solvents to remove dust, dirt, grease, and any microscopic glass dust left over from the break.
- Rust Prevention: If any minor scratches occurred to the metal during the initial break-in, we treat the bare steel immediately to prevent future oxidation.
Step 5: Advanced Primer Application
Chemical preparation ensures a lifetime bond between the vehicle frame, the urethane, and the new quarter glass.
- Pinch Weld Priming: We apply a highly specialized, fast-drying urethane primer to any exposed bare metal on the pinch weld. This acts as a rust inhibitor and a bonding agent.
- Glass Frit Band Priming: We meticulously clean the new quarter glass and apply glass primer to its internal encapsulation frame and frit band. This ensures the new adhesive will chemically bite into the replacement part, preventing delamination.
Step 6: High-Quality Urethane Application and Glass Installation
The structural integrity of your Lexus in the event of a rollover heavily relies on the quality of the auto glass installation.
- OEM-Grade Adhesive: We apply a precise, triangular bead of premium, high-viscosity, fast-curing automotive urethane directly onto the prepared pinch weld. This OEM-grade adhesive meets or exceeds all federal motor vehicle safety standards.
- Precision Setting: With extreme care, the Master Technician aligns the new encapsulated quarter glass with the vehicle's body lines and chrome trim, gently setting it into the wet urethane bead.
- Securing the Glass: We apply firm, even pressure to ensure proper wet-out of the adhesive, guaranteeing an airtight and watertight seal. Retention tape is temporarily applied to keep the glass perfectly aligned while the urethane begins its initial cross-linking cure.
Step 7: Post-Installation Cleanup and Quality Assurance
The final touches ensure your Lexus looks and feels exactly as it did before the damage occurred.
- Reassembly: We carefully reinstall all interior C-pillar trim panels, ensuring all clips snap perfectly into place without rattling.
- Final Cleaning: We perform a secondary vacuuming of the interior, clean the new quarter glass inside and out with streak-free glass cleaner, and wipe down the exterior paint.
- Safe Drive-Away Time (SDAT) Verification: We calculate and inform you of the strict SDAT based on the current temperature and humidity. Our premium fast-cure urethane typically allows the vehicle to be safely driven in as little as 30 to 60 minutes.
Premier Mobile Auto Glass Services Across the Greater Toronto Area (GTA)
Driving a luxury vehicle with a shattered window covered in plastic tape is not only unsightly but also unsafe and severely damages your interior by exposing it to the harsh Canadian weather. At AlexWindshield, we eliminate the hassle by bringing our state-of-the-art auto glass shop directly to you. We proudly offer comprehensive mobile auto glass services across the entire Greater Toronto Area (GTA).
Whether you need a rapid response at your corporate office in Markham, require a repair right in your residential driveway in Richmond Hill, or are stranded at a shopping center in Vaughan, our fully equipped mobile service vans arrive promptly. We carry all the specialized tools, climate-controlled adhesives, and power supplies necessary to perform a flawless, factory-level quarter glass replacement wherever you are located in the GTA.
Choose AlexWindshield for Your Lexus ES Auto Glass Needs
When it comes to the safety and aesthetics of your 2013-2018 Lexus ES 350 or ES 300h, do not trust the job to amateurs. AlexWindshield has built a reputation throughout the GTA as the premier choice for luxury auto glass replacement. Our Master Technicians combine years of dedicated experience with an unwavering commitment to automotive perfection.
We stand firmly behind our craftsmanship. Every quarter glass replacement we perform comes backed by our comprehensive Lifetime Warranty, which protects you against any wind noise, water leaks, or manufacturer glass defects for as long as you own the vehicle. Don't let a shattered window compromise your luxury driving experience. Contact AlexWindshield today for swift, professional, and guaranteed mobile auto glass service.


