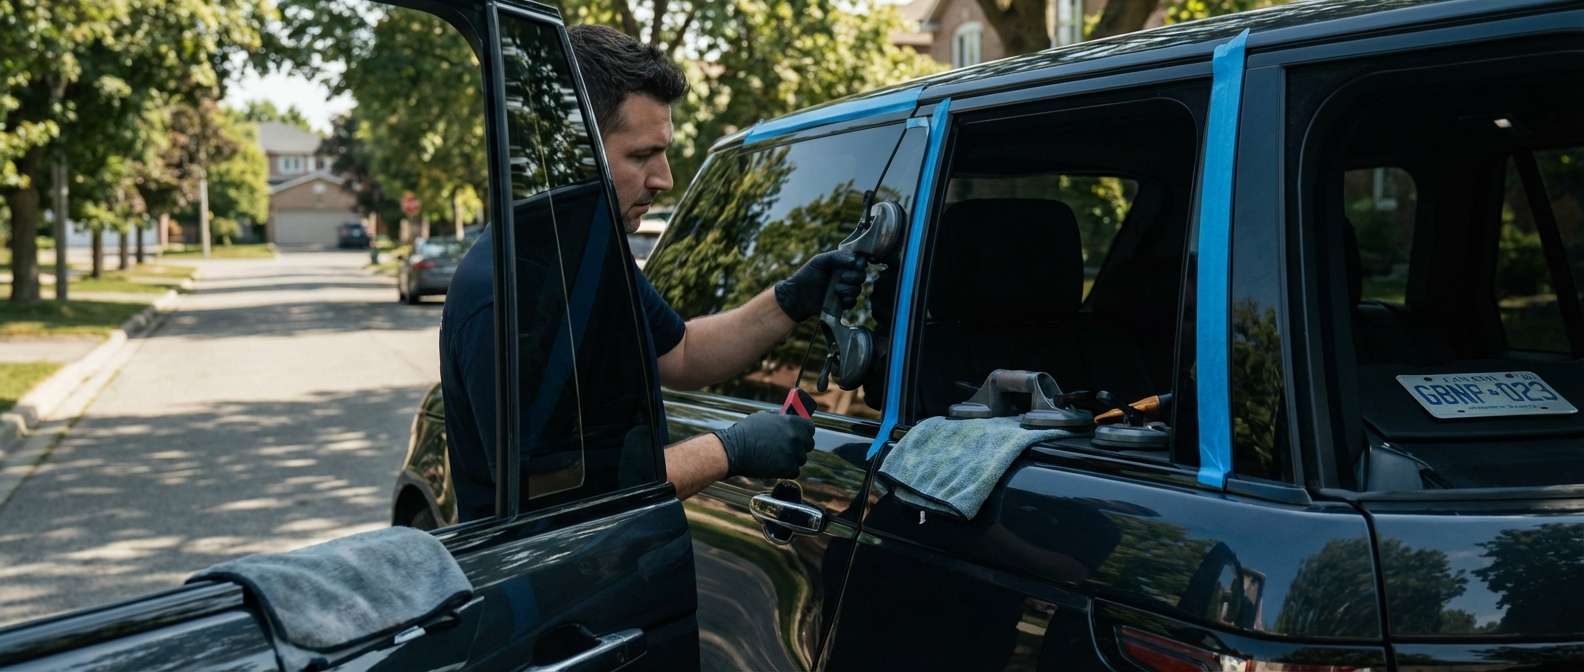
Premium Vent Glass Replacement for Land Rover Range Rover 2013-2021 (L405)
The 2013-2021 Land Rover Range Rover, famously known by its chassis code L405, revolutionized the global luxury SUV market with its all-aluminum monocoque body and an interior cabin designed to be a whisper-quiet sanctuary. When a piece of your vehicle's glazing is compromised—specifically the vent glass—that sanctuary is instantly shattered. Whether it is the result of an unfortunate vehicle break-in or impact from severe road debris, driving with a damaged or missing vent window exposes your premium leather interior to the elements, increases road noise, and presents a major security risk.
At AlexWindshield, we understand that a sophisticated British luxury vehicle requires an equally sophisticated level of care. You cannot trust your Range Rover to just any glass shop. Our Master Technicians specialize in vent glass replacement for the Land Rover Range Rover 2013-2021 (L405), utilizing cutting-edge techniques, OEM-equivalent materials, and a meticulous attention to detail that restores your vehicle to its factory-fresh condition.
Local SEO: Serving the Greater Toronto Area (GTA)
Dealing with broken auto glass is stressful, which is why AlexWindshield brings our premier services directly to your doorstep. We proudly offer comprehensive mobile auto glass services across the Greater Toronto Area (GTA). Whether you are parked at your office in the bustling business sectors of Markham, at your home in the quiet residential neighborhoods of Richmond Hill, or out running errands in Vaughan, our fully equipped mobile service vans will come to you. You do not need to risk driving your Range Rover L405 with a compromised cabin; our technicians provide seamless, on-site vent glass replacements anywhere in the GTA.
Why Range Rover L405 Vent Glass Requires Specialized Expertise
The vent glass on a Range Rover is not a simple piece of standard glass. Land Rover engineered the L405 with advanced acoustic dampening and climate control features. Depending on your specific trim level—be it the HSE, Autobiography, or SVAutobiography—your vent glass may feature specialized solar attenuation properties or factory privacy tinting. Installing a subpar aftermarket glass can result in mismatched tints, increased wind noise, and a degradation of the vehicle’s luxury feel.
Furthermore, because the vent glass is integrated tightly into the door frame or rear quarter structure, replacing it is an intricate procedure. It requires an in-depth understanding of Land Rover's specialized clips, interior trim fasteners, and advanced bonding materials. Our technicians are rigorously trained to navigate these complexities without causing damage to your delicate interior trims, Windsor leather, or electronic window components.
Our Master Technician’s Step-by-Step Replacement Process
As a Senior SEO specialist and Master Technician at AlexWindshield, I believe in absolute transparency. When you book a Range Rover L405 vent glass replacement with us, here is the exact, step-by-step technical process we execute to ensure a flawless installation.
Step 1: Comprehensive Damage Assessment and Interior Protection
Before any tools are lifted, we conduct a thorough assessment of the damage. We verify the exact glass specifications matching your L405’s VIN to ensure the privacy tint and acoustic ratings are identical to factory standards. Next, we prioritize protecting your interior. We drape heavy-duty, non-scratch protective blankets over your Range Rover's premium leather seats, center console, and door armrests. We also apply protective tape to the exterior painted surfaces surrounding the vent glass to prevent any accidental scratches during the extraction process.
Step 2: Interior Trim and Door Panel Removal
Because the vent glass is structurally integrated into the vehicle's door or rear quarter panel assembly, we must gain access to the internal mechanics. Using specialized, non-marring nylon pry tools, our technicians carefully disengage the hidden retaining clips to perform the removal of door panels and interior trim pieces. We meticulously disconnect the ambient lighting wiring harnesses, speaker cables, and window switch modules. We treat every internal component with the utmost care, ensuring that no plastic tabs are broken and that your Range Rover's door panel will fit perfectly upon reassembly.
Step 3: Meticulous Broken Glass Evacuation
When tempered automotive vent glass shatters, it explodes into thousands of tiny, granular shards. These pieces inevitably fall down into the window channels and deep inside the door cavity. If left unattended, these shards will cause a highly irritating rattle every time you drive over a pothole in Vaughan or Markham. We deploy high-powered, narrow-nozzle industrial vacuums to extract every single fragment. Vacuuming all broken glass shards from the vehicle's interior, window regulator tracks, and deep inside the internal door shell is a mandatory and exhaustive step in our process. We also thoroughly vacuum your carpets and floor mats to guarantee your cabin is entirely safe for you and your passengers.
Step 4: Removing the Damaged Vent Glass Frame and Sealant
With the area cleaned and prepped, we move to the structural removal. If the vent glass is bolted in via a division bar, we carefully extract the mounting bolts and slide the division bar out of the way. If the L405 vent glass is a bonded piece, we use advanced cold-knife or wire-cutting extraction tools to cleanly slice through the original polyurethane adhesive bead. We carefully lift out the remaining glass frame and factory molding, ensuring the metal pinch weld beneath remains completely intact and uncompromised.
Step 5: Surface Preparation, Cleaning, and Primer Application
A new piece of glass is only as secure as the surface it is bonded to. We trim down the old adhesive to a thin, even layer of about 1-2 millimeters, which serves as an ideal base for the new urethane. Next comes the critical surface cleaning. We use a specialized, alcohol-based automotive glass cleaner to remove all dirt, grease, and debris from the bonding area. Once immaculate, we proceed with the primer application. We apply a high-quality, scientifically formulated blackout primer to any bare metal on the pinch weld to prevent rust, as well as to the frit band (the black painted edge) of the new vent glass. This primer acts as an essential chemical bridge, promoting maximum adhesion between the vehicle body, the urethane, and the glass.
Step 6: Installation of the New Glass Using High-Quality Adhesive
Once the primer has flashed (dried completely), we prepare for the installation of the new glass. Using an electric caulking gun for absolute precision, our Master Technician applies a thick, uniform "V-bead" of premium, fast-curing automotive polyurethane adhesive. We strictly utilize high-quality adhesive that meets or exceeds OEM safety standards, ensuring rapid drive-away times and incredible structural integrity. The new, OEM-equivalent Range Rover vent glass is then carefully set into place. We apply gentle, even pressure to ensure the glass makes perfect contact with the adhesive bead, perfectly aligning it with the vehicle's unique body contours and weatherstripping.
Step 7: Reassembly and Final Quality Control Inspection
While the advanced urethane begins its rapid curing process, we reverse the disassembly steps. We securely bolt in the division bars, reconnect all electrical wiring harnesses, and snap the interior door panels seamlessly back into their factory positions. Once reassembled, we clean all the windows, double-check the window regulator functionality of the adjacent drop-glass, and perform a strict quality control inspection. We ensure there are no gaps, the molding sits flush, and your Range Rover L405 looks exactly as it did the day it rolled off the assembly line in Solihull.
The Critical Importance of OEM-Equivalent Glass and Adhesives
When servicing a sophisticated vehicle like the Range Rover L405, cutting corners is not an option. Using inferior adhesives can lead to water leaks, annoying wind whistling at highway speeds, and compromised structural safety in the event of a rollover. Furthermore, unmatched glass can ruin the aesthetic synergy of your SUV. At AlexWindshield, we guarantee the following:
- Perfect Fitment: Glass manufactured to exact Land Rover dimensional tolerances.
- Advanced Urethanes: We use industry-leading adhesives that ensure maximum bonding strength and safe drive-away times in all Canadian weather conditions.
- Acoustic Integrity: Maintaining the sound-deadening qualities that make the Range Rover cabin a serene environment.
- Immaculate Cleanup: You will never find a stray glass shard in your door pocket or on your luxury carpets.
Why Choose AlexWindshield for Your Range Rover Glass Needs?
When you are dealing with auto glass damage in the GTA, Vaughan, Richmond Hill, or Markham, you need a service provider that values your time and your vehicle's integrity. AlexWindshield stands above the competition by combining technical mastery with unparalleled customer convenience. Our mobile service means you do not have to disrupt your busy schedule or navigate traffic with a broken window. We bring the auto glass shop directly to your driveway.
Furthermore, we stand behind the quality of our craftsmanship. Every single vent glass replacement performed by AlexWindshield is backed by our comprehensive Lifetime Warranty. This covers any issues related to workmanship, including air leaks, water leaks, and manufacturer defects in the glass itself. When you choose us, you are investing in peace of mind, knowing that your Land Rover Range Rover 2013-2021 (L405) has been serviced by the absolute best in the industry.
Do not let a broken vent glass compromise the security, comfort, and luxury of your Range Rover. Trust the local experts who understand the intricate engineering of British luxury SUVs. Contact AlexWindshield today to schedule your mobile vent glass replacement in the Greater Toronto Area and experience premium auto glass service backed by a Lifetime Warranty.


